CSS Button Gradient Border Animation (Free Code)

CSS Button Gradient Border Animation

In this tutorial, you will learn how to make CSS Button Gradient Border. Earlier I shared with you the tutorials of different types of gradient buttons. However, the background gradient color was not used here. Instead, the background is kept completely transparent and CSS Gradient Borders are used on the button borders.

Buttons we use in different places. If that button is attractive and animated it attracts more user attention. In that case, you can use such a simple CSS Button Gradient Border Button. This will definitely enhance the beauty and quality of your website.

CSS Button Gradient Border

Only if you have a basic idea about HTML and CSS can you build it. Below I have given a demo that will help you to get a live preview of this project. If you only want the source code, you can use the download button at the bottom of the article.

See the Pen
Untitled
by Foolish Developer (@foolishdevweb)
on CodePen.

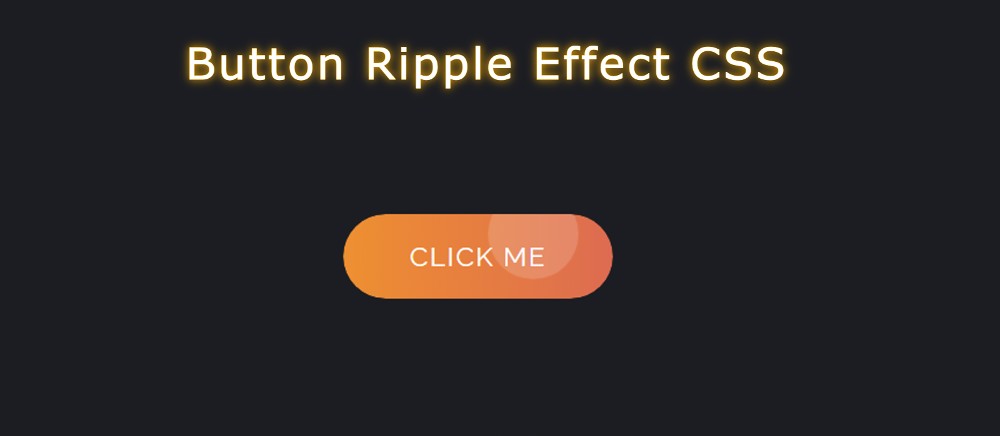
I created a button on a web page as you can see above. A text has been used in the CSS Gradient button. I have kept the background of the button completely transparent. 

How to Create CSS Gradient Borders

However, I have used CSS Gradient Borders animation in button text and borders. Here you will have to animate different colors together. Here you can add colors of your choice.

Follow the steps below to create this CSS Button Gradient Border. I have given below all the code and step-by-step information.

1: Basic structure of Gradient Border

The basic structure of this button has been created using the following HTML and CSS codes. I used linear-gradient color in the background of the button. Here I have used 5 colors. 

You can add colors of your choice. Every color here can be seen at a 45-degree angle. Here I used the animation for four seconds. That means a color can be seen again after 4 seconds.

<div class=”container”>
    
<div>
* {
  box-sizing: border-box;
  margin: 0;
}
.container {
  position: absolute;
  transform: translateX(-50%) translateY(-50%);
  top: 50%;
  left: 50%;
  min-width: 300px;
  min-height: 100px;
  padding: 12px 15px;
  background-image: linear-gradient(-45deg, #3eff0d, #db12c8, #00ffee,#fffa00,#0099ff);
  border-radius: 1000px;
  -webkit-border-radius: 1000px;
  -moz-border-radius: 1000px;
  -ms-border-radius: 1000px;
  background-size: 400% 400%;
  animation: mymove 4s linear infinite;
}
Basic structure of Gradient Border

2. Activate the background color animation (more…)

Continue ReadingCSS Button Gradient Border Animation (Free Code)

Simple Character Counter using JavaScript & CSS

Simple Character Counter using JavaScript

In this article, you will learn how to create a Character Counter using JavaScript. Earlier I shared with you tutorials on different types of JavaScript word counters, limit character input, etc. 

Here you will learn how to make simple character count javascript. The character counter basically helps to count how many characters are in an input box. You can use it to count every character and space in the input box.

The counted numbers can be seen in a small display. If you want you can put a limit in that input box. Earlier I shared a tutorial that has a limit on character input.

Character Count JavaScript

Below I have given a preview that will help you to know how this character count javascript works. If you only want the source code, use the button below the article.

See the Pen
Untitled
by Foolish Developer (@foolishdevweb)
on CodePen.

A box has been created on a web page as you saw above. The background color of this box is white. First of all, a heading has been used in the box which is basically to enhance the beauty. 

Then the character input space is created using textarea. Below all is a small box in which the amount of character can be seen. When you input something into the input box, the amount of that input will count. 

Create Character Counter using JavaScript

This project (Character Counter using JavaScript) is very easy to create if you have an idea about HTML CSS and JavaScript. Here is a step-by-step tutorial for beginners with pictures of possible results after each step.

Step 1: Basic structure of Character Counter

The basic structure of this character count javascript has been created using the following HTML and CSS codes. All the information can be found in this basic structure.

<div class=”container”>
 
</div>

I designed the web page using the following codes. Here I have used blue as the background color of the webpage. 

* {
  box-sizing: border-box;
  margin: 0;
  padding: 0;
}
body {
  display: flex;
  align-items: center;
  justify-content: center;
  min-height: 100vh;
  background-color:  #1193bd;
  font-family: ‘Roboto’, sans-serif;
}

Character counter width: 500px and height will depend on the amount of content. I used white as the background color and box-shadow to make it more attractive.

.container {
  width: 500px;
  padding: 40px;
  background-color: white;
  display: flex;
  flex-direction: column;
  box-shadow: 0 5px 15px rgba(0, 0, 0, 0.1);
  border-radius: 5px;
}
Basic structure of Character Counter

Step 2: Add a heading (more…)

Continue ReadingSimple Character Counter using JavaScript & CSS

Animated Hamburger Menu using HTML CSS (Free Code)

Animated Hamburger Menu using HTML CSS

In this article, you will learn how to create Animated Hamburger Menu using HTML and CSS. Hamburger Menu CSS We use it in different places. Earlier I shared a tutorial on making more hamburger icons. However, I have added animation to this design.

In this article, you will learn how to create an Animated Hamburger Menu CSS. Here I have used a small amount (only two lines) of JavaScript. The most common type of hamburger icon is found in different types of site menubars, navigation menu bars.

Animated Hamburger Menu CSS

Here you will find the required source code, tutorials, and previews. Below I have given a preview of this project and you can see how it works.

See the Pen
Untitled
by Foolish Developer (@foolishdevweb)
on CodePen.

 As you can see, a small button has been created at the top of a web page. There are three lines on that button. When you click on that hamburger icon, you will see animation in it. 

Those three lines will be transformed into a circular circle and a cross mark will be seen in the circle. When you click on that button again, the button will be converted to three lines again. The background of the hamburger menu icon has been made blue and the color of the lines has been made white.

How to make an animated hamburger menu

To make it, you must have a basic idea about HTML CSS. Here I have used only 2 lines of JavaScript. However, it is very easy if you do not know JavaScript can easily understand.

Step 1: Basic structure of the Hamburger Menu

Using your bellow HTML and CSS codes, add the necessary information to this menu. I have only used 2 line HTML code here. 

I used blue color in the background of this button and the button is height: 172px, width: 172px.

<div id=”toggle-nav”>
  <div class=”hamburger”></div>
</div>
body {
  position: absolute;
  top: 0;
  bottom: 0;
  display: flex;
  align-items: center;
  justify-content: center;
  width: 100%;
}
#toggle-nav {
 position: relative;
 background: rgb(12, 94, 196);
 height: 172px;
 width: 172px;
 border-radius: 30px;
 cursor: pointer;
}
Basic structure of the Hamburger Menu

Step 2: Add 3 lines to the hamburger menu (more…)

Continue ReadingAnimated Hamburger Menu using HTML CSS (Free Code)

Popup Contact Form using HTML and CSS (Free Code)

Popup Contact Form using HTML and CSS

In this article, you will learn how to create Popup Contact Form using HTML and CSS. Earlier I shared with you the tutorials of different types of Simple Contact Forms. However, this HTML Contact Form is a complete pop-up

This means that under normal circumstances this form is hidden. A button is available. When you click on that button, you can see the complete contact form.

This type of form is used on various websites to save a lot of space. This Popup Contact Form is very easy to create if you have an idea about Basic HTML CSS. I didn’t use any javascript or jQuery here. Earlier I shared tutorials on a pop-up login form, popup registration forms, etc. You can see those designs. 

Popup Contact Form Html

Below I have given a preview that will help you to know how this Popup Contact Form HTML CSS works. Below you will find tutorials and source codes. If you want to download the source code, use the download button at the bottom of the article.

See the Pen
Untitled
by Foolish Developer (@foolishdevweb)
on CodePen.

As you can see above, the contact form is completely hidden. Instead, a small button is found inside the webpage. When you click on that popup button, you can see the complete contact form. 

I used HTML’s checkbox to make this button work. So there is no need to use JavaScript here. There is a cancel button in the contact form which if clicked will hide the HTML Popup Contact Form.

How to create a popup contact form in HTML

The form has a heading used first and then there are three input boxes for input. The input boxes are for inputting names, emails, and messages, respectively. At the end of all, there is a submit button on which the messages can be sent by clicking.

I created this contact form according to the neomorphic design. I have already shared tutorials on many elements such as login form, analog clock, digital clock, etc. using Neumorphism. If you want to create this popup contact form then follow the tutorial below.

Step 1: Html code of contact form

Below is the HTML code needed to create this popup contact form. However, each code has given the required information so that you can understand which code I have used for which purpose. 

First I created the button on the homepage then created an area of ​​the contact form. That area has three input boxes, first the heading, the cancel button, and then the input. At the end of it all, I have a submit button.

<div class=”center”>
<!–Popup button on the homepage–>
  <input type=”checkbox” id=”click”>
  <label for=”click” class=”click-me”>Contact Us</label>
<!–popup login form area–>
  <div class=”content”>
    <div class=”wrapper”>
<!–The heading of the login form–>
    <h3>Contact Us</h3>
<!–Button to close the form–>
    <label for=”click” id=”times”>x</label>
    <div class=”form”>
<!–Place to input the name–>
      <div class=”input_field”>
        <input type=”text” placeholder=”Name”>
      </div>
<!–Place to input the email–>
      <div class=”input_field”>
        <input type=”text” placeholder=”Email”>
      </div>
<!–Place to input the message–>
      <div class=”input_field”>
        <textarea placeholder=”Message”></textarea>
      </div>
<!–Submit button–>
     <div class=”btn”>
       <a href=”#”>Send</a>
     </div>
   </div>
  </div>
 </div>
</div>

Step 2: Design the webpage with CSS (more…)

Continue ReadingPopup Contact Form using HTML and CSS (Free Code)

Simple 3D Text Animation Effects using HTML & CSS

Simple 3D Text Animation Effects using HTML & CSS

In this article, I have shown you how to create Simple 3D Text Animation Effects. Earlier I shared with you the tutorials of different types of text animation. 

Notable among them are 3D Text Effects, Text Animation, Text Typing Effect, Multiple Text Typing, etc. This 3D Text Animation effect is created by HTML and CSS only. Shadow is used here to show plain text in 3D.

CSS 3D Text Animation Effects

To create it you need to have a basic idea about HTML and CSS. Below I have shared all the tutorials that will help you to know how to create this 3d text animation for free. Below is a demo that will help you learn how it works.

See the Pen
Untitled
by Foolish Developer (@foolishdevweb)
on CodePen.

As you can see above, some amount of text has been added to the top of a web page. That text was created in 3d. Shadow is used here to better understand the 3D effect

Animation has been used in this text. As a result, the text continues to rotate slightly to the left and slightly to the right.

Step 1: Basic structure of 3D Text Effects

The basic structure of this project and the required text have been added using the following HTML and CSS. Here some text has been used using the h1 tag and “data-shadow” has been added along with it. In the “data-shadow” option, add the text you want to show in the shadow.

When you change the text in h1 you need to change the value of that “data-shadow”. I used black as the background color of that webpage.

<div>
 <h1 data-shadow=”3D Text Effect”>
    3D Text Effect
 </h1>
</div>
body {
 background-color: #444;
 font-family: sans-serif;
}
div {
 width: 800px;
 height: 100px;
 margin: 200px auto;
 perspective: 1000px;
 perspective-origin: 50% -200px;
}
Basic structure of 3D Text Effects

Step 2: Text is designed by CSS (more…)

Continue ReadingSimple 3D Text Animation Effects using HTML & CSS

Simple Loading Animation using HTML & CSS (Free Code)

Simple Loading Animation using HTML & CSS

In this article, you will learn how to create Simple Loading Animation using HTML and CSS. CSS loader spinner we use in different places. Basically, this type of animation can be seen while loading a web page. 

Many web pages open normally without any CSS spinner animation. However, in many cases, such simple animated loading can be seen. This type of loading is much more attractive and enhances user satisfaction. The loading animation that I have created here is absolutely simple and has been created using only HTML and CSS.

This is much more beautiful than the simple CSS loading spinner example. Because different colors and animations have been used here.

Simple Loading Animation CSS

Below is a preview that will help you learn how this animation works. If you only want the source code, you can use the download button at the bottom of the article.

See the Pen
Untitled
by Foolish Developer (@foolishdevweb)
on CodePen.

As you can see above, this is a simple animated loading animation. First, create a circular area on the webpage. A border has been used around that area. There is a kind of color animation in this border that enhances its beauty many times. A text called ‘loading’ is used in this circle.

To make it, you must have a basic idea about HTML and CSS. Here I have shared all the step-by-step tutorials and provided the required source code. I hope you will not have any difficulty in understanding.

Step 1: Basic structure of Loading Animation

The necessary information for this loading animation has been added using your own HTML code. Very little HTML code has been used. The background color of the web page is black.

<div class=”ring”>
  loading
  <span></span>
</div>
body{
margin: 0;
padding: 0;
background: #262626;
}
Basic structure of Loading Animation

Step 2: Basic Design of Loading Animation Area (more…)

Continue ReadingSimple Loading Animation using HTML & CSS (Free Code)

Simple Button Hover Effects using HTML & CSS (Free Code)

In this article, I have shown you how to create Simple Button Hover Effects using HTML and CSS. Buttons are used in different places on any website. In this tutorial, you will learn how to make simple button hover effects CSS.

Animated buttons are much more interesting than ordinary buttons. Added hover effect to this button. When the mouse is moved over the button, some changes will be made to the button. 

I have designed this button with the color of the Indian flag. In other words, the color of the Indian flag has been used in the background of the simple hover button CSS.

Simple Button Hover Effects CSS

When hovering over that button, the back of the button can be seen as the color shadow of the button. You can use this Simple Button Hover Effects in any of your buttons. Undoubtedly this CSS button hovers effect will make your button more beautiful.

Below is a demo or preview that will help you to know how this button hover works.

See the Pen
Untitled
by Foolish Developer (@foolishdevweb)
on CodePen.

As you can see above, there is a button that uses the color of the Indian flag in the background. That is, the first ocher, then white and then green has been used. I have used a text here.

I used a small amount of HTML and CSS to make it. If you only want the source code, you can use the download button at the bottom of the article. However, I request you to follow the tutorial below.

Step 1: Basic structure of button hover

Button’s basic information has been created using the following HTML and CSS codes. Here I have used a text that you can change the text to your liking. 

Background color black has been used here. When you use it in your project, you can change this color to your liking.

<div class=”ct-btn”>
   <div class=”gr-tri”>
       <span class=”gr-shadow3″></span>
       <button class=”gradient-neon”>My India</button>
   </div>
</div>
* {margin:0;padding: 0;}
body {
  background-color: #272727;
  margin: 200px auto;
}
.ct-btn {
  justify-content: center;
  display: -webkit-box;
  display: flex;
  cursor: pointer;
  margin:20px;
}
Basic structure of button hover

Step 2: Design the button with CSS (more…)

Continue ReadingSimple Button Hover Effects using HTML & CSS (Free Code)

Responsive Checkout Form using HTML CSS (Free Code)

Responsive Checkout Form using HTML CSS

In this article, you will learn how to create a Responsive Checkout Form using HTML and CSS. Earlier I shared with you the tutorials of different types of checkout form CSS. This is the first time I have created a Responsive Checkout Form tutorial using HTML and CSS.

I use payment forms in different places. This type of check-out form is also used for a variety of e-commerce platforms, online products, or service platforms. This Responsive Form I created only with HTML and CSS. 

Everything contained in a professional payment form is provided here. Although it is not functional as it is only designed by HTML CSS here.

Responsive Checkout Form

Checkout form HTML CSS is fully responsive so you can use it directly in any of your projects. Below I have given a preview that will help you to know how it works (Responsive Checkout Form using HTML CSS).

You can use the download button below the article to get the required source code.

See the Pen
CHECKOUT FORM HTML CSS
by Foolish Developer (@foolishdevweb)
on CodePen.

I made a box on the webpage as you saw above. I used black as the background color of the webpage. The background of the entire checkout page has been whitewashed. First I used a heading with blue in the background. 

There are four inputs here. To input the first input box card number, to input the name of the second input box cardholder. Then there are two input boxes to input Expire date and CVC code. There is a button at the end of all that will submit this information.

How To Create a Checkout Form with CSS

Below I have shown a step-by-step tutorial on how to create a Responsive Checkout Form. If you only want the source code, you can use the download button below the article.

Step 1: Basic structure of checkout form

I have created the basic structure of this check-out form and designed the webpage using the following HTML codes. Its max-width of background 500px and height will depend on the amount of content.

<div class=”container”>
  <div class=”title”>Checkout Form</div>
   <div class=”input-form”>
   </div>
</div>
*{
margin: 0;
padding: 0;
box-sizing: border-box;
outline: none;
font-family: ‘Open Sans’, sans-serif;
}
body{
background: rgb(12, 18, 27);
background-size: cover;
width: 100%;
height: 100vh;
font-size: 16px;
}
.container{
max-width: 500px;
height: auto;
margin: 60px auto;
background: #fff;
padding: 20px 40px 30px;
border-bottom-left-radius: 5px;
border-bottom-right-radius: 5px;
border-top: 5px solid #5f6c7d;
}
Basic structure of checkout form

Step 2: Design the title in the form (more…)

Continue ReadingResponsive Checkout Form using HTML CSS (Free Code)

Simple Rain Animation Effects using CSS & JavaScript

Rain Animation Effects using CSS

In this article, you will learn how to create Rain Animation Effects using CSS and javascript. You will see this kind of CSS Rain Effects animation in different places. Creating this effect is much easier if you know basic CSS and javascript.

This type of Rain Animation effect is used in the background of different projects or elements. The black color of the webpage background has been used to create this CSS animation rain. Then the point of white water is falling from top to bottom. Although JavaScript has been used to make it work.

Pure CSS Rain Animation Effect

Here you can use color instead of white color which is more beautiful and attractive. This design is used in the background of various projects which basically helps to enhance the beauty. 

Below I have given a demo that will help you to know how it works. Live Demo 👇👇

See the Pen
Untitled
by Foolish Developer (@foolishdevweb)
on CodePen.

As you can see above a lot of water droplets are falling from the top to the bottom on a gradient background. This project looks very difficult but it is very easy to make. This beautiful CSS rain animation with Lightning can be created with very little code.

If you only want the source code, you can use the download button below the article. And use the demo section above to get the live demo.

How to Create Rain Animation Effect using CSS

Below I have shown with some steps how I have created Rain Animation Effects using CSS. No HTML code is used here. 

These animations can be seen in the background of the webpage. So the body tag of the webpage has been used. So there is no need to use any HTML separately.

Step 1: Design the webpage (more…)

Continue ReadingSimple Rain Animation Effects using CSS & JavaScript