How to Make a Word Counter with JavaScript ‍

You will learn how to create word counters with the help of JavaScript. You will see that there are many websites on the internet that are much more popular for counting words or characters. I will try to explain in this tutorial a basic structure of how these designs work. 

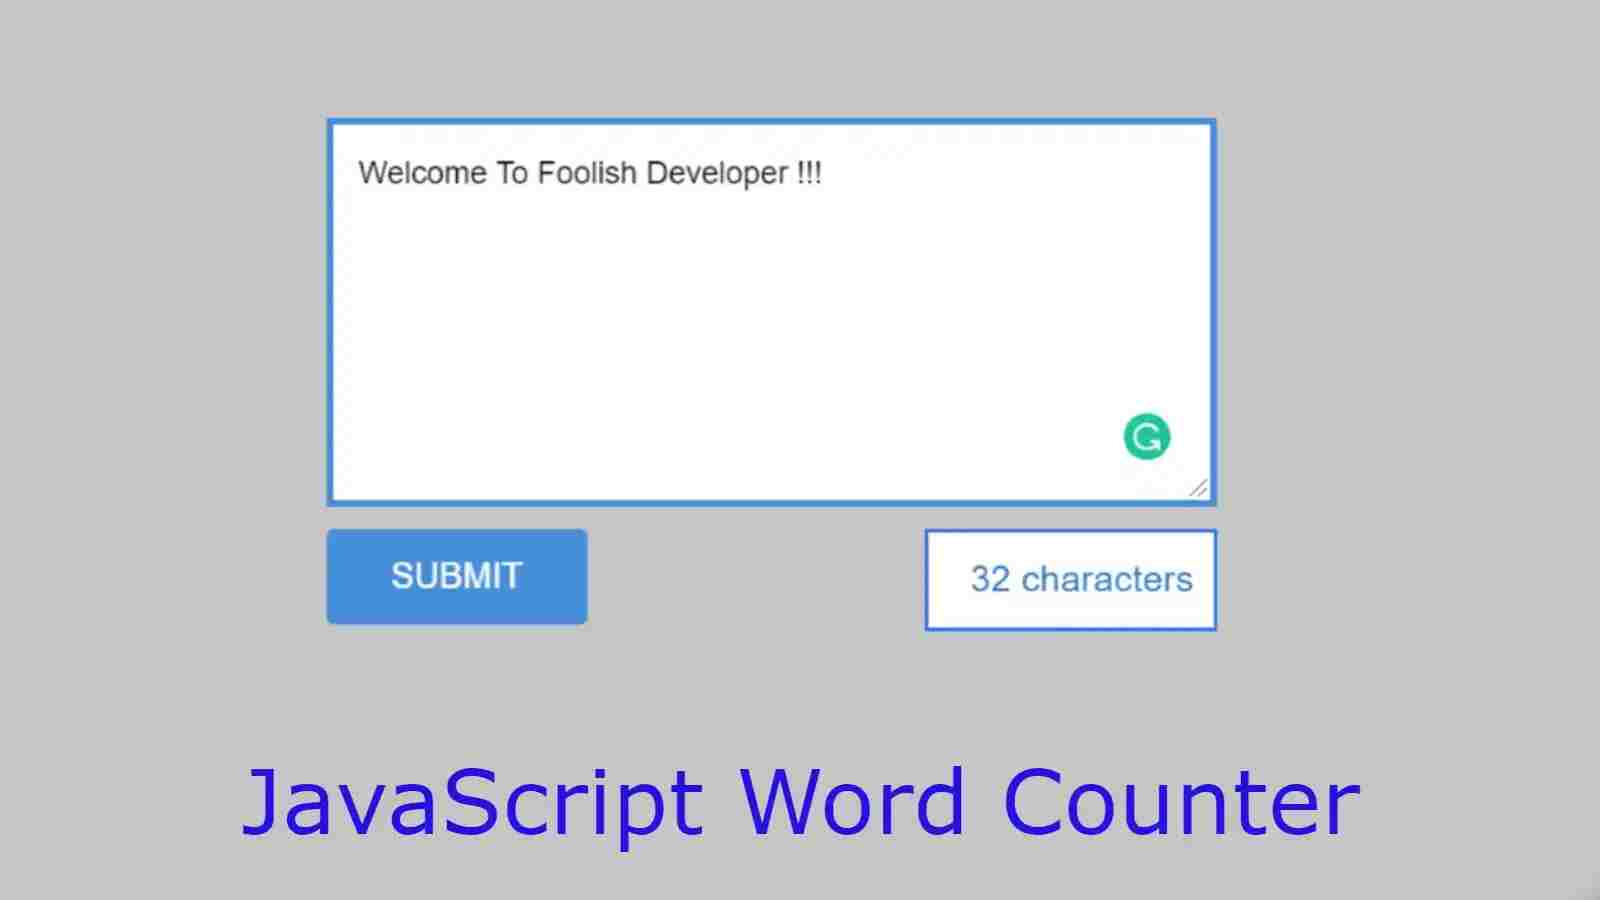
A simple word counter depending on the general JavaScript programming code. First of all, I have made a box (Textarea) here. When you write something in that box, every character you write in that box will be a live count. The counted results can be seen in the box below. 

Simple Word Counter with JavaScript ‍

Basically, this design will count the number of characters, each character you write in this box will count with space. I used a small amount of HTML and CSS code to create the box and design the background. 

Here all the work is handled by JavaScript, that is, everything shown in the box that counts these words is handled by JavaScript. If you want to know better how this word (character) counter works then you can see the demo below.

See the Pen
word counter
by Foolish Developer (@fghty)
on CodePen.

As you can see, I made a rectangular box here. When you type something in that box, it will count live. The counted results can be seen through a small box below.

In the background of this box, I have used white color and added a blue border all around to enhance the beauty. Follow the tutorial below to make this design. In this case, first of all, let me say that I have used the bootstrap CDN link. Be sure to add a link to these two in the head section of your HTML file.

Step 1: Design the background of the word counter

 First of all, you create HTML and CSS files. Then copy the following HTML structure and add it to your HTML file.

<!DOCTYPE html>
<html lang=”en”>
<head> 
  <link rel=”stylesheet” href=”https://cdn.jsdelivr.net/npm/bootstrap@4.6.0/dist/css/bootstrap.min.css”>
  
  <meta charset=”UTF-8″>
  <meta http-equiv=”X-UA-Compatible” content=”IE=edge”>
  <meta name=”viewport” content=”width=device-width, initial-scale=1.0″>
  <title>Document</title>
  <style>
   /* CSS Code */
  </style>
</head>
<body>
  
   
  <div class=”column”>
 
</div>
<script>
  // Javascript code
</script>
</body>
</html>

Using the CSS code below I basically designed this word counter in the background.

(more…)

Continue ReadingHow to Make a Word Counter with JavaScript ‍

Pure CSS Flip Card On Hover Using HTML & CSS

Learn how to make a flip card using Html and CSS code. Flip Card is a great UI design that you can create with the help of basic Html and CSS. The flip card basically helps to add a lot of information to a card. You can add some information on the front and back of this card. 

As a result, this type of flip card is used to add a lot of information in one place. When you click on this card or move the mouse, the backside of this card will appear in front. The structure I have created in this article is basically a subscribe box and in this case, information related to a YouTube channel has been added. Under normal circumstances, I used the background red color on the front of this card and a youtube logo image. 

The back of this design can be seen when you hover the mouse over the card. On the backside, I added the profile image, name, some information about that youtube channel. I have added a subscribe button with all this information. Clicking on it will subscribe to the channel.

See the Pen
Flip subscribe Card
by Foolish Developer (@fghty)
on CodePen.

In the following tutorial, I have shared complete information for making this design. I have shared with you the method of making this flip card with all the information step by step. I hope you can learn how to make a flip card by following the tutorial below.

Step 1:  Create the basic structure of the card

First of all, I have used the basic HTML structure below which has been used to create the front and back sites of the card.
The CSS code below has helped to design the front and backside of this card and add a variety of colors. On the front I used red and on the back I used white. Height: 13px and width: 26px have been used for this card.

<!DOCTYPE html>
<html lang=”en”>
<head>
  <meta charset=”UTF-8″>
  <meta http-equiv=”X-UA-Compatible” content=”IE=edge”>
  <meta name=”viewport” content=”width=device-width, initial-scale=1.0″>
  <title>Document</title>
  <style>
  </style>
</head>
<body>
  <div class=”card-wrap”>
    <div class=”card”>
        <div class=”card-front”>
             <!– Card Fonts –>
        </div>
        <div class=”card-back”>
             <!– card Back –>
        </div>
    </div>
    </div>
 
  
</body>
</html>

@import url(‘https://fonts.googleapis.com/css2?family=Cabin:wght@400;500;600;700&display=swap’);
*{
    box-sizing: border-box;
    margin: 0;
    padding: 0;
}
html{
    height: 100vh;
    justify-content: center;
    font-family: ‘Cabin’, sans-serif;
    background-image: linear-gradient(60deg, #66757F, #292F33);
    display: flex;
    align-items: center;
}
.card-wrap{
   border-radius: 0.37rem;
    perspective: 1000px;
    height: 13.65rem;  /* Card Height */
    width: 27.15rem;  /* card width */
}
.card{
    height: inherit;
    width: inherit;
    position: relative;
    transition: transform 1s;
    transform-style: preserve-3d; 
}
.card-front,.card-back{
    width: inherit;
    backface-visibility: hidden;
    position: absolute;
    height: inherit;
    border-radius: 0.37rem;
}
.card-front{
    background-color: #d30404; / * Card front background color */
    display: flex;
    align-items: center;
    justify-content: center;
}
 
.card-back{
    background-color: #CCD6DD;
    transform: rotateY(180deg);
}

The hover effect is used in the card as I said before. When you click on this card you will see the back of this card. For this, I have used a small amount of CSS code below which means that when you click on the top of the card the card will rotate at a 180-degree angle.

.card-wrap:hover .card{
    transform: rotateY(180deg);
}

Step 2: Add an image to the front of the card

First of all, we have added the profile image on the front of this card i.e. YouTube logo with the help of our own HTML and CSS code.

 <div class=”card-logo”>
               <img src=”https://i.pinimg.com/originals/19/7b/36/197b365922d1ea3aa1a932ff9bbda4a6.png”/>
</div>

.card-logo img{
  width: 290px;
}

Step 3: Add a profile image to the back of the card

Again we will design the back of this card i.e. we will add all the information on the back. As I said before I added a profile image and some information on the back. The following HTML and CSS code helped to create and design the profile image.

 Box-shadow has been used to make this profile image more interesting. I have used a border radius of 50% in this case. The following HTML code helps to make the various information on the card and the subscribe button on the card to make this image completely round.

 <div class=”user”>
                <img src=”https://lh3.googleusercontent.com/a-/AOh14Gj99VObFyE8W_h8RrcwZO_aYiIHu5AAa_XpnOym=s600-k-no-rp-mo” alt=”user-profile-picture”>
</div>

.card-back .user img{
    width: 35%;
    float: left;
    border-radius: 50%;
    margin: 1.6rem 1.1rem;
    box-shadow: 3px 3px 10px #66757F;
}

Step 4: Add profile information and buttons (more…)

Continue ReadingPure CSS Flip Card On Hover Using HTML & CSS

Fullscreen Overlay Responsive Navigation Menu Using HTML & CSS

 In this article, I am going to show you how to create a full-screen navigation menu bar. You can create a full-page menu bar using only HTML and CSS code. Earlier I have created many types of navigation menus such as site menu bar, top menu bar, responsive menu bar, etc. You can visit our new website Tecnoacquisti to know more about this.

Full-screen navigation is a kind of menu design where you can arrange the topics in your website or blog neatly. So that your user can easily find the topics. In most cases, the top menu bar can be noticed in most websites which is the most popular. But in some cases, this type of full skin menu bar is used which can be made very easily and simply.

In this case, there is a button on the homepage, which when clicked, the menu bar can be seen across the entire page. Hope you like this design.

See the Pen
fullpage menu 1
by Foolish Developer (@fghty)
on CodePen.

Hopefully looking at the design above you like this Full-screen Overlay Responsive Navigation menu. If you want to make it and want to know how I made this design then you can follow the tutorial below.

Below you can watch the video tutorial to know the complete step-by-step. Here you can find out which programming code has been used to create which element.

(more…)

Continue ReadingFullscreen Overlay Responsive Navigation Menu Using HTML & CSS

Awesome Animated Search bar using HTML & CSS

In this article, I am going to show you how to create an animated search bar using HTML and CSS code. The search bar is an important design that is used in every website. There are different types of search bars.

 In some cases, the search bar is completely fixed, in some cases pop-ups, and in some cases animated. In the case of animated search bars, the icon is basically visible. When you click on that icon, the entire search bar is visible. The design I have shown in this tutorial is a complete animated search bar. Normally only icons are seen in this search bar. When you click on that icon, the full search box will appear and you will see the place to input.

 In this case, I have basically used a small amount of JavaScript programming code. You can use the demo below to know how it works.

(more…)

Continue ReadingAwesome Animated Search bar using HTML & CSS

Simple Analog Clock using HTML, CSS and JavaScript

In this article, I will show you how to make an analog clock using HTML CSS and JavaScript programming code. Earlier I made many more types of analog and digital clocks with the help of JavaScript programming code. If you know basic CSS and JavaScript, you can easily create an analog clock

This type of design is largely based on JavaScript programming code. The time that is seen in this case depends on the time of your device. As you can see in the picture above it is a rectangular analog clock. In this, I have added numbers from 1 to 12 which indicate time. Of these I have used three hands, one hand will indicate the time, one minute, and the other the second. I have designed each hand to be a different color. I have used an image to make the numbers that appear in the background.

 If you want to add these numbers manually, you can see another analog watch design I made. Manually I added this number from 1 to 12 to the watch made in that article. Basically in the case of analog clocks, it will take the time of your device once then it will run at its own interval every second.
You can watch the demo below to know better.

See the Pen
analog clock 2
by shantanu jana (@fghty)
on CodePen.

Hopefully from the demo above you know how this digital clockworks. If you want to get the required source code on this watch, you can copy that source code from the section above.

(more…)

Continue ReadingSimple Analog Clock using HTML, CSS and JavaScript

How to Create a digital clock with date using JavaScript

In this article, you are going to learn how to make a digital clock using HTML, CSS, and JavaScript programming code. Earlier I shared with you many more types of analog and digital clock-making methods. In this article, I have shown you how to make a completely simple digital watch design.

 There are basically two types of clock, an analog and a digital. Digital clocks are much easier to make than analog clocks. In this watch, I have added a date with time, not just time. That means together you will see time, date, month, date everything

This design is based on JavaScript programming code. If you know the basic JavaScript programming code then you will definitely know how to make this design.

Simple Digital clock using Javascript [Live Demo]

If you want to know how it works then you can watch the live demo below. From below you can copy the required source code i.e. HTML, CSS, and JavaScript, and use it in your own work.

See the Pen
digital clock 2
by shantanu jana (@fghty)
on CodePen.

If you want to know how to make this digital with the help of video then you can follow the video tutorial below. This is a youtube video where I showed you step by step how I made this digital watch. We hope this tutorial helps you.

How to Create a digital clock using JavaScript 

First of all, you create an HTML and CSS file. You can add CSS code to the Html file using style tags. In this case, I have used a very small amount of HTML and CSS code, so even if you do not create a separate file for the CSS code. 

Step 1: Create the basic structure of the clock

The HTML programming code below is basically the basic HTML structure. You copy the following structure and paste it into your HTML file. The CSS codes below are mainly used to design the background of this digital watch. The CSS code below has helped to create and design the box you saw in the demo.

   <div class=”time”>
       
  </div>
       

body {
    font-family: “Work Sans”, sans-serif;
    margin-left: 50px;
    margin-top: 150px;
    background: rgb(230, 230, 230);
}
.time {
    background: rgb(12, 12, 12);
    color: #fff;
    border: 7px solid rgb(255, 252, 252);
    box-shadow: 0 2px 10px 0 rgba(0,0,0,0.16), 0 2px 10px 0 rgba(0,0,0,0.12);
    padding: 8px;
    text-align: center;
    width: 500px;
}

Step 2: Add time, am / pm, date options (more…)

Continue ReadingHow to Create a digital clock with date using JavaScript