How to Create Pulse Animation Using CSS (Code + Demo)

CSS Pulse Animation We see it in different places on web pages. Pulse Animation is used to make different UI elements interesting.

Here we will discuss how a Pulse Animation can be created using CSS. Here I have shared different types of designs such as Simple Pulse Animation CSS, button pulse animation, text pulse animation, image pulse animation, pulse animation on hover, etc.

Here I will use only CSS and HTML. I have shared here the complete information of each design, source code, and live demo of everything.

Examples – 1 

Simple Pulse Animation CSS

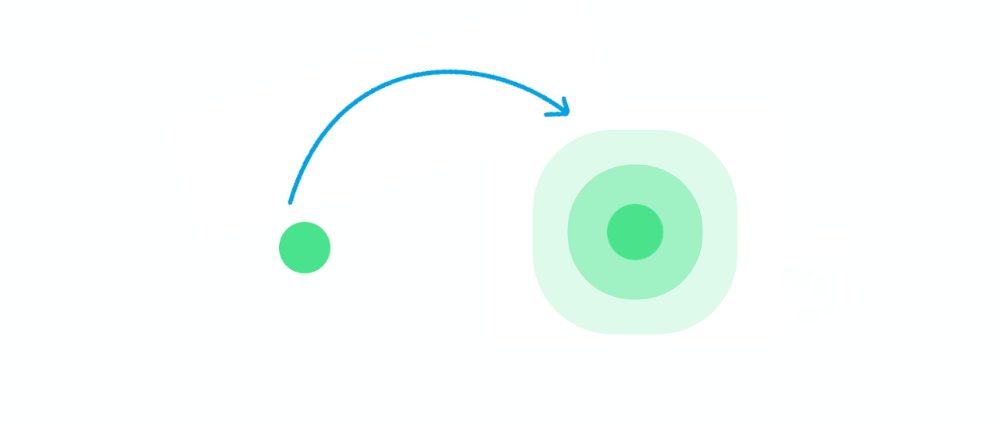
This is a simple Pulse Animation design created by HTML and CSS only. This design is basically a basic example of Pulse Animation.

There is a small round point here that will continue to be the center of animation.

Simple Pulse Animation CSS

Hopefully, with the help of the demo button above, you know how it works. If you want you can download all the code using the button below.

But below I have given all the HTML CSS code. The code used for this CSS Pulse Animation effect is very simple so you will not have any difficulty understanding it.

The following code is the HTML code that helps to add the basic information of this pulsing animation. Here I have put together all the HTML codes that you can copy and paste into your HTML file.

<!DOCTYPE html>
<!–Simple Pulse Animation–>
<html lang=“en”>
<head>
    <!–CSS file–>
   <link rel=“stylesheet” href=“style.css”>
</head>
<body>
    <div class=“relative”>
        <button></button>
        <div class=“span”></div>
        <div class=“span”></div>
    </div>
</body>
</html>

The following code is the CSS code that activates this pulsing animation. Copy these and paste them into your CSS file. Remember to rename your CSS file to ‘style.css’.

.relative {
  position: relative;
  margin: 50vh auto;
  width: 60px;
}
.span {
  position: absolute;
  width: 60px;
  height: 60px;
  border-radius: 50%;
  top: 0;
  left: 0;
  border: 0;
  -webkit-animation: sploosh 2s cubic-bezier(0.165, 0.84, 0.44, 1);
  -webkit-animation-iteration-count: infinite;
}
.span:nth-child(2) {
  -webkit-animation-delay: .33s;
  -webkit-animation-duration: 2.2s;
}
button {
  border: 0;
  margin: 50vh auto;
  border-radius: 50%;
  display: block;
  width: 60px;
  height: 60px;
  background-color: rgba(71, 225, 141, 1);
  -webkit-animation: pulse 2s ease-out;
  -webkit-animation-iteration-count: infinite;
}
@-webkit-keyframes sploosh {
  0% {
    box-shadow: 0 0 0 0px rgba(71, 225, 141, .7);
    background: rgba(71, 225, 141, .7);
  }
  80% {
    background: rgba(66, 166, 223, 0);
  }
  100% {
    box-shadow: 0 0 0 120px rgba(66, 166, 223, 0);
  }
}
@-webkit-keyframes pulse {
  0% {
    -webkit-transform: scale(1);
  }
  3.3% {
    -webkit-transform: scale(1.1);
  }
  16.5% {
    -webkit-transform: scale(1);
  }
  33% {
    -webkit-transform: scale(1.1);
  }
  100% {
    -webkit-transform: scale(1);
  }
}

Hopefully, you have been able to create a simple pulse animation design using the above code.

Examples – 2 

Button pulse animation CSS (more…)

Continue ReadingHow to Create Pulse Animation Using CSS (Code + Demo)

How to Create Modal Popup in React JS (Free Code)

Simple Modal Popup in React Js

In this tutorial, we will learn how to create a modal popup using React js. Earlier we learned how to create a popup window using JavaScript.

React is a free and open-source front-end JavaScript library. To create this react js modal popup example you need to have some idea about react. React js is used to create most user interface components.

Before this, we created a modal popup using only Html and CSS. With it, I learned how to create different elements using the popup window. This reacts modal popup has to be opened manually by clicking on the button.

Simple Modal Popup in React Js

Model pop-ups are a common web element that we see on various websites. Every time we visit a web page we see such a pop-up after a certain period of time.

Although in that case automatic pop-ups are used. However, this react js modal popup example is not automatic. It has to be opened by clicking on the button.

See the Pen
Modal Popup in React JS
by Shantanu Jana (@shantanu-jana)
on CodePen.

Since this is a basic example of React modal, there is not much information here. The popup window contains some text and a cancel button. There is also a popup button which after clicking on it we will see a simple modal popup.

We have already discussed in an article how to create an automatic popup window using JavaScript. You can easily create a popup login form, popup registration form and email subscription form using this react js popup example.

Create a Simple Modal Pop-up with React

Now we will learn how to create this react popup form. If you want to know step by step then follow the tutorial below. However, if you want, you can download all the code using the button below the article.

As I said earlier, React is an open-source JavaScript library, so you have to use React’s CDN link to activate the code.

Step 1: HTML code of React Modal Popup

The following codes are HTML codes. HTML is used a lot in the case of React. Here we will create all the elements in JavaScript using ‘createElement’.

<div id=”app”></div>

Step 2: CSS code of Popup window (more…)

Continue ReadingHow to Create Modal Popup in React JS (Free Code)

Simple JavaScript Audio Player for Beginners (Free Code)

Simple Javascript Audio Player

JavaScript Audio Player is a popular client-side project. This type of Simple JavaScript Audio Player is used when using audio in projects or websites. Music player is made in many advanced ways using different types of programming code.

From this tutorial, you will learn how to create a Simple Audio Player using HTML 5 and javascript. There are many tutorials on the Internet for creating HTML audio players

However, I noticed that a lot of advanced JavaScript has been used to create that design. I have created this music player tutorial to solve that problem.

Simple Javascript Audio Player

You will find many tutorials on creating a simple audio player on the Internet. However, in most cases, a lot of difficult JavaScript has been used. However, in this case, I have used very simple JavaScript and no external library is used here.

Ordinary music players have many options. Image, song change options, playlists, etc. make the audio player interesting. Live Preview 👇

See the Pen
Untitled
by Shantanu Jana (@shantanu-jana)
on CodePen.

Hopefully from the demo above you have learned how to create an HTML Audio Player. With this music player HTML code you can copy from the demo section.

Since this is a simple design, there are not many options. Only one audio has been used here. It also has some control buttons that will control the audio. It also has a sound control button in this Simple JavaScript Audio Player.

How to Create an Audio Player in JavaScript

Now I am going to see step-by-step how to create this project (music player HTML CSS javascript). Here I have used HTML, CSS, and javascript.

Step 1: Basic structure of Audio Player

A box has been created at the top of the web page using the following HTML and CSS. This box will serve as the basic structure of this audio player.

<div class=”container”>
  <div class=”text-container”>
  </div> 
</div>
* {
  box-sizing: border-box;
}
html {
  background: #084b78;
}
html, body, .container {
  height: 100%;
  margin: 0;
 font-family: Arial, Helvetica, sans-serif;
}
.container {
  display: flex;
  align-items: center;
  justify-content: center;
}
.text-container {
  background-color: rgb(255, 255, 255);
  padding: 40px 50px;
  border-radius: 5px;
  width: -webkit-fit-content;
  width: -moz-fit-content;
  width: fit-content;
  text-align: center;
  position: absolute;
  top: 50%;
  left: 50%;
  transform: translate(-50%,-50%);
}
Basic structure of Audio Player

Step 2: Add a heading in Music Player (more…)

Continue ReadingSimple JavaScript Audio Player for Beginners (Free Code)

#1 Simple and Easy Price Range Slider Using HTML,CSS & JavaScript

Price Range Slider HTML CSS JavaScript

If you want to create JavaScript Price Range Slider then this tutorial will help you. Price Range Slider is used in different places to determine the minimum and maximum value of a price.

You can create this kind of price range slider javascript in many ways. However, the design that I have shared here is absolutely simple. This range slider is made with basic HTML, CSS, and javascript. There are two handles that allow you to set the minimum and maximum values.

Price Range Slider HTML CSS JavaScript

Price range slider HTML Search filters for different types of eCommerce websites. Which will show the result to the user depending on his price value.

I have fully explained the code used to make the Price Range Slider. If you are absolutely Beginner then there is no reason to worry.

Although it is not fully functional, only the basic design has been made here. You can watch the demo below to know how this Price Range Slider HTML CSS works.

See the Pen
Untitled
by Shantanu Jana (@shantanu-jana)
on CodePen.

Hopefully, the preview above has completely helped you to know how it works. Here is the complete source code for enhancing this design. First, a box has been created on the webpage where all the information can be found.

There is a heading, there is a result box in which the price minimum maximum value can be seen, then there is a range slider.

I have taken the help of HTML, CSS, and JavaScript to create this Javascript Price Range Slider. First I have added all the information using HTML. I designed it using CSS. Finally, I have implemented this Price Range Slider using JavaScript.

Price Range Slider HTML Code

The following HTML codes have been used to add all the information in this slider. First the basic structure, then a text, then the value view of the range slider, and a range slider with two handles. Copy the following Html code and add it to your Html file.

<div class="slider">
     
   <p>Price Range</p>
     
   <div class="range-slider">
          <span class="rangeValues"></span>
          <input value="1000" min="1000" max="50000" step="500" type="range">
          <input value="50000" min="1000" max="50000" step="500" type="range">
        
   </div>
</div>

Design Price Range Slide using CSS (more…)

Continue Reading#1 Simple and Easy Price Range Slider Using HTML,CSS & JavaScript

QR Code Generator Using JavaScript & CSS (Free Code)

In this article, you will learn how to create a QR code generator using JavaScript.
If you know basic JavaScript, you can easily create a simple QR code generator Javascript. You can follow our other site Tech Virtual to create more other types of JavaScript QR Code Generator.

QR code is a type of matrix barcode that is currently used in almost all digital payments and products. In fact, it is a machine-readable optical label that contains some special information about the product.

QR Code Generator Using JavaScript

I have shared many more types of JavaScript projects before. This JavaScript QR code generator is fully operational.

JavaScript QR Code Generator

There are many such QRcode js examples on the internet. But here I have shared the complete tutorial and tried to explain to you step-by-step how to create a QR code generator using JavaScript.

This QR code generator JavaScript has been created in a very simple way. Here you can create a matrix barcode of any text or link.

If you do not understand what I am saying and would like to get a live demo of this project then use the demo below.

See the Pen
JavaScript QR Code Generator
by Shantanu Jana (@shantanu-jana)
on CodePen.

Hopefully, the preview above has helped you to understand how this QR code generator JavaScript works.

It is fully functional which means it will work perfectly when you scan it using QR scanner.

Many people think that it is very difficult to create this kind of pure javascript QR code generator. In fact, it is not. You can easily create if you know basic HTML CSS and javascript.

How to make a QR Code generator in JavaScript

First I added all the information using HTML. Then designed a QR Code Generator using JavaScript. JavaScript and qrcode.js CDN are used last.

There is a place input in which you can input any text or link. Then there is a small display in which the QR Code can be seen.

Now if you want to create this QR code generator javascript then follow the tutorial below.

Step 1: Basic structure of QR code Generator (more…)

Continue ReadingQR Code Generator Using JavaScript & CSS (Free Code)