
Temperature Converter App in React (Step by Step)
In this tutorial, we will walk through the process of building a temperature converter in React. Temperature conversion is a common task in many applications, especially those dealing with weather…
In this tutorial, we will walk through the process of building a temperature converter in React. Temperature conversion is a common task in many applications, especially those dealing with weather…
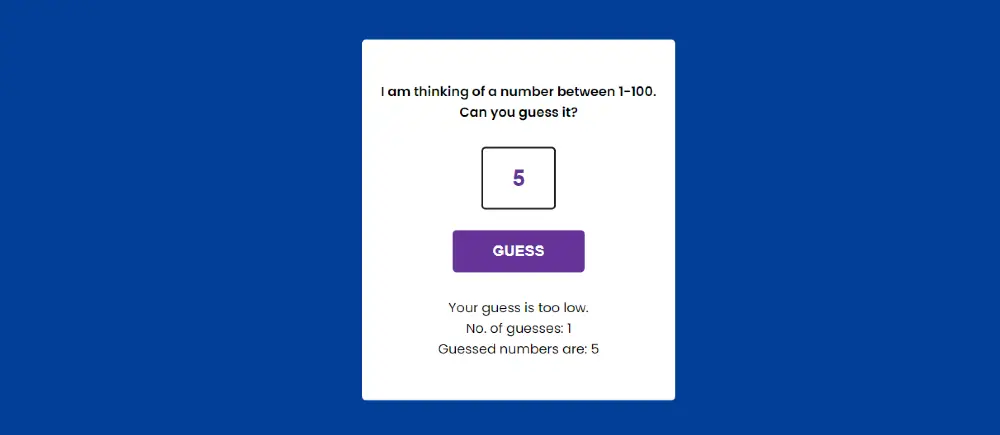
In this tutorial you will learn how to make simple number guessing game using html css and javascript. If you know basic javascript then you can make this javascript number…

Do you want to make a Simple Tic-Tac-Toe game using JavaScript? In this article you will learn how to create tic tac toe game using html css and javascript. If…
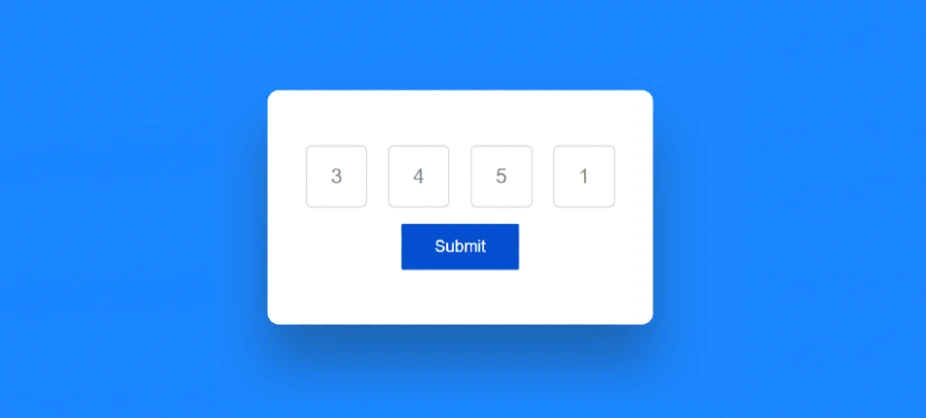
Do you want to create OTP Input Field using HTML css and javascript? In this article, you will know how to make OTP Page With Autofocus Input Fields using JavaScript.OTP …

In this article, you will learn how to create a QR code generator using JavaScript.
If you know basic JavaScript, you can easily create a simple QR code generator Javascript. You can follow our other site Tech Virtual to create more other types of JavaScript QR Code Generator.
QR code is a type of matrix barcode that is currently used in almost all digital payments and products. In fact, it is a machine-readable optical label that contains some special information about the product.

I have shared many more types of JavaScript projects before. This JavaScript QR code generator is fully operational.
There are many such QRcode js examples on the internet. But here I have shared the complete tutorial and tried to explain to you step-by-step how to create a QR code generator using JavaScript.
This QR code generator JavaScript has been created in a very simple way. Here you can create a matrix barcode of any text or link.
If you do not understand what I am saying and would like to get a live demo of this project then use the demo below.
See the Pen
JavaScript QR Code Generator by Shantanu Jana (@shantanu-jana)
on CodePen.
Hopefully, the preview above has helped you to understand how this QR code generator JavaScript works.
It is fully functional which means it will work perfectly when you scan it using QR scanner.
Many people think that it is very difficult to create this kind of pure javascript QR code generator. In fact, it is not. You can easily create if you know basic HTML CSS and javascript.
First I added all the information using HTML. Then designed a QR Code Generator using JavaScript. JavaScript and qrcode.js CDN are used last.
There is a place input in which you can input any text or link. Then there is a small display in which the QR Code can be seen.
Now if you want to create this QR code generator javascript then follow the tutorial below.
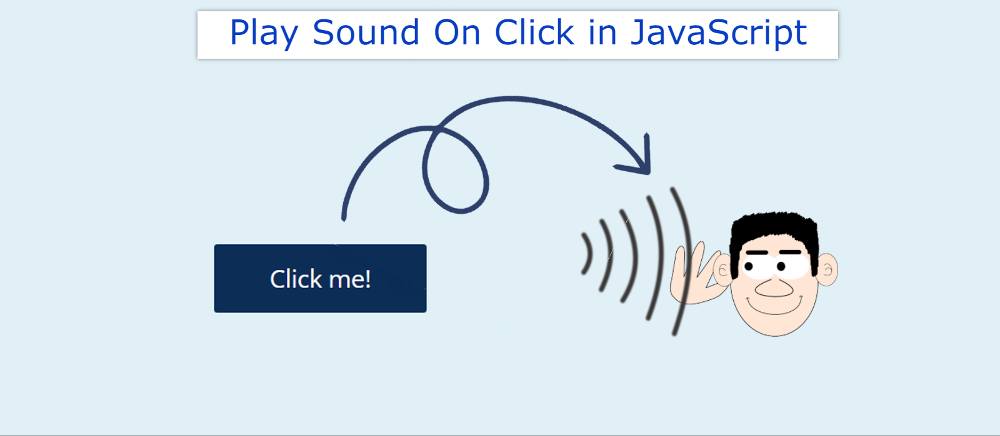
Play sound on click using javascript is a function that create a sound on clicking on the button as the user clicks on the button the click evenlistener triggers the…


In this tutorial, you will learn how to create detect pressed key javascript. This type of project will basically help you to know which key has been pressed on the keyboard.
detect enter key design can be seen in many large applications. If you want to create a project where the user needs to show the key entered. Then you can use this kind of design.
When you click a button on the keyboard, that key, key code can be seen here. If you do not understand what I am saying then you can see the preview below.
From here you will get a live preview and source code of this project (Detect Enter Key Press in JavaScript).
See the Pen
Untitled by Foolish Developer (@foolishdevweb)
on CodePen.
As you can see we have created a box at the top of a web page. When you press a key on your keyboard. Then all the information in the box can be seen.
Here you will find complete information and step-by-step tutorials. But to make this detect enter key project you need to have an idea about HTML, CSS, and javascript.
Below the article is a section on copying code. There is also a button to download the source code.
First I created a box at the top of the web page in which all the information can be found. I have used blue color in the background of the web page and light white color has been used in the background of the box.


If you are a beginner and want to create a JavaScript Password Generator then this tutorial is for you. Here I have shown step-by-step and shared complete information on how to create a password generator using JavaScript.
JavaScript Password Generator will help you create the password of your choice. Earlier I showed you how to create JavaScript Random Password Generator. However, this design will give you the option to create a password manually.
This simple password generator will help you create the password you want. There are different options and controls. This will allow you to create the password you need.
You need JavaScript enabled to view it to make it. Here I have used HTML CSS and some amount of JavaScript.
See the Pen
Untitled by Foolish Developer (@foolishdevweb)
on CodePen.
First, a box was created on the webpage. In that box, I first created a display where the generated passwords can be seen.
Then an input box is created where you can control the width of the password. This means that the number of characters you want to create the password can be controlled by this slider.
Then there are the four smaller boxes. This select box created by the checkbox will help you to further customize your password. There is a button at the end of which clicks on which the password is generated and can be seen in the display.
If you want to create this Password Generator JavaScript then you must have a basic idea about HTML, CSS, and javascript.
But if you just want the source code then follow the part below the article. But if you are a beginner then follow the tutorial below.
This JavaScript Password Generator has a copy button. When you click on the Generate button, the password will be copied automatically.
I first created an area using the following HTML and CSS codes. In this area, you can see all the information of Password Generator with JavaScript.
The webpage has been designed using the following code. Here the background color of the webpage is blue.

I have used the background color of this box as white and width: 500px. Box shadows have been used to enhance beauty.

 is one of the colors we can use to express different formats.")
In this article, I have shown you how to create RGB Color Generator using JavaScript. Earlier I shared with you how to make different types of random color generators, background-color generators, etc. In this tutorial, I have shown you how to create JavaScript RGB Color Generator. RGB is a color format. RGB (Red, Green, and Blue) is one of the colors we can use to express different formats.
In this project, you can create different colors by combining Red, Green, and Blue colors of your choice. A lot of times we can’t find the color we want to use for different projects. In that case, this kind of project will help you completely.
The three colors used here are red, green, and blue respectively. You can create any color you like by combining these colors.
Below is a demo that will help you to know how this RGB Color Generator works. Here you will find the required source code and live demo.
If you want, you can copy the source code and use it in your own work. However, for the source code, you can take the help of the download button below the article.
See the Pen
JavaScript RGB Color Generator by Raj Template (@RajTemplate)
on CodePen.
Hope you like the demo above. As you can see above, I used blue as the background color for the first web page. Then I made a small box. All information will be added to this box and its height will depend on the amount of content. First created a display in which the colors can be seen. Then I made three range slides.
I used HTML’s input function to create the slides. Three range riders have been used for the colors Red, Green, and Blue respectively. Below all is a small box in which the color code can be seen. You can copy that code and use it in your work.
RGB Color Generator is built with HTML CSS and JavaScript. First I designed the basics using HTML CSS. Then I implemented it using JavaScript. To make this RGB color generator you must have some basic idea about HTML CSS JavaScript.
If you only want the source code, you can use the download button at the bottom of the article. However, I request you to follow the tutorial below. This will allow you to know step by step how I made this.


In this article, you will learn how to create a Simple Loan Calculator using HTML CSS, and JavaScript. JavaScript Loan Calculator will help you to calculate the loan amount, interest rate, and information of monthly payment.
Before that, I used JavaScript to create many types of calculator projects like Age calculator, Height calculator, weight calculator, etc. Now I am going to show you how to make a simple loan calculator using JavaScript. We basically use the general formula to calculate the interest rate and monthly payment of a loan amount. However, JavaScript will help you to make this task more perfect and easy.
Computer programming makes our tasks much easier. Similarly, this EMI calculator will help you to calculate the monthly payment of your loan. Here I have used HTML CSS and JavaScript. HTML and CSS helped create and design the basic structure of this JavaScript loan calculator. Here JavaScript helps to make it work.
First I used a heading that basically helped to enhance the beauty. Then I made 3 input boxes. To input the loan amount in the first input box, interest rate in the second input box, and information input of the third input box month. Below all is a small display where the calculations can be seen.
This loan calculator will help you know how much money you have to pay each month with interest.
For example, if you want to buy a product, the total value of this product is X and there is a Y % interest rate. You want to repay that loan in 6 months. In this case, you can easily find out how much money you have to pay per month from this calculator.
If you want to do it manually, you have to work a little harder.
See the Pen
Untitled by Foolish Developer (@foolishdevweb)
on CodePen.
Hopefully, the above demo has helped you to know how this interest rate calculator javascript works. If you only want to get the source code then you can copy the source code from the demo section above.
But keeping in mind the beginners, I have shared the complete step-by-step tutorial. If you want to know how to build this JavaScript loan calculator then you must follow our tutorials step by step.