Save Textarea Text to a File using JavaScript

Save Textarea Text to a File using JavaScript

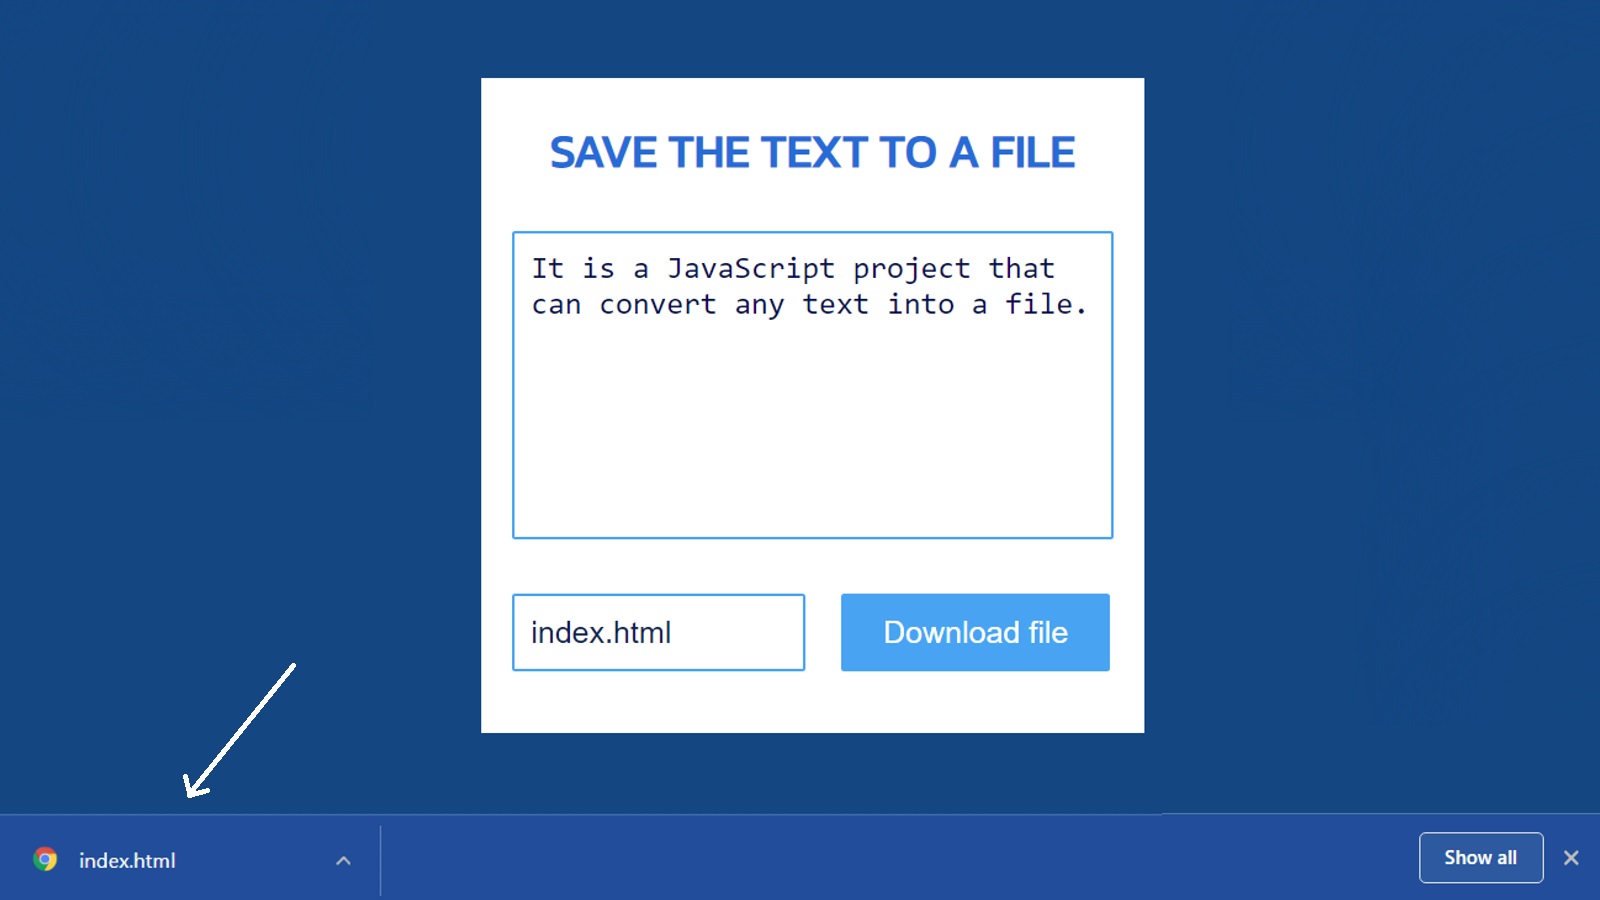
In this article, you will learn how to convert Textarea Text to File using JavaScript. This is a great project for beginners. There is a box here, you can convert the contents of that box into a file. Many times in a project you need to save the text content to the file later. In that case, you can use this JavaScript Create and Save text file project.

 We usually use Notepad when we want to create any kind of files like HTML, CSS, or text. This project will make that task much easier. There is a small box in which you can input some text or information. 

Then there is another small box where you can use the rename of your choice. Then there is a download button that will save the file by clicking on it.

Save Text to a File in JavaScript

I used JavaScript, HTML, and CSS to create this project. First, we created its basic structure using HTML CSS. Then I implemented this project (Create and Save the text file in JavaScript) using JavaScript.

See the Pen
Untitled
by Code Media (@codemediaweb)
on CodePen.

First I designed the webpage and made a box on it. I added a heading at the beginning of this box. The h1 tag has been used to enhance this heading. Then I created a box using HTML’s Textarea. In this box, you can input some text. Then create another input box in which you can add the rename of the file of your choice. Here you can create any type of file.

 If you open this Create and save a file project with a browser, your content will be downloaded automatically. If you open it using a code editor, you will be asked for permission to download the file.

How to save textbox value to file using JavaScript

To build it you need to have a basic idea about HTML CSS and JavaScript. The video below will help you learn how it works.

You can also use the demo section above to know How to save form data in a Text file using JavaScript. If you just want the source code, you can use the download button at the bottom of the article. However, I request you to follow the step-by-step tutorials below. 

Below I have shown step-by-step how to save text to a client-side file using JavaScript. Hereafter each step I have given possible results which will help you to understand better.

Step 1: Basic structure of Text to a File project

I have created the basics of this project (Create and Save the text file in JavaScript) using the following HTML and CSS code. 

A box has been created here with width: 430px and the background color is white. Here I have used the background-color blue of the webpage.
<div id=”container”>
 
</div>
* {
  box-sizing: border-box;
}
body {
  height: 100vh;
  margin: 0;
  display: flex;
  align-items: center;
  justify-content: center;
  background-color: #044b82;
  font-family: “Kanit”, Verdana, Arial, sans-serif;
}
#container {
  width: 430px;
  padding: 40px 20px;
  background: white;
}
Basic structure of Text to a File project

Step 2: Add a heading using HTML (more…)

Continue ReadingSave Textarea Text to a File using JavaScript

Simple Weather App using JavaScript – Free Source Code

JavaScript Weather App

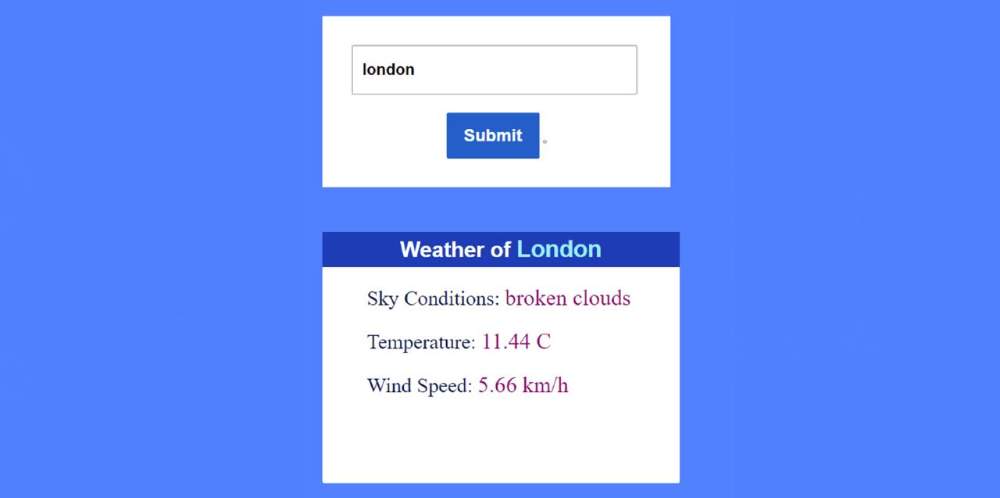
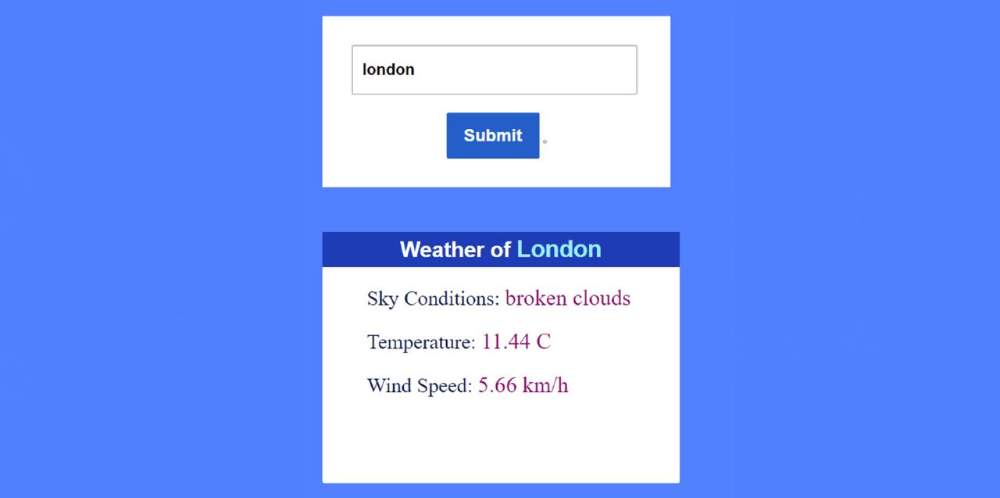
In this article, you will learn how to create a Simple Weather App using HTML CSS, and JavaScript. JavaScript Weather App is a great project that helps to find out the weather of any location.

In this project made here, you will be able to know the temperature, wind speed, sky condition, etc. First I created a box that contains an input box. If you input the name of any city in the input box, you will get all the information.

You will see all the information in another box. With the help of this simple weather application, you can easily know the weather of any city in the world. This design can be easily made with the help of Jquery. However, if you want, you can easily create this application using pure JavaScript.

No doubt you need to have a basic idea about JavaScript. If you know Basic JS then you can make it very easy. Because for beginners I have given a complete step-by-step explanation of why I used that code line.

JavaScript Weather App

 Below is a live demo that will help you learn how this project (JavaScript Weather App) works. Here, after you input the name of any city, click on the submit button below, all the information can be seen in the box below. I have shown in the following tutorial how you can increase the amount of information if you want.

See the Pen
Untitled
by Code Media (@codemediaweb)
on CodePen.

Hopefully, the demo above has helped you to know how it works (how to make a weather app in HTML). You will find the source code required to create it in the demo box above. There is also a download button at the bottom of the article.

How to Build a Weather App JavaScript

Below is a step-by-step tutorial on how to build this application in this weather. First of all, I created a box using some amount of HTML. Then I created a box to input using the input function of HTML. 

In this input box, you can input the name of any city. Then I have created the submit button which can be clicked to see all the information. All the information shown here will be collected with the help of the API link.

The information will be collected first with the help of the JavaScript fetch method. Then with the help of innerHTML all those information has been arranged to be displayed on the web page. First I arranged to show a small heading in the information box. Where you can find the name of the city you searched for. 

Then all the other information in the box like sky condition, temperature, wind speed, etc. can be seen. First, you create an HTML CSS file. Then follow the step-by-step tutorial below. I have shared a video for your needs which will help you to know better.

Step 1: Basic structure of the Weather App

The basic structure of this Weather App has been created using the following HTML and CSS code. This structure will contain all the information. The width of this area: 410px and margin: 50px auto has been used to keep it in the middle.

<div class=”container-fluid”>
  <section class=”main”>
  </section>
</div>
* {
    margin: 0;
    padding: 0;
    box-sizing: border-box;
}
body{
    background: #448aff;
}
.container-fluid{
 width: 410px;
 margin: 50px auto;
 padding: 10px;
}

Step 2: Create a place to input the city name (more…)

Continue ReadingSimple Weather App using JavaScript – Free Source Code
Random CSS Gradient Generator with JavaScript

Random Gradient Generator with JavaScript & CSS

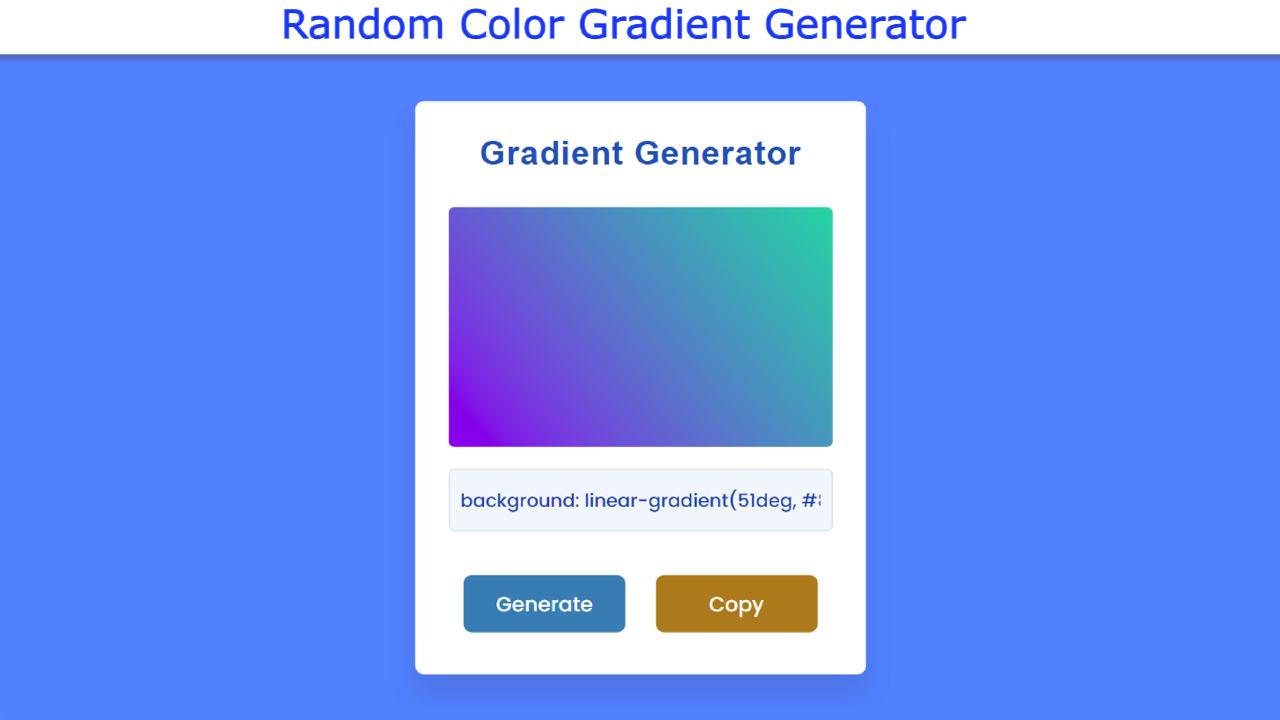
In this article, you will learn how to build a Random Gradient Generator using JavaScript, HTML, and CSS. CSS Gradient Generator is basically a simple JavaScript project that will increase…

Continue ReadingRandom Gradient Generator with JavaScript & CSS
Javascript Age Calculator | Calculate Age from Date of Birth

Javascript Age Calculator | Calculate Age from Date of Birth

Javascript Age Calculator | Calculate Age from Date of Birth

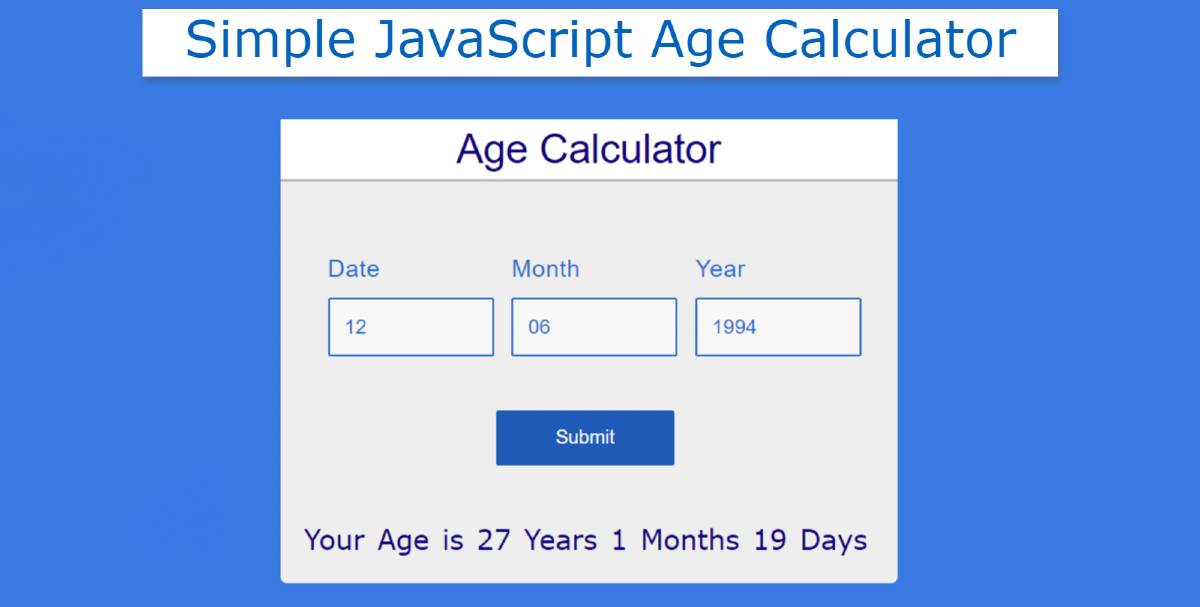
JavaScript Age Calculator is a remarkable JavaScript application that will help to calculate a user’s age. Earlier I have shown many types of JavaScript projects like JavaScript Clock, Random Password Generator, Calculator, etc. 

This is the first time I am going to make such an age calculator. This type of design is used in many cases. Basically, there are different types of registration forms where the user needs to be 18 years of age or whatever. 

In that case, the system will calculate the age of the user as soon as the user inputs his date of birth. In this javascript Age Calculator, I have given three places to input age. Where the user can input the day, month, and year of his date of birth. 

Javascript Age Calculator 

The system will then automatically convert the distance of its date of birth from the current time to year months and days. Here I have designed this system using HTML and CSS code and implemented it using JavaScript. 

First I collected the current date from your device using JavaScript code (new Date). Then we subtract that with your input time and convert the subtraction to years, months and days.

As you can see above, I painted the background # 2782e3 of the web page and made a rectangular box in it. I used a title or heading on top of that box. Then I made three boxes to input using HTML’s input (<input>) function. 

The first, second, and third boxes are designed to input days, months, and years, respectively. Then there is a submit button below which the user can see his current age by clicking on it. I have arranged to show the result at the bottom of the box. 

Here’s how to transform your current age into years, months and days. If you want to know how it works and you want to use it live then use the demo section below. Here you will find the required source code which you can use for your own purposes. 

However, I would urge you to follow the tutorial below if you are a beginner and want to know how I made it (Age Calculator using javascript). 

See the Pen
Age calculator
by Foolish Developer (@fghty)
on CodePen.

Hopefully, the demo above has helped you to know and enjoy its live demo.

Calculate Age from Date of Birth using Javascript

Now is the time to get to know it steps by step. I have shared the possible results after each step so that it is more convenient for you to understand. 

At the bottom of the article, I have given a download button with the help of which you can download the source code.

Step 1: Design the webpage and create a box (more…)

Continue ReadingJavascript Age Calculator | Calculate Age from Date of Birth

How to Make a Word Counter with JavaScript ‍

You will learn how to create word counters with the help of JavaScript. You will see that there are many websites on the internet that are much more popular for counting words or characters. I will try to explain in this tutorial a basic structure of how these designs work. 

A simple word counter depending on the general JavaScript programming code. First of all, I have made a box (Textarea) here. When you write something in that box, every character you write in that box will be a live count. The counted results can be seen in the box below. 

Simple Word Counter with JavaScript ‍

Basically, this design will count the number of characters, each character you write in this box will count with space. I used a small amount of HTML and CSS code to create the box and design the background. 

Here all the work is handled by JavaScript, that is, everything shown in the box that counts these words is handled by JavaScript. If you want to know better how this word (character) counter works then you can see the demo below.

See the Pen
word counter
by Foolish Developer (@fghty)
on CodePen.

As you can see, I made a rectangular box here. When you type something in that box, it will count live. The counted results can be seen through a small box below.

In the background of this box, I have used white color and added a blue border all around to enhance the beauty. Follow the tutorial below to make this design. In this case, first of all, let me say that I have used the bootstrap CDN link. Be sure to add a link to these two in the head section of your HTML file.

Step 1: Design the background of the word counter

 First of all, you create HTML and CSS files. Then copy the following HTML structure and add it to your HTML file.

<!DOCTYPE html>
<html lang=”en”>
<head> 
  <link rel=”stylesheet” href=”https://cdn.jsdelivr.net/npm/bootstrap@4.6.0/dist/css/bootstrap.min.css”>
  
  <meta charset=”UTF-8″>
  <meta http-equiv=”X-UA-Compatible” content=”IE=edge”>
  <meta name=”viewport” content=”width=device-width, initial-scale=1.0″>
  <title>Document</title>
  <style>
   /* CSS Code */
  </style>
</head>
<body>
  
   
  <div class=”column”>
 
</div>
<script>
  // Javascript code
</script>
</body>
</html>

Using the CSS code below I basically designed this word counter in the background.

(more…)

Continue ReadingHow to Make a Word Counter with JavaScript ‍