In this article, I am going to show you how to make a simple javascript stopwatch. Many times this type of design is needed in different types of projects or websites. If you want to make Stopwatch using JavaScript, then follow the tutorial below.

Stopwatch is a type of JavaScript project that is used to count sometimes. You need to know the basics of JavaScript to create this project. In this tutorial, I will give you a complete explanation.
JavaScript Stopwatch
Now is the time to create this simple countdown timer using JavaScript. All you need is an HTML CSS and JavaScript file. Are you looking for comptia A+ certification dumps? I can help you with that.
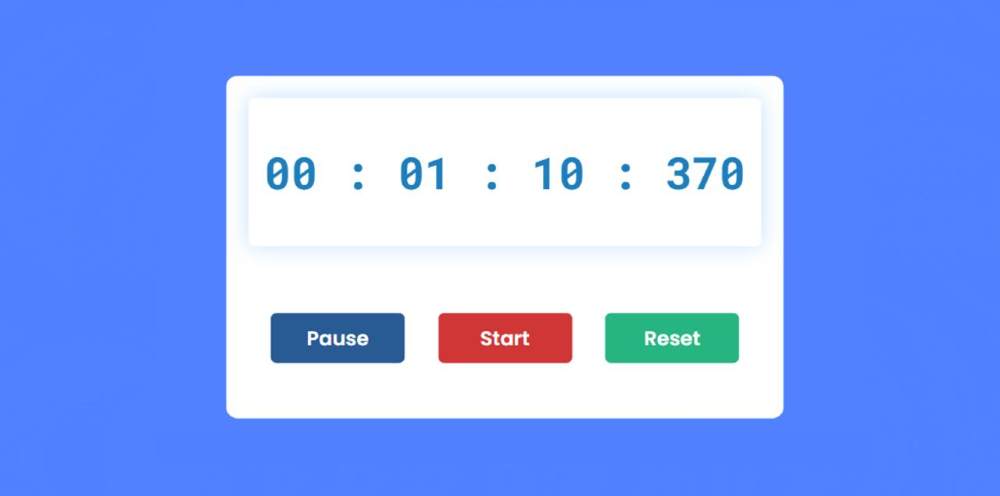
The notable point of this stopwatch is that here you can count the hours, minutes, seconds, and milliseconds.
See the Pen
javascript simple stopwatch by Foolish Developer (@fghty)
on CodePen.
I have completed this project (Simple Stopwatch using JavaScript) in three steps. First I made the display then I added the buttons and at the end of all, I made the stopwatch functional.
How to create a simple stopwatch using JavaScript
Let me tell you something about this design before sharing this tutorial. First I designed the webpage and then made a small box. This box has a display to show the time. There are also three navigation buttons to control this time.
Step 1: Create the basic structure of the stopwatch
We have created the basic structure of this stopwatch using the following HTML and CSS code. Here I have given blue as the background color of the webpage and white as the background color of the design.
This box uses 40% length and min-width: 500px. No specific height is given here, it will determine the height based on the amount of content.

Step 2: Create a display to see the time
Created a display using the following HTML and CSS code. All the time can be seen in this display. Here you can count the hours, minutes, seconds, and milliseconds.
Its width has been used 92% which means this box can be seen 92% mm. A shadow has been used around the display to make it brighter and more attractive.

Step 3: Create 3 buttons in Stopwatch using HTML CSS
Now I have created three buttons in the stopwatch. These are to start the countdown, to close the other, and to run the countdown from the beginning again.
HTML’s button function has been used to create the buttons. I used height: 45px, width: 120px and background color blue.
I changed the background color of the second and third buttons using the following two lines of CSS code. Nth-last-child has been used to change the background color.

Step 4: Activate Simple Stopwatch using JavaScript
Above we just designed it. Now you need to implement this project (Simple Stopwatch using JavaScript) using JavaScript.
First I collected some information using let. Such asset is a constant of display id and holds 0 for hours, minutes, seconds, and milliseconds.
I have executed the start button using JavaScript below. The countdown will begin when you click this button.
I have implemented the pause button using the code below. As a result, when you click this button, the countdown will stop during the stopwatch.
The following codes have helped to make the reset button work. Hours, minutes, seconds, and milliseconds will be 0 when you click the reset button.
Below I have implemented this time stopwatch using the function displayTimer. Below I have tried to give some explanations so that you can understand.
➤ You will see that here I have used three ‘if’ functions. I have added the condition in the first ‘if’ function that when the milliseconds are equal to thousands, the value of milliseconds will be zero and will increase by one in seconds.
➤ We know that one second is equal to 1000 milliseconds. So when the value of milliseconds reaches thousands after the countdown, the value of milliseconds will be zero and the value of seconds will increase by 1.
➤ Similarly, I have used the second ‘if’ function for the time in seconds. We know one minute is equal to 60 seconds. So when the value of the second is equal to 60, the time of the second will be zero and the minute cell will increase by one.
➤ We know that one hour is equal to 60 minutes. So when the time in minutes reaches 60, we see 0 in the minute cell and one increase in the hour cell.
This is how the countdown timer will continue. If you know basic JavaScript you will definitely understand it. If you have difficulty understanding, please let me know in the comments.
I added a zero before each one-digit period. A number is seen when the time is less than 10. I have used the following four-line codes to add one zero to each of these one-digit numbers. When the value of hours, minutes, seconds, and milliseconds is less than 10, one zero is added before those times.
Here in the millisecond cell, I added a little extra code. Because milliseconds are four numbers, two conditions have to be added here. When the value of milliseconds is less than 10, two 0s will be added. When its value is less than 100, a 0 will be added.
We have arranged to display all this information in the display using innerHTML. As you can see above, we have stored the hours, minutes, seconds, and milliseconds between h, m, s, and ms, respectively. Below is an image that will help you learn more about this code.


Now this countdown stopwatch is absolutely ready to work. You can use this simple JavaScript stopwatch for any task.
Final Javascript code
For your understanding, I have put together the complete JavaScript code below. As a result, you can better analyze.
I hope from this tutorial, you have learned how to make a simple JavaScript Stopwatch. I have already shared with you how to make different types of analog clocks and countdown timers.
If you want to know more about JavaScript, you can watch those tutorials. If there is any problem, you can ask questions directly on Instagram (@foolishdeveloper).