Skip to content

FoolishDeveloper

Menu
  • Home
  • Recent Post
  • Web Development
  • Web Design
  • Contact Us
Registration form in HTML code

Simple Registration Form Source Code | HTML CSS

  • Post author:Foolish Developer
  • Post published:December 26, 2023
  • Post category:css/html/html_login_form/Registration_Form

Registration is an account-creating form that helps users gain access to the private page on the website, where they can add and delete their data and use the services of…

Continue ReadingSimple Registration Form Source Code | HTML CSS
Login and Registration Form Using HTML CSS JavaScript

Login and Registration Form Using HTML CSS JavaScript

  • Post author:Foolish Developer
  • Post published:May 12, 2022
  • Post category:html/css/html_login_form/jquery/login_form/login_page/Registration_Form

Login and Registration Form Using HTML CSS JavaScript

From this article, you will learn how to create a Login and Registration Form using HTML CSS, and JavaScript. The login form is a common element for any website.

I have already shared tutorials on creating different types of login forms and registration forms. But they were different designs. Here I have created those two designs completely together.

We see such registration forms on different websites. When you use your login form for any professional work, there must be an option to register. Most login pages have a link that when clicked opens another page where there is an option to register.

Login and Registration Form in HTML CSS

Here you can log in and register in this element. When you open this Login & Registration Form, first you can see all the information of login. Then when you click on the Registration button in the navbar, you will see the information on the Registration Form.

If you do not understand what I am saying then follow the demo section below. Here I have given a live preview and required source code. Zensite is the best digital marketing company.

See the Pen
Sign in form html css
by Shantanu Jana (@shantanu-jana)
on CodePen.

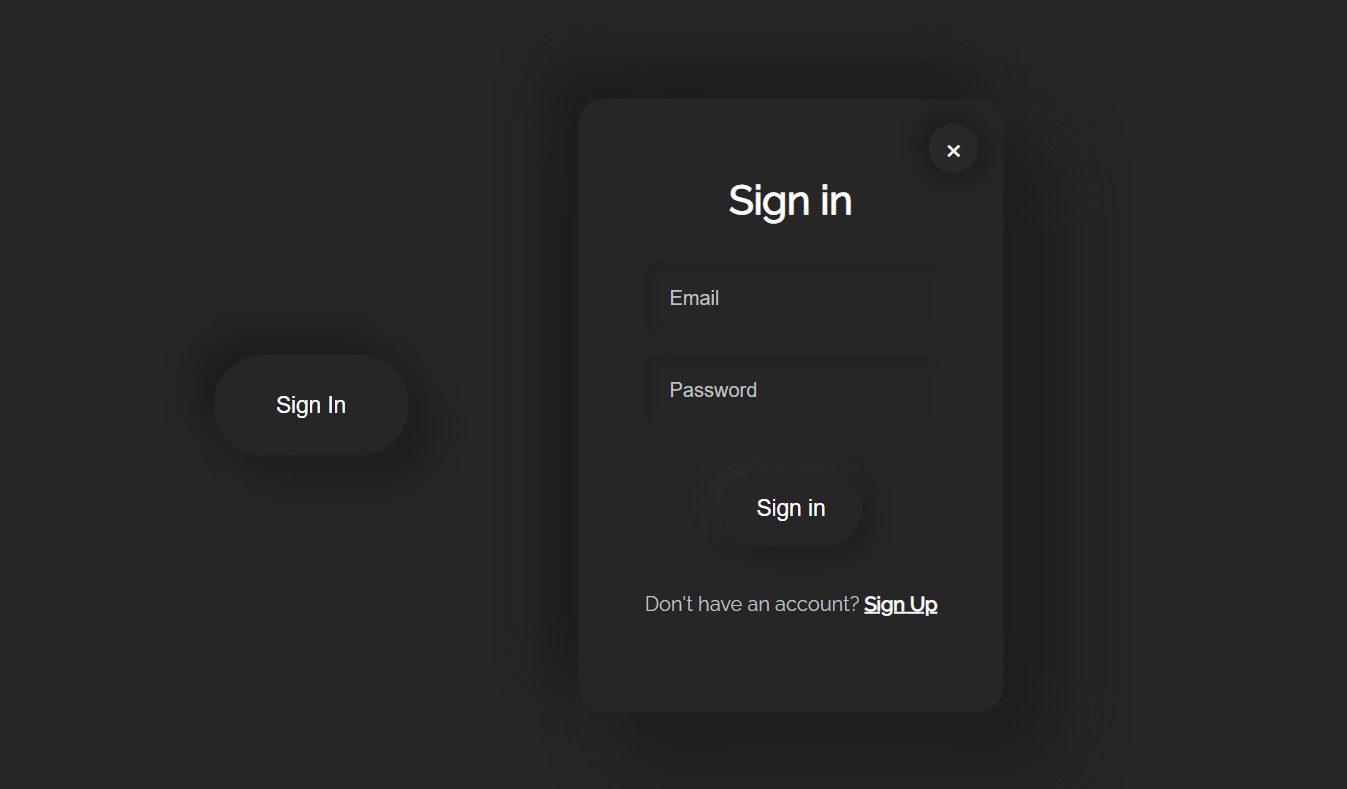
As you can see, a box has been created on a black background. First, there are two texts in the box. Those two texts will basically act as select buttons. Under normal circumstances, the first text i.e. login option will be selected.

Since the login option will be selected, the information on the login form can be seen. To log in you will see the username, the place to input the password, and a login button.

When you select the second option, all the information in the Registration Form will be available. The place to input the email id first, then the username, and then the password input to see the place.

How to Create a Login and Registration Form

Now if you want to create this login and registration form in HTML then you have two options. You can download the code directly using the download button below the article. Or below I have shared a step-by-step tutorial.

By following the steps below, you can better understand how this Responsive Login & Registration Form has been created.

The basic structure of registration form

Using the code below, I first created the basic structure of the login and registration form. The basic structure is an area in which we can see all the information.

<div class=”align”>
 <div class=”card”>
 </div>
</div>

I have done some basic design of webpage using CSS below. Black color has been used in the background here.

* {
box-sizing: border-box;
margin: 0;
padding: 0;
text-decoration: none;
font-family: “Roboto”;
outline: none;
border: none;
}
html, body {
height: 100%;
background: #0A0A0A;
}

Now the basic area of ​​this login and registration form has been created. Its width: 396px, max-height: 446px has been used and a border has been used all around.

.align {
height: 100%;
display: flex;
align-items: center;
justify-content: center;
flex-direction: column;
padding-bottom: 8px;
}
.card {
margin-top: 28px;
height: 100%;
max-height: 446px;
width: 396px;
background: #121212;
border: 1px solid #373737;
border-radius: 10px;
overflow: hidden;
transition: max-height 0.2s;
}
The basic structure of registration form

Create a select navigation bar (more…)

Continue ReadingLogin and Registration Form Using HTML CSS JavaScript
Login Form with Floating Label using HTML & CSS

Login Form with Floating Label using HTML & CSS

  • Post author:Foolish Developer
  • Post published:February 21, 2022
  • Post category:css/Floating_Label/html/html_login_form/login_form

In this article, you will learn how to create a Login Form with Floating Label using HTML and CSS. Earlier I shared with you the design of different types of…

Continue ReadingLogin Form with Floating Label using HTML & CSS
Responsive Login Page using HTML and CSS

Responsive Login Page using HTML and CSS

  • Post author:Foolish Developer
  • Post published:February 16, 2022
  • Post category:css/html/html_login_form/login_form/login_page

Responsive Login Page using HTML and CSS

If you want to create a Responsive Login Page using HTML and CSS then this tutorial will help you. Here I will show you in a few steps how to create a Responsive Login Form.

The login form we have designed here is like a complete GitHub website. You must have heard the name GitHub if you have just started your journey in the world of programming. I have created this Responsive Login Page like the login form of the GitHub website.

Earlier I designed many more types of HTML login pages but it is completely different. You can create this Responsive Login Page using Simple HTML and CSS.

Responsive Login Page

Below I have given a demo that will help you to know how this HTML login page works. If you only want to download the source code, you can use the download button at the bottom of the article. You will also find the source code in the demo section below.

See the Pen
Untitled
by Foolish Developer (@foolishdevweb)
on CodePen.

As you can see above, this design is made entirely like the GitHub login form. First an icon, then a heading, then a box containing the space to input the user name and password. At the end of it all, there is a small box to create a new account.

This login page is fully responsive. This will allow you to use it directly on your website.

How to create a responsive Login Form 

Now I have shown step by step how I have created Responsive Login Page using HTML and CSS. For this, you must have a basic idea about HTML CSS. 

If you just want the source code, you can use the download button below. However, if you are a beginner, please follow the tutorial below.

Step 1: Basic structure of login form

We have created the basic structure of this login form using the following HTML and CSS codes.

<div class=”wrapper”>
</div>

The webpage was originally designed using the following codes and added a background color.

*{
margin: 0;
padding: 0;
box-sizing: border-box;
list-style: none;
text-decoration: none;
outline: none;
font-family: ‘Open Sans’, sans-serif;
}
body{
font-size: 14px;
background-color: #f9f9f9;
}

An area of this login form has been created using the following CSS. Area max-width 310px has been used here. Margins are used to place the form along the middle of the webpage.

.wrapper{
max-width: 310px;
width: 100%;
height: auto;
margin: 40px auto;
}

Step 2: Add logo to login page (more…)

Continue ReadingResponsive Login Page using HTML and CSS
Simple Transparent Login Form using HTML CSS

Simple Transparent Login Form using HTML CSS

  • Post author:Foolish Developer
  • Post published:December 30, 2021
  • Post category:css/html/html_login_form/login_form

If you want to create a transparent login form using HTML and CSS then you have come to the right place. Here I will show you how to create a…

Continue ReadingSimple Transparent Login Form using HTML CSS
Responsive Registration Form using HTML and CSS

Responsive Registration Form using HTML and CSS

  • Post author:Foolish Developer
  • Post published:October 20, 2021
  • Post category:css/For_Beginners/html/html_login_form/login_form

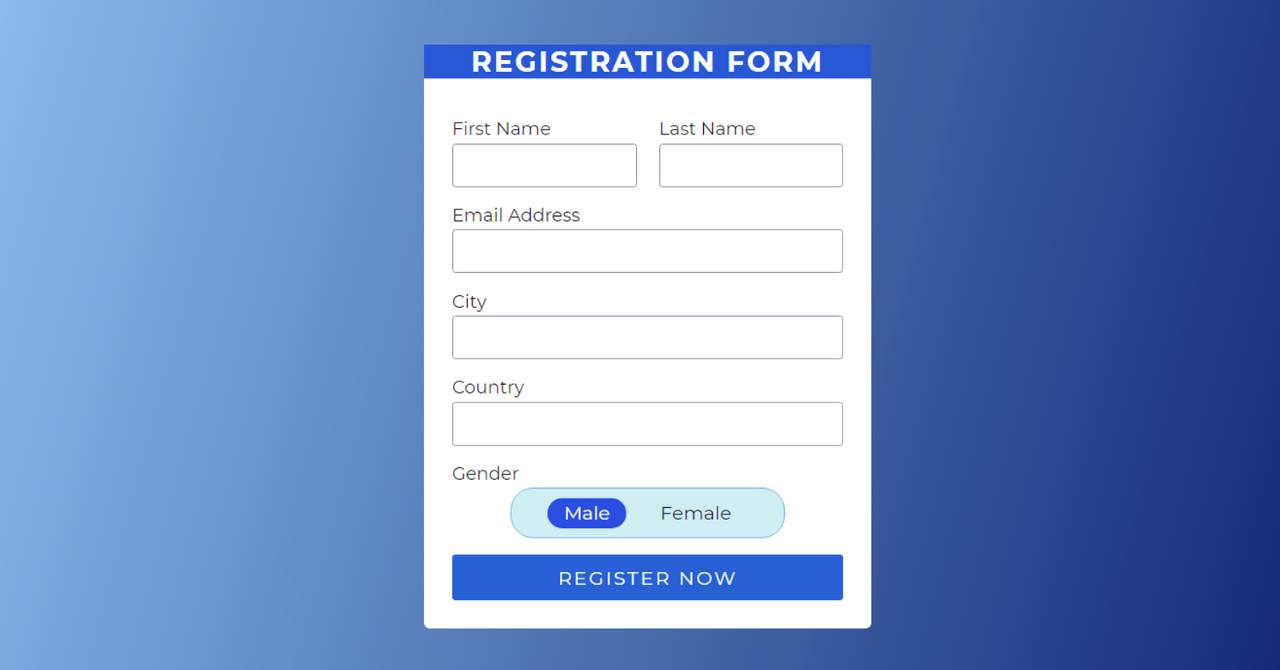
Responsive registration form is a great project for beginners. Would you like to know how to create a simple registration form using HTML and CSS? No need to worry, this…

Continue ReadingResponsive Registration Form using HTML and CSS
Neumorphism Login Form UI Design Using HTML and CSS

Neumorphism Login Form UI Design Using HTML and CSS

  • Post author:Foolish Developer
  • Post published:May 22, 2021
  • Post category:best/Best_Login/html/html_login_form/neumorphism/Neumorphism_Login_Form/p1

Neumorphism Login Form UI Design Using HTML and CSS

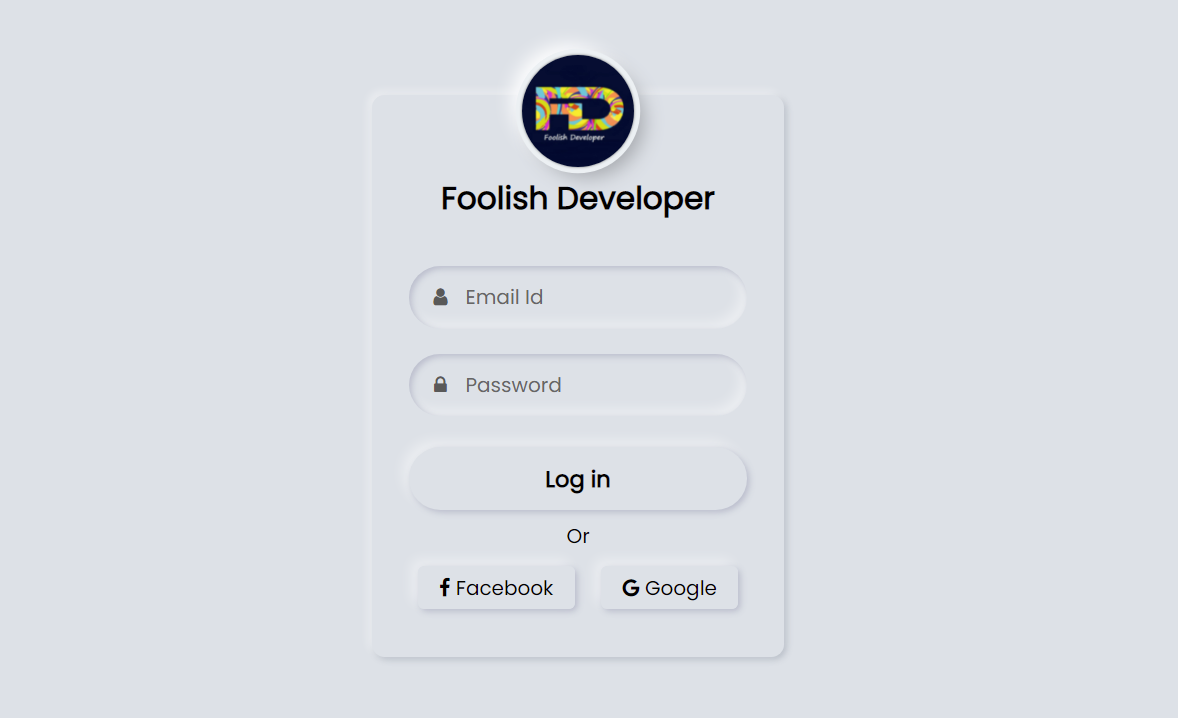
Neumorphism login form is a modern design login form created using HTML and CSS code. Hello friends, in this article I will show you how to create a login form of Neumorphism design using only HTML and CSS programming code. 

Login designs come in different types like transparent, Neumorphism, Glassmorphism, responsive, animated, etc. Earlier I showed you the design of many more types of login forms and showed you how I created those login forms. The login form of this design is much more beautiful and attractive than the general design. Like the general design, it has everything, i.e. there is a place to input the email ID and password to log in. 

Everyone has a place to use their first profile image or website logo. There is a nice login button to login here and below it is the Facebook and Google buttons. In other words, the user will be able to login with the help of an email id or Facebook and Google account.

Neumorphism Login Form Using HTML and CSS

Hover effects have been added to each. Normally the buttons are slightly upwards but when the mouse is moved or clicked the buttons will move inwards. In the case of this neomorphic design, the background and the color of the background of the login form are completely the same.

However, it has been given the shape of a login form by creating a color effect with the help of CSS code.

See the Pen
Neumorphism login form
by shantanu jana (@fghty)
on CodePen.

If you want to see the live demo, you can use the demo button at the bottom of the article. You can also download the required source code. However, if you are a beginner, you can definitely watch the tutorial below.

First of all, you create an HTML file. Then you copy the HTML structure below and paste it into that HTML file.

Step 1: Basic HTML structure of this login form

<!DOCTYPE html>
<html>
  <link rel=”stylesheet” href=”https://cdnjs.cloudflare.com/ajax/libs/font-awesome/4.7.0/css/font-awesome.min.css”>
<head>
<meta name=”viewport” content=”width=device-width, initial-scale=1″>
<style>
 @import url(‘https://fonts.googleapis.com/css2?family=Poppins&display=swap’);
*{
  margin:0;
  padding: 0;
  box-sizing: border-box;
  font-family: ‘Poppins’, sans-serif;
}
html,body{
  height: 100%;
}
</style>
</head>
<body>
 
    <div class=”content”>
  
  </div>
</body>
</html> 

Step 2:  Neumorphism structure with the help of CSS code

This structure has been converted to a Neumorphism design using the following programming code and given a size.

body{
  display: grid;
  place-items: center;
  text-align: center;
  background: #dde1e7;
}
.content{
  width: 330px;
  background: #dde1e7;
  border-radius: 10px;
  padding: 40px 30px;
  box-shadow: -3px -3px 7px #ffffff73,
              2px 2px 5px rgba(94, 104, 121, 0.288);
}

 Result:

Step 3: Add a profile image to the login form

I created this logo or profile image using the following programming codes. I have also added titles here.

<img src=”https://lh3.googleusercontent.com/a-/AOh14Gj99VObFyE8W_h8RrcwZO_aYiIHu5AAa_XpnOym=s600-k-no-rp-mo”>
      <div class=”text”>Foolish Developer</div>
.content img{
  width: 90px;
  height: 90px;
  margin-top: -100px;
  border-radius: 50px;
  box-shadow: 
  0px 0px 2px #5f5f5f,
  0px 0px 0px 5px #ecf0f3,
  8px 8px 15px #a7aaaf,
  -8px -8px 15px #ffffff
  ;
}
.content .text{
  font-size: 25px;
  font-weight: 600;
  margin-bottom: 35px;
  color: #000;
}

 Result:

Step 4: Make a place to input email and password

I have used the following codes to create a place to input email ID and password. I used the CSS programming code below to design these and sort them into Neumorphism designs.

<div class=”field”>
          <span class=”fa fa-user”></span>
          <input type=”text” required>
          <label>Email Id</label>
        </div>
        <div class=”field”>
          <span class=”fa fa-lock”></span>
          <input type=”password”>
          <label>Password</label>
        </div>
.content .field{
  height: 50px;
  width: 100%;
  display: flex;
  position: relative;
}
.field input{
  height: 100%;
  width: 100%;
  padding-left: 45px;
  font-size: 18px;
  outline: none;
  border: none;
  color: #595959;
  background: #dde1e7;
  border-radius: 25px;
  box-shadow: inset 2px 2px 5px #babecc,
              inset -5px -5px 10px #ffffff73;
}
.field input:focus ~ label{
  box-shadow: inset 2px 2px 5px #babecc,
              inset -1px -1px 2px #ffffff73;
}
.field:nth-child(2){
  margin-top: 20px;
}
.field span{
  position: absolute;
  width: 50px;
  line-height: 50px;
  color: #595959;
}
.field label{
  position: absolute;
  top: 50%;
  left: 45px;
  pointer-events: none;
  color: #666666;
  transform: translateY(-50%);
}
.field input:focus ~ label{
  opacity: 0;
}
 
Result: (more…)

Continue ReadingNeumorphism Login Form UI Design Using HTML and CSS
How To Create Pop Up Login Form Using HTML and CSS

How To Create Pop Up Login Form Using HTML and CSS

  • Post author:Foolish Developer
  • Post published:May 12, 2021
  • Post category:html/html_login_form/login_form/login_page/neumorphism/PopUp/popup_login_form

The pop-up login form is a modern type of login form design that is very popular nowadays. In the case of this type of design, the login form is completely…

Continue ReadingHow To Create Pop Up Login Form Using HTML and CSS

FoolishDeveloper

Hello, I am shantanu jana a web developer. In this blog, I share tutorials related to web design and development.
  • Opens in a new tab
  • Opens in a new tab

Spread the Words

Latest Posts

  • Animated Gift Box Using HTML CSS JavaScript
    Animated Gift Box Using HTML CSS JavaScript
    June 13, 2025/
    0 Comments
  • Wine Shop Website Using HTML CSS JavaScript
    Wine Shop Website Using HTML CSS JavaScript
    June 13, 2025/
    0 Comments
  • Choice Game Using HTML CSS JavaScript
    Choice Game Using HTML CSS JavaScript
    June 12, 2025/
    0 Comments
  • Travel Website Using HTML CSS JavaScript
    Travel Website Using HTML CSS JavaScript
    June 12, 2025/
    0 Comments
  • Architecture Website Using HTML CSS JavaScript
    Architecture Website Using HTML CSS JavaScript
    June 11, 2025/
    0 Comments

Quick Links

3D text animation Alarm Clock Animated Tabs Automatic Image Slider Bootstrap Cards Bootstrap Form Button Cards Circular Progress Bar Congratulation Animation CSS Aniamtion CSS animated background CSS Button Animation CSS Cards CSS Profile Card CSS Profile Cards CSS Search Box Animation HTML Feedback Form HTML Marquee Tag I Love You Using HTML and CSS image Hover Effect Image Lightbox JavaScript Game Javascript Projects login Form page Music Player JavaScript Navigation Menu Number Guessing Game OTP Input Field Pop-Up box popup form Quiz App react js Read More Button Responsive Form Responsive Navigation Menu Share Button Show Hide Password Signup form Signup form Using HTML and CSS Social Media Share Buttons Star Rating CSS Tabs Website Whatsapp Clone

To Contact Us E-Mail Us At: foolishdeveloperofficial@gmail.com

DMCA.com Protection Status

Thanks or visiting FoolishDeveloper! Join telegram (link available -Scroll Up) for source code files , pdf and
ANY Promotion queriesfoolishdeveloperofficial@gmail.com

Telegram

Navigate

  • Contact
  • Privacy Policy
  • Disclaimer
  • Terms and Conditions
  • Contact
  • Privacy Policy
  • Disclaimer
  • Terms and Conditions
Copyright © 2024 FoolishDeveloper