Introduction :
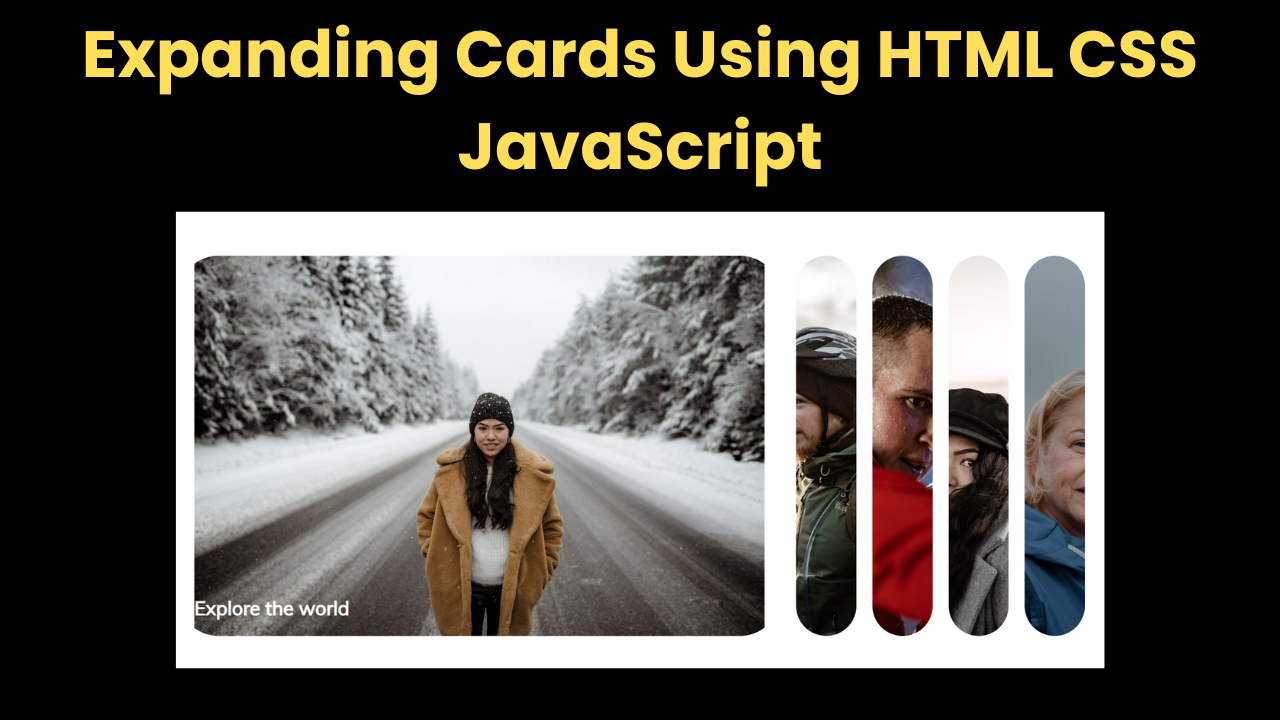
Hello friends this is an Expanding Cards Using HTML CSS JavaScript project in which the images are animated when the user clicks on the image the images expand which is displayed with a smooth animation which looks amazing. This project is created using html css and JavaScript. The role of css is most important in this. If you have good knowledge of css then you can make very good projects. Let us now understand its code.
Explanation :
First comes the structure of the project in which we create the design of the project with the help of HTML.
- <!DOCTYPE html> This is the tag of HTML from which we come to know that this code is of HTML
- Head Section:
- The head section contains all the things like links, meta links, etc.
- To link the file link to the HTML, we need to add the link in the head section of the HTML.
- The project title needs to be added to the head section of the HTML.
- <div class=”container”>: First we have created a main container in which we will add the images.
- <div></div>: we have created in which we have added images with the help of inline css.
- <h3>: We have also added heading text to our image.
- In the same way, we have added the remaining images and text which also include the process.
Friends, right now our project will not look right because we have not added CSS yet. With the help of HTML we can only create the structure of our project, but we have to use CSS to design it.
CSS Styling:
Now let us design our project with the help of what kind of background color we want, what kind of font we should have, etc.
- font-family: “Muli”, sans-serif; First of all we have set the font in the body, you can use any other font.
- height: 100vh; We have kept the height of the project full so that the image is displayed properly.
- overflow: hidden; The overflow is hidden so that the scrollbar is hidden.
- display: flex; Flexed the display in the container so that all images flex in one line and kept the width at 90VW
- color: #fff; We have used white color in the color which you can edit.
In the same way we have designed our project code with the help of CSS. Friends, in CSS there is background color, margin, padding, etc., with the help of which you design your project.
JavaScript:
With the help of JavaScript we activate our project like when a user comes to our project and clicks on the image then some activity should happen in the image, all this work is done with the help of JavaScript.
- const panels = document.querySelectorAll(“.panel”); First of all we have connected our HTML panel in JavaScript which is done with the help of JavaScript query Selector.
- panel.addEventListener(“click”, ()): Then we have created an event listener in which we have made our button clickable, when the user clicks on the button then the button should work.
- active: In next process we have activated the button, when user clicks on the button then the button will be clicked and then it will be activated.
Index.html
<body>
  <div class="container">
    <div class="panel active" style="
          background-image: url('https://images.unsplash.com/photo-1610212570473-6015f631ae96?ixid=MXwxMjA3fDB8MHxwaG90by1wYWdlfHx8fGVufDB8fHw%3D&ixlib=rb-1.2.1&auto=format&fit=crop&w=1350&q=80');
        ">
      <h3>Explore the world</h3>
    </div>
    <div class="panel" style="
          background-image: url('https://images.unsplash.com/photo-1606838830438-5f380a664a4e?ixlib=rb-1.2.1&ixid=MXwxMjA3fDB8MHxwaG90by1wYWdlfHx8fGVufDB8fHw%3D&auto=format&fit=crop&w=1350&q=80');
        ">
      <h3>Explore the world</h3>
    </div>
    <div class="panel" style="
          background-image: url('https://images.unsplash.com/photo-1606059100151-b09b22709477?ixid=MXwxMjA3fDB8MHxwaG90by1wYWdlfHx8fGVufDB8fHw%3D&ixlib=rb-1.2.1&auto=format&fit=crop&w=1778&q=80');
        ">
      <h3>Explore the world</h3>
    </div>
    <div class="panel" style="
          background-image: url('https://images.unsplash.com/photo-1603048675767-6e79ff5b8fc1?ixid=MXwxMjA3fDB8MHxwaG90by1wYWdlfHx8fGVufDB8fHw%3D&ixlib=rb-1.2.1&auto=format&fit=crop&w=1350&q=80');
        ">
      <h3>Explore the world</h3>
    </div>
    <div class="panel" style="
          background-image: url('https://images.unsplash.com/photo-1595433502559-d8f05e6a1041?ixid=MXwxMjA3fDB8MHxwaG90by1wYWdlfHx8fGVufDB8fHw%3D&ixlib=rb-1.2.1&auto=format&fit=crop&w=1350&q=80');
        ">
      <h3>Explore the world</h3>
    </div>
  </div>
  <script src="script.js"></script>
</body>
Style.css
@import url("https://fonts.googleapis.com/css2?family=Muli&display=swap");

* {
  box-sizing: border-box; /* to avoid width problems if padding */
}

body {
  font-family: "Muli", sans-serif;
  display: flex;
  align-items: center;
  justify-content: center;
  height: 100vh;
  overflow: hidden; /* to hide scrollbars */
  margin: 0;
}

.container {
  display: flex;
  width: 90vw;
}

.panel {
  background-size: auto 100%;
  background-position: center;
  background-repeat: no-repeat;
  height: 80vh;
  border-radius: 50px;
  color: #fff;
  cursor: pointer;
  flex: 0.5;
  margin: 10px;
  position: relative;
  transition: flex 0.7s ease-in;
  -webkit-transition: all 700ms ease-in;
}

.panel h3 {
  font-size: 24px;
  position: absolute;
  bottom: 20px;
  left: 20px;
  margin: 0;
  opacity: 0;
}

.panel.active {
  flex: 5;
}

.panel.active h3 {
  opacity: 1;
  transition: opacity 0.3s ease-in 0.4s;
}

@media (max-width: 480px) {
  .container {
    width: 100vw;
  }

  .panel:nth-of-type(4),
  .panel:nth-of-type(5) {
    display: none;
  }
}
Script.js
const panels = document.querySelectorAll(".panel");

panels.forEach((panel) => {
  panel.addEventListener("click", () => {
    removeActiveClasses();
    panel.classList.add("active");
  });
});

const removeActiveClasses = () => {
  panels.forEach((panel) => {
    panel.classList.remove("active");
  });
};