In this article, you will learn how to create a Tags Input Box using HTML, CSS, and javascript. If you know basic javascript, you can easily make these Tags input in CSS and javascript.
Tag input box is the section in which we add the important tags which are in relevant with the blog and helps in targeting the right audience for the article for increasing the traffic on the website and also helps used in clearing there doubts.
You can convert any text into tags using the add tags in the input field. The most prominent example of these tags input html css is YouTube. In YouTube, we see this type of Tags Input Box where after inputting something, if you press enter, it is converted into a small tag box. If you are thinking of building a website for your service. Then Vsble will be the most suitable for you.
Here I will give you a basic idea to create Custom Tags Input by html css and javascript. First created the basic structure with html and implemented it with javascript.
Tags Input Box in HTML CSS JavaScript
JavaScript Tags Input Boxes have become a popular feature for many websites and applications, allowing users to categorize and organize content in a user-friendly manner. In this article, we will explore the basics of implementing a Tags Input Box using HTML, CSS, and JavaScript.
See the Pen Tags Input by Ground Tutorial (@groundtutorial) on CodePen.
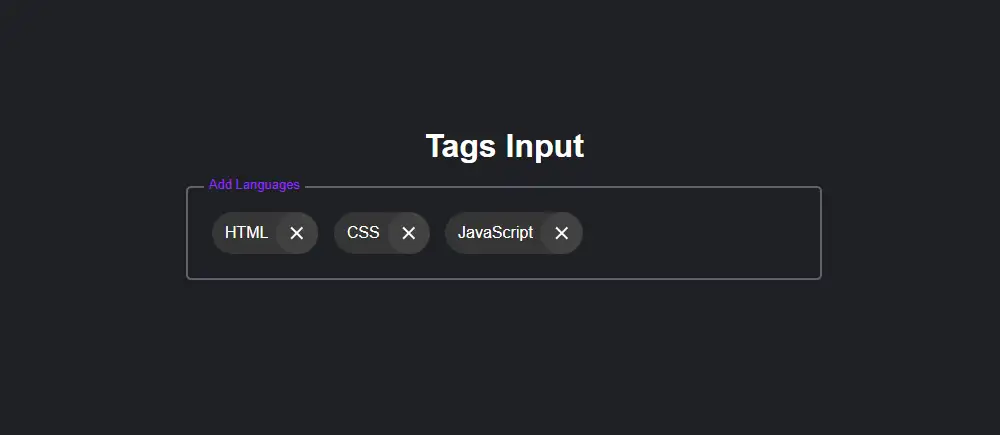
Hopefully from the above preview you have come to know how this project (How to create Multi Tags Input Box in HTML CSS & JavaScript) works. First I added a heading to the web page. Then there is an input box to input Tags. I have added some animations inside the tags input box.
When you input something into that input box, Interpret will convert it into a tag. Each tag of this Tags Input Box has a cancel button by which you can delete that tag.
How to create Tags Input in HTML CSS & JavaScript
You have two options to create this project (Create Tag Input Box using HTML, CSS, and Javascript). First, follow the step-by-step tutorials below and then create this JavaScript Tag Input step by step. Or you can download the code using the download button below the article.
You can input multiple tags in this Responsive Tags Input. Next time I’ll share a tutorial where I’ll show you how to add tags to your project using PHP.
Step 1: Basic structure of add tags in input field
I have created a basic structure for this project (How to create tag input in JavaScript) using the following HTML. Use an input in which we can input all the texts or numbers.
A label is added to this HTML Tags Input Box which is animated. When you single-click on the input box it will move up.
					    <div class="tag-area">
        <label for="tag-input" class="label">Add Languages</label>
        <ul>
            <input type="text" class="tag-input" id="tag-input" />
        </ul>
    </div>
Step 2: Design the Tags Input Box with CSS
Some basic designs of these tags are input in html css and javascript using the below css. First I designed the basic structure of this project using some CSS. Then the levels and input boxes to be used here are designed.
					.tag-area {
    padding: 1rem;
    outline: none;
    width: 600px;
    border: 2px solid #605f6f;
    border-radius: 5px;
    transition: all 0.2s;
    cursor: text;
    display: flex;
    align-items: center;
    position: relative;
}

.label {
    position: absolute;
    background: #1f2023;
    padding: 0 0.3rem;
    color: #adadad;
    top: 22px;
    transition: all 0.1s;
}
					.label-active {
    top: -11px;
    color: #8d29ff;
    font-size: 13px;
}

.tag-area ul {
    display: flex;
    flex-wrap: wrap;
    align-items: center;
}

.active {
    border: 2px solid #8d29ff !important;
}

.tag {
    padding-left: 0.8rem;
    background: #353535;
    border-radius: 100px;
    display: flex;
    align-items: center;
    justify-content: space-between;
    margin: 0.5rem;
}

.tag-input {
    padding: 0.5rem;
    outline: none;
    border: none;
    width: 150px;
    margin-left: 0.5rem;
    background: transparent;
    font-size: 20px;
    color: #fff;
}
Now we need to add some css for input tags. We will not see these tags now. We’ll add them when we activate the Add Tags Input Box via JavaScript. Now add css to design.
					.cross {
    cursor: pointer;
    display: flex;
    margin-left: 0.5rem;
    justify-content: center;
    align-items: center;
    padding: 1.3rem;
    transform: rotate(45deg);
    border-radius: 50%;
    background: #414141;
}

.cross:hover {
    background: #818181b1;
}

.cross::before {
    content: "";
    width: 2px;
    height: 16px;
    position: absolute;
    background: rgb(255, 255, 255);
}

.cross::after {
    content: "";
    height: 2px;
    width: 16px;
    position: absolute;
    background: rgb(255, 255, 255);
}

@media (max-width: 650px) {
    .tag-area {
        width: 300px;
    }
}
Step 3: Activate the tags input field with javascript
Now we need to implement these Tags Input Components by JavaScript. The JavaScript used here is very simple. So hope you don’t have any difficulty in understanding.
Although here I have shared step by step tutorial and given necessary explanation after each step. Here I have done pure JavaScript but you can also activate it with Vanilla JavaScript Tags Libraries if you want.
1. Sets up the variables of Tags Input Components
This code sets up the variables that will be used to interact with the HTML elements in the document. The tagInput variable is set to the element with the class of .tag-input, which is likely an input field. The tagArea variable is set to the element with the class of .tag-area, which is likely a container for the tags.
					const tagInput = document.querySelector(".tag-input");
const tagArea = document.querySelector(".tag-area");
const ul = document.querySelector(".tag-area ul");
const label = document.querySelector(".label");
let tags = [];
The ul variable is set to the unordered list element within the tag area. The label variable is set to the element with the class of .label, which is likely a label for the input field. Finally, the tags array is set to an empty array, which will be used to store the tags entered into the JavaScript input field.
2. Sets up the event listeners for the tag input field
					function addEvent(element) {
    tagArea.addEventListener("click", () => {
        element.focus();
    });

    element.addEventListener("focus", () => {
        tagArea.classList.add("active");
        label.classList.add("label-active");
    });

    element.addEventListener("blur", (e) => {
        tagArea.classList.remove("active");
        if (element.value === "" && tags.length === 0) {
            label.classList.remove("label-active");
        }
        if (!element.value.match(/^\s+$/gi) && element.value !== "") {
            tags.push(e.target.value.trim());
            element.value = "";
            renderTags();
        }
    });

    element.addEventListener("keydown", (e) => {
        console.log(e);
        const value = e.target.value;
        if (
            (e.keyCode === 32 ||
                e.keyCode === 13 ||
                value[value.length - 1] === " ") &&
            !value.match(/^\s+$/gi) &&
            value !== ""
        ) {
            tags.push(e.target.value.trim());
            element.value = "";
            renderTags();
        }
        if (e.keyCode === 8 && value === "") {
            tags.pop();
            renderTags();
        }
    });
}
addEvent(tagInput);
This code sets up the event listeners for the html tag input field. When the addEvent function is called, it adds several event listeners to the input field.
The first event listener is triggered when the user clicks on the tag area. It focuses on the input field, so the user can immediately start typing.
The second event listener is triggered when the input field receives focus. It adds the
activeclass to the tag area and thelabel-activeclass to the label. This can be used to apply styles to the tag area and label when the input field is focused.The third event listener is triggered when the input field loses focus. It removes the
activeclass from the tag area, and if the input field is empty and there are no tags, it removes thelabel-activeclass from the label. If the input field is not empty, the value is added to thetagsarray and therenderTagsfunction is called.The fourth event listener is triggered when the user presses a key while the input field is focused. If the key pressed is a space or enter, and the input field is not empty, the value is added to the
tagsarray and therenderTagsfunction is called. If the user presses the backspace key and the input field is empty, the last item in thetagsarray is removed and therenderTagsfunction is called.
The function is called by passing in the tagInput element, so that the event listeners are added to it.
3. Render the tags in the tag input area
This code is responsible for rendering the tags in the tags input field. The renderTags function first empties the contents of the unordered list by setting its innerHTML to an empty string. Then, for each item in the tags array, it calls the createTag function and passes in the tag and its index.
					function renderTags() {
    ul.innerHTML = "";
    tags.forEach((tag, index) => {
        createTag(tag, index);
    });
    const input = document.createElement("input");
    input.type = "text";
    input.className = "tag-input";
    addEvent(input);
    ul.appendChild(input);
    input.focus();
    setTimeout(() => (input.value = ""), 0);
}
After the tags have been rendered, the function creates a new input field element and sets its type to text and class name to tag-input. The addEvent function is then called and passed in the input field, so that the event listeners are added to it.
The input field is then added to the end of the unordered list, and it is focused so the user can start typing immediately. Finally, a timeout is set to clear the value of the input field after 0 milliseconds. This allows the input field to receive focus and the cursor to be placed inside it, without any initial text being displayed.
4. Create each individual tag input element
The createTag function is responsible for creating each individual tag element in the html tag input area. The function takes two arguments: tag, which is the text of the tag, and index, which is the index of the tag in the tags array.
The function starts by creating a new li element, which will represent the tag, and sets its class name to tag. Then, it creates a text node with the tag text, and creates a new span element, which will be used to display the cross icon that allows the user to remove the tag.
					function createTag(tag, index) {
    const li = document.createElement("li");
    li.className = "tag";
    const text = document.createTextNode(tag);
    const span = document.createElement("span");
    span.className = "cross";
    span.dataset.index = index;
    span.addEventListener("click", (e) => {
        tags = tags.filter((_, index) => index != e.target.dataset.index);
        renderTags();
    });
    li.appendChild(text);
    li.appendChild(span);
    ul.appendChild(li);
}
The class name of the span element is set to cross and its dataset.index property is set to the index argument, so that the index of the tag can be accessed when the cross icon is clicked.
An event listener is added to the span element, and it listens for the click event. When the cross icon is clicked, the tags array is filtered so that the tag at the specified index is removed. Finally, the renderTags function is called to update the display of the tags in the HTML CSS Tags Input Box.
The text node and the span element are then added to the li element, and the li element is added to the unordered list. This creates the tag element, with its text and cross icon, and adds it to the javaScript tags input area.
final output:

Conclusion:
Hope you got to know from the above tutorial how I made this Tags input in CSS and javascript. If there is any problem then you can comment me.