Do you want to create a JavaScript snake game?
In this article you will learn how to create simple snake game using html css and javascript. In this snake game JavaScript tutorial you will get all the information to make the game.
Earlier I have shared with you many types of JavaScript game tutorials. Hopefully this Snake Game In JavaScript will help you a lot like other projects.
There are many games that can be created through JavaScript and HTML. One popular game, League of Legends, is also created using Javascript and HTML, where lol elo boosting and snakeskin types are required.
I made this snake game javascript in a very simple way. Also here you will find all necessary codes and step by step tutorial. You need to have some knowledge of html css and javascript to make this Basic Snake HTML Game. First I created the basic structure of this project(Creating a Javascript Typescript snake game clone) using html.
Then did some basic designing by css. Finally, this Coding Snake Game is activated by JavaScript.
Snake Game JavaScript
JavaScript Snake Game is a classic game that is implemented using JavaScript, HTML, and CSS. It involves controlling a snake to eat food while avoiding running into the wall or its own tail. The snake grows in length every time it eats food, and the game ends when the snake runs into a wall or its own tail.
The game is usually played on a rectangular grid, and the player controls the direction of the snake’s movement using keyboard arrows. It’s a simple but entertaining game that is popular among beginner programmers to practice and improve their JavaScript skills.
See the Pen snake game using javascript by Ground Tutorial (@groundtutorial) on CodePen.
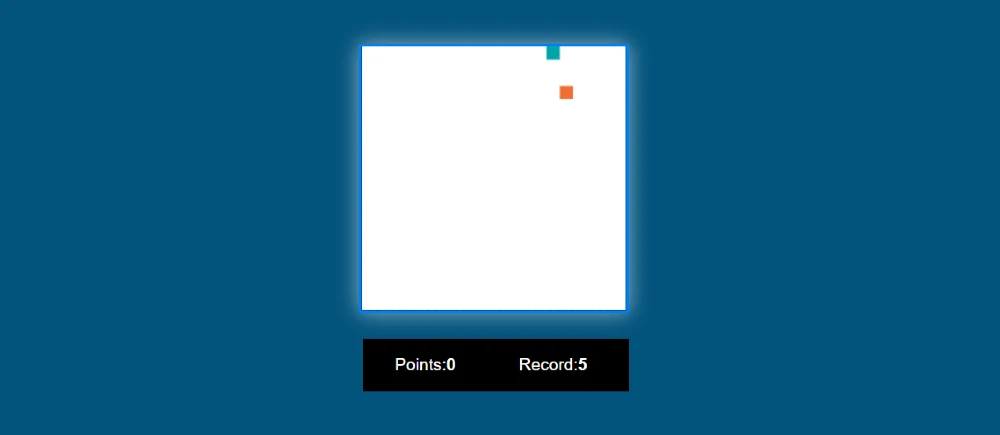
As you have seen above this is a simple snake game in html and javascript. In this snake game javascript project, there are two boxes first. In the first box you can play the game and in the second box you can see the results. Here snake’s color is green and food’s color is orange.
How to make snake game using HTML CSS and JavaScript?
Now if you want to build this project(Snake Game in Vanilla JavaScript) you can follow our step by step tutorial. You can download all code of Snake Game In JavaScript if you want. The download link is at the end of the article.
But if you are a beginner then follow this step by step tutorial. Here first the basic structure of this JavaScript snake game is created by html and css. Then activated the html snake game by javascript. Earlier I shared another tutorial on advanced snake game using react js. If you want to make this snake game with React then you can check out that tutorial.
Step 1. Basic structure of snake game
Using the following html and css codes I have created the basic structure on the web page and added the background color to it.
					<wrapper>

</wrapper>
					body {
    display: flex;
    justify-content: center;
    align-items: center;
    height: 100vh;
    max-width: 100%;
    overflow: hidden;
    background: rgb(2, 83, 124);
}
.wrapper {
    flex-direction: row;
}

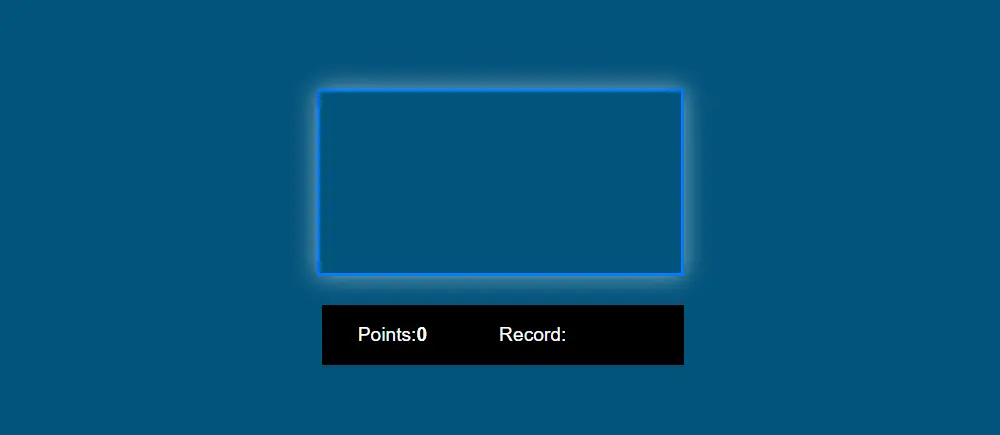
Step 2. Place to play snake game
Now use the canvas to create an area in which the game can be played. All the information of that snake game will be created by JavaScript. Here we will create only a basic area. Then I added a little color effect to that area using some CS to enhance the beauty.
<canvas id="canvas"></canvas>
					#canvas{
    box-shadow: 0 0 20px rgba(255, 255, 255, 0.55);
    border:  3px solid rgb(1, 125, 248);
}

Step 3. JavaScript snake game results place
Now we need to create a place to view the results in this JavaScript snake game. In this box we can see the points and score of the game.
					<div class="counter">
   <p>Points: <strong id="points">0</strong></p><div class='code-block code-block-10' style='margin: 8px 0; clear: both;'> <script type="litespeed/javascript" data-src="https://pagead2.googlesyndication.com/pagead/js/adsbygoogle.js?client=ca-pub-2145094925886663"
     crossorigin="anonymous"></script> <ins class="adsbygoogle"
     style="display:block; text-align:center;"
     data-ad-layout="in-article"
     data-ad-format="fluid"
     data-ad-client="ca-pub-2145094925886663"
     data-ad-slot="2051606518"></ins> <script type="litespeed/javascript">(adsbygoogle=window.adsbygoogle||[]).push({})</script></div>

   <p>Record: <strong id="record"></strong></p>
</div>
					.counter {
    margin-left: 4px;
    margin-top: 20px;
    color: white;
    display: flex;
    font-family: sans-serif;
    background: rgb(0, 0, 0);
}
.counter p{
    display: flex;
    margin-left: 30px;
}
.counter p:last-child{
    margin-left: 60px;
}
Step 4: Activate snake game with javascript
Now it’s time to implement this Basic Snake HTML Game with JavaScript. Here first I put all the javascript code together. But there is no reason to worry because below I have explained all the codes.
To make Snake Game In JavaScript you need to have a basic understanding of JavaScript.
If you find it difficult to understand the javascript codes below then you can follow the explanation below. Even if there is any problem then you can comment me.
					window.onload = () => {

var canvas = document.getElementById('canvas'),
ctx = canvas.getContext('2d'),
cw = canvas.width = canvas.height = 250,
s = cw / 20, x = y = 0,
rows = cols = cw / s,
direction = { dir: 'right', change: true },
tail = [],
food = {x, y},
head,
drawInterval,
speed = 120,
points,
record;

if (localStorage.getItem('record')) record = localStorage.getItem('record');
else record = 0;
_('record').innerHTML = record;

createFood();
draw();
document.addEventListener('keydown', e => getDirection(e));

function cutTale() {
    alert('shit');
    tail = [];
}

function createFood(caught = false) {

    var xf = Math.floor(Math.random() * cols) * s;
    var yf = Math.floor(Math.random() * rows) * s;

    for (var i = 0; i < tail.length; i++) {
        if (xf     == tail[i].x + s && yf     == tail[i].y    ) { createFood(); return; };
        if (xf     == tail[i].x     && yf     == tail[i].y + s) { createFood(); return; };
        if (xf + s == tail[i].x     && yf     == tail[i].y    ) { createFood(); return; };
        if (xf     == tail[i].x     && yf + s == tail[i].y    ) { createFood(); return; };

        if (xf == tail[i].x && yf == tail[i].y) { createFood(); return; };
    }

    food = { ...food, x: xf, y: yf };
    tail = [ ...tail, '1' ];

    if (caught) {
        points = tail.length - 1;

        if (record < points) {
            record = points;
            localStorage.setItem('record', record);
            _('record').innerHTML = record;
        };

        _('points').innerHTML = points;
    }
}

function getDirection(e) {
    switch(e.keyCode) {
        case 37: if (direction.dir !== 'right' && direction.change)
            direction = { ...direction, dir: 'left', change: false }; break;
        case 38: if (direction.dir !== 'bottom' && direction.change)
            direction = { ...direction, dir: 'top', change: false }; break;
        case 39: if (direction.dir !== 'left' && direction.change)
            direction = { ...direction, dir: 'right', change: false }; break;
        case 40: if (direction.dir !== 'top' && direction.change)
            direction = { ...direction, dir: 'bottom', change: false }; break;
    }
}

function setDirection() {
    switch(direction.dir) {
        case 'left':    x -= s; break;
        case 'top':     y -= s; break;
        case 'right':   x += s; break;
        case 'bottom':  y += s; break;
    }
    if (x == cw) x =  0;
    if (x <   0) x =  cw - s;
    if (y == cw) y =  0;
    if (y <   0) y =  cw - s;
}

function draw () {
    drawInterval = setInterval(() => {
        setDirection();

        ctx.fillStyle = 'white';
        ctx.fillRect(0, 0, cw, cw);

        if (tail.length > 0) {
            for (var i = 1; i < tail.length; i++) {
                tail[i - 1] = tail[i];
                ctx.fillStyle = '#02A4A8';
                ctx.fillRect(tail[i].x + 2, tail[i].y + 2, s - 4, s - 4);
                if (tail[i].x == x && tail[i].y == y) cutTale();
            }
            tail[tail.length - 1] = {x, y};
        }

        ctx.fillStyle = '#F16D31';
        ctx.fillRect(food.x, food.y, s, s);

        ctx.fillStyle = '#02A4A8';
        ctx.fillRect(x, y, s, s);

        if (x == food.x && y == food.y) createFood(true);

        direction = { ...direction, dir: direction.dir, change: true }
    }, speed)
}

function _(id) {
    return document.getElementById(id);
}

}
Hope the above codes are not difficult for you to understand. But to better understand the JavaScript snake game tutorial, you can take a look at the following code explanations.
JavaScript Explanation
This JavaScript code is setting up a canvas of this snake game javascript . It initializes the canvas and the 2D context, sets the width and height of the canvas to 250 pixels and the size of each cell in the game grid to 250/20=12.5 pixels. It sets the starting position of the head of the snake to (0,0) and sets the number of rows and columns in the grid to 20.
The “direction” variable is an object that keeps track of the direction in which the snake is moving and whether or not it needs to change direction. The “tail” array keeps track of the cells occupied by the snake’s body. The “food” object holds the position of the food that the snake needs to eat.
The “head” variable will keep track of the position of the snake’s head. The “drawInterval” variable will be used to control the speed of the game. The “speed” variable is set to 120 milliseconds. The “points” and “record” variables will be used to keep track of the player’s score. This is the first part of snake game javascript.
					var canvas = document.getElementById('canvas'),
ctx = canvas.getContext('2d'),
cw = canvas.width = canvas.height = 250,
s = cw / 20, x = y = 0,
rows = cols = cw / s,
direction = { dir: 'right', change: true },
tail = [],
food = {x, y},
head,
drawInterval,
speed = 120,
points,
record;
This code sets the initial value of the “record” variable by checking if there is a saved record stored in the local storage. If a saved record is found, it is retrieved and stored in the “record” variable. If not, the “record” variable is set to 0. The value of the “record” variable is then displayed on the HTML page using the “_(‘record’).innerHTML” line of code.
The “createFood()” function is called to create a food item for the snake to eat. The “draw()” function is called to start drawing the game on the canvas. An event listener is added to the document to listen for keydown events and call the “getDirection()” function when a key is pressed.
The “cutTale()” function resets the “tail” array to an empty array when the snake hits the wall or its own tail. An alert message “shit” is displayed when the function is called. This is the second part of snake game javascript.
					if (localStorage.getItem('record')) record = localStorage.getItem('record');
else record = 0;
_('record').innerHTML = record;

createFood();
draw();
document.addEventListener('keydown', e => getDirection(e));

function cutTale() {
    alert('shit');
    tail = [];
}
The “createFood()” function generates a random food item for the snake to eat of this snake game javascript.. The function takes in an optional “caught” parameter which is set to false by default.
The “xf” and “yf” variables are set to random x and y coordinates for the food item, calculated by multiplying a random number between 0 and the number of columns or rows by the size of each cell “s”.
The function then checks if the generated coordinates for the food overlap with any of the cells occupied by the snake’s tail. If there is an overlap, the function calls itself again to generate a new set of coordinates.
The “food” object is updated with the new coordinates, and a new value “1” is added to the end of the “tail” array.
If the food was caught by the snake (when the “caught” parameter is set to true), the “points” variable is updated to the length of the “tail” array minus 1, since the last value added to the “tail” array was only used to track the size of the snake’s body. The new value of “points” is then compared to the “record”. If “points” is greater than “record”, the “record” is updated to the new value of “points”, saved in the local storage and displayed on the HTML page. The value of “points” is also displayed on the HTML page.
					function createFood(caught = false) {

    var xf = Math.floor(Math.random() * cols) * s;
    var yf = Math.floor(Math.random() * rows) * s;

    for (var i = 0; i < tail.length; i++) {
        if (xf     == tail[i].x + s && yf     == tail[i].y    ) { createFood(); return; };
        if (xf     == tail[i].x     && yf     == tail[i].y + s) { createFood(); return; };
        if (xf + s == tail[i].x     && yf     == tail[i].y    ) { createFood(); return; };
        if (xf     == tail[i].x     && yf + s == tail[i].y    ) { createFood(); return; };

        if (xf == tail[i].x && yf == tail[i].y) { createFood(); return; };
    }

    food = { ...food, x: xf, y: yf };
    tail = [ ...tail, '1' ];

    if (caught) {
        points = tail.length - 1;

        if (record < points) {
            record = points;
            localStorage.setItem('record', record);
            _('record').innerHTML = record;
        };

        _('points').innerHTML = points;
    }
}
The “getDirection()” function changes the direction of the snake based on the arrow key that was pressed by the user. The “e.keyCode” property of the event object “e” is used to determine which arrow key was pressed.
The “switch” statement checks the value of “e.keyCode” and updates the “direction” object accordingly. If the user presses the left arrow key (37), the “direction” object is updated to have “dir” set to “left” if the current direction is not “right” and the “change” property is set to “false”. The same logic applies for the other arrow keys.
The “if” statement before each “case” block ensures that the snake does not change direction to the opposite direction it is currently moving in. The “change” property is used to make sure that the direction can only be changed once per loop of the game. This is the third part of snake game javascript.
					function getDirection(e) {
    switch(e.keyCode) {
        case 37: if (direction.dir !== 'right' && direction.change)
            direction = { ...direction, dir: 'left', change: false }; break;
        case 38: if (direction.dir !== 'bottom' && direction.change)
            direction = { ...direction, dir: 'top', change: false }; break;
        case 39: if (direction.dir !== 'left' && direction.change)
            direction = { ...direction, dir: 'right', change: false }; break;
        case 40: if (direction.dir !== 'top' && direction.change)
            direction = { ...direction, dir: 'bottom', change: false }; break;
    }
}
The “setDirection()” function updates the position of the snake based on its current direction. The “switch” statement checks the value of the “dir” property of the “direction” object and updates the “x” and “y” variables accordingly.
The “x” and “y” variables represent the position of the head of the snake. If the “dir” property is set to “left”, “x” is decremented by “s”. If the “dir” property is set to “top”, “y” is decremented by “s”. The same logic applies for the other directions.
The following “if” statements wrap the snake around the canvas when it goes off the screen. If “x” is equal to the canvas width, it is set to 0. If “x” is less than 0, it is set to the canvas width minus “s”. The same logic applies for “y”.
					function setDirection() {
    switch(direction.dir) {
        case 'left':    x -= s; break;
        case 'top':     y -= s; break;
        case 'right':   x += s; break;
        case 'bottom':  y += s; break;
    }
    if (x == cw) x =  0;
    if (x <   0) x =  cw - s;
    if (y == cw) y =  0;
    if (y <   0) y =  cw - s;
}
This is JavaScript code that implements a Snake game.
It has several functions:
cutTale: empties the tail array and shows an alert message.createFood: creates food on random position within the canvas, and updates the tail and points.getDirection: sets the direction of the snake based on the keyCode of the pressed arrow key.setDirection: moves the snake in the direction set bygetDirectionand changes the direction if it reaches the edges of the canvas.draw: draws the snake and the food on the canvas, updates the tail, sets the speed, and calls thesetDirectionfunction._: a shorthand function to get elements by ID.
The code sets an interval for the draw function to run, and listens for arrow key events to change the direction of the snake. The food will be created randomly and the snake will grow in length if it reaches the food. The record of the highest points is saved in the local storage.
					function draw () {
    drawInterval = setInterval(() => {
        setDirection();

        ctx.fillStyle = 'white';
        ctx.fillRect(0, 0, cw, cw);

        if (tail.length > 0) {
            for (var i = 1; i < tail.length; i++) {
                tail[i - 1] = tail[i];
                ctx.fillStyle = '#02A4A8';
                ctx.fillRect(tail[i].x + 2, tail[i].y + 2, s - 4, s - 4);
                if (tail[i].x == x && tail[i].y == y) cutTale();
            }
            tail[tail.length - 1] = {x, y};
        }

        ctx.fillStyle = '#F16D31';
        ctx.fillRect(food.x, food.y, s, s);

        ctx.fillStyle = '#02A4A8';
        ctx.fillRect(x, y, s, s);

        if (x == food.x && y == food.y) createFood(true);

        direction = { ...direction, dir: direction.dir, change: true }
    }, speed)
}

function _(id) {
    return document.getElementById(id);
}
Hope you got to know how I made this project(snake game using HTML, CSS and JavaScript) from this tutorial. It is not very difficult to make but if you are into science you might have some trouble. If you have problem understanding this snake game html code then you can comment me.
Please comment how you like this simple snake game in pure HTML and JavaScript and use the download button below to directly download the necessary code used here.
To build a snake game in JavaScript, you need to:
- Create a canvas element in HTML and style it.
- Write JavaScript code to draw the snake and food on the canvas.
- Implement the logic for snake movement, including changing direction based on user input.
- Check for collision between the snake and the canvas edges or its own body.
- Keep track of the snake’s length as it eats food.
- Generate new food at a random location when the snake eats the current piece.
- Keep track of the score.
Here’s an example of a basic Snake game written in HTML and JavaScript:
<!DOCTYPE html>
<html>
<head>
<style>
canvas {
border: 1px solid black;
}
</style>
</head>
<body>
<canvas id="gameCanvas" width="400" height="400"></canvas>
<script src="snake.js"></script>
</body>
</html>
const canvas = document.getElementById("gameCanvas");
const ctx = canvas.getContext("2d");

let x = canvas.width / 2;
let y = canvas.height - 30;

let dx = 2;
let dy = -2;

function drawBall() {
ctx.beginPath();
ctx.arc(x, y, 10, 0, Math.PI * 2);
ctx.fillStyle = "#0095DD";
ctx.fill();
ctx.closePath();
}

function draw() {
ctx.clearRect(0, 0, canvas.width, canvas.height);
drawBall();
x += dx;
y += dy;
}

setInterval(draw, 10);
This code creates a canvas element with a width and height of 400 pixels, sets the border to 1 pixel and solid black, and creates a ball that moves across the screen. The draw() function is called every 10 milliseconds to update the position of the ball and redraw the canvas.
Here is a high-level outline of the steps to create a JavaScript snake game:
Set up the game board
Draw the snake:
Move the snake:
Add food for the snake
Check for collision
Keep score
Add user controls
Game loop
End the game
Style and polish
Creating a snake game using HTML, CSS, and JavaScript is a fun and rewarding project that can teach you the basics of game development and web development.
In this article, we’ll walk you through the steps to create a simple snake game from scratch. In this article you will get complete information to create snake game using HTML CSS and JavaScript.
Yes, you can make a snake game using vanilla JavaScript, which is the plain, unmodified version of JavaScript without any additional libraries or frameworks. With vanilla JavaScript, you have full control over the code and can create a snake game with all the features you want.
Here is a simple example of how you could write the JavaScript code to create a snake game using only vanilla JavaScript:
- Get the canvas element from the HTML using the
getElementByIdmethod. - Define the snake and its starting position.
- Create the game loop using
setInterval. - Define the
updateanddrawfunctions. - Add user controls to change the direction of the snake’s movement.
This is just a basic example of how to create a snake game using vanilla JavaScript.