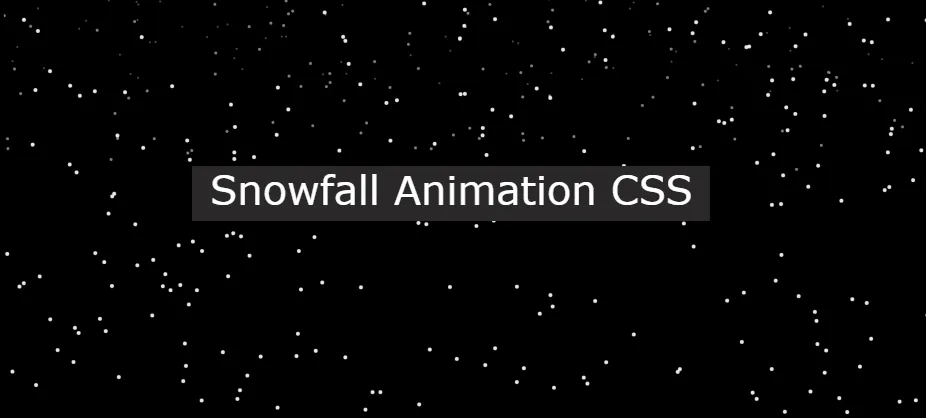
In this article you will learn how to create Snowfall Animation using HTML CSS and JavaScript. We see CSS Snow Animation Effect in many places which helps to enhance the beauty of webpage or element.

Earlier I have shared tutorials on Snow Animation, Rain Effect and many other types of css animation.
CSS Snow Animation Effect
In this tutorial I have shared the design of a very simple JavaScript Snowfall Animation. If you just want to create CSS Snow Animation Effect then you can check this tutorial.
Here I used one line of html, little css and some javascript. If you have basic knowledge of css and javascript then you can create this Simple Snowfall Animation very easily.
See the Pen Snowfall Animation CSS by Ground Tutorial (@groundtutorial) on CodePen.
As you can see above in this CSS Snow Effects small dots are falling from top to bottom. The size of these dots is different and their falling time is also different.
You can increase or decrease the size of these white dots i.e. Snow as you need. I have shared how to in the tutorial below.
Snowfall Animation using HTML CSS
Now if you want to create this project (Simple Snowfall Animation using HTML CSS) then follow the tutorial below. As I said earlier here you can get the complete source code using the download button below.
If you are a beginner then definitely follow below steps to create Falling Snow Effect.
Step 1: Create Snowfall's canvas with HTML
Here I have created a canvas using the following line of html. In this canvas we can see the Snowfall Animation.
<canvas id="canvas"></canvas>
Step 2: Design webpages with CSS
I have only added background color to the webpage using below css. Here I have used black color in the background. You can use any other color.
					* {
  box-sizing: border-box;
}
body {
  background-color: #000000;
  overflow: hidden;
}
Step 3: Activate Snow Animation with JavaScript
Now it’s time to create and execute this Simple Snowfall Animation using JavaScript. Below I have tried to explain you with complete explanation. Hope you don’t have any difficulty in understanding.
					let canvas = document.getElementById("canvas");
let context = canvas.getContext("2d");
let width = window.innerWidth;
let height = window.innerHeight;
let nearParticles = [],
  middleParticles = [],
  farParticles = [];
let particleSettings = {
  count: 250,
  //count for wach layer. Increase/Decrease based on requirement
};

window.requestAnimationFrame =
  window.requestAnimationFrame ||
  window.webkitRequestAnimationFrame ||
  window.mozRequestAnimationFrame ||
  window.oRequestAnimationFrame ||
  window.msRequestAnimationFrame ||
  function (callback) {
    window.setTimeout(callback, 1000 / 60);
  };

//Random number in given range
function randomNumberGenerator(min, max) {
  return Math.random() * (max - min) + min;
}

function createsnowfall(particles, flag) {
  while (particles.length < particleSettings.count) {
    let particle;
    //create particles based on flag
    if (flag == "near") {
      //(area,alpha,vy)
      particle = new Particle(4, 0.9, 0.3);
    } else if (flag == "middle") {
      particle = new Particle(3, 0.5, 0.2);
    } else {
      particle = new Particle(2, 0.3, 0.1);
    }
    particle.color = `rgb(255,255,255)`;
    particles.push(particle);
  }
}

function startSnowFall() {
  context.fillStyle = "rgba(0,0,0,1)";
  context.fillRect(0, 0, width, height);
  createsnowfall(nearParticles, "near");
  createsnowfall(farParticles, "far");
  createsnowfall(middleParticles, "middle");
  //combine all and sortg randomly
  particles = [...nearParticles, ...middleParticles, ...farParticles];
  particles = particles.sort(() => 0.5 - Math.random());
  for (let i in particles) {
    particles[i].draw();
    //If particle has crossed screen height
    if (particles[i].y > height) {
      particles[i].y = Math.random() * height - height;
    }
  }
  window.requestAnimationFrame(startSnowFall);
}

function Particle(areaValue, alphaValue, vyValue) {
  this.area = areaValue;
  this.x = Math.random() * width;
  this.y = Math.random() * height - height;
  this.alpha = alphaValue;
  this.vy = vyValue * 10;
}

Particle.prototype = {
  draw: function () {
    this.y += (Math.cos(this.area) + this.vy) * 0.3;
    context.save();
    context.beginPath();
    context.arc(this.x, this.y, this.area, 0, Math.PI * 2);
    context.fillStyle = this.color;
    context.globalAlpha = this.alpha;
    context.closePath();
    context.fill();
    context.restore();
  },
};

window.onload = () => {
  canvas.width = width;
  canvas.height = height;
  nearParticles = [];
  middleParticles = [];
  farParticles = [];
  window.requestAnimationFrame(startSnowFall);
};
Hopefully from the above tutorial you have learned how I created this Beautiful Snowfall Animation CSS.
If this is difficult for you to understand then you can follow another tutorial I made. You just created it with css. Make sure to comment how you like this Best Falling Snow Effects tutorial.
If you want you can create snow animation effect only with CSS. But it might not be so good. Use this link to create Snowfall Effect by css.
If you want to create Best Falling Snow Effects then this tutorial will help you. Here I have used basic html css and javascript. You will find the required code and tutorial.
It is not possible to create snow effects with only html. You need to use at least css. Earlier I shared a tutorial on making snow effect using html and css. I used JavaScript in the design of this article.
Snowfall effect looks very beautiful in the background of any webpage. So if you want to create this kind of effect then this article is for you. Here I have shared the tutorial.


