In this article, you will learn how to create Simple Email Validation using JavaScript. Many times we notice this type of JavaScript Email Validation in many types of login forms or registration forms. As a result, the user will not be able to input email incorrectly.
We all know from the technical format of email id. If the user does not input the email according to that format, then an error can be seen here.
Similarly, you can add JavaScript validation for passwords and confirm passwords. As a result, the user will get additional benefits when they input their email and password.
JavaScript Email Validation
If you want to create this project (Simple Email Validation in Javascript) and get the source code then follow the tutorial below.
Here I have given a complete step-by-step explanation for beginners. First, we created the basic structure and the input space here using HTML. I have validated validation using JavaScript.
See the Pen
Simple Email validation with javascript by Raj Template (@RajTemplate)
on CodePen.
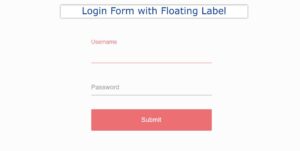
First I created a box on the web page. This box is basically the basic structure of a login form or a registration form. I first used a heading in this box. Then I created an input tax space. You will input your email ID in that input field.
If the email ID is correct then the border of the input will be green and a green icon will be seen. As a result, the user will understand that he has given the correct format of the email ID.
Email Validation using HTML and JavaScript
If the format is incorrect, the border of this input will be red and a red icon will be seen. Below this, you will see an error where the user will be directly informed that he has input the format of the email ID incorrectly.
Below the article, you will find the complete source code which you can copy to create this email validation in HTML.
Step 1: Basic structure of Email Validation
I have created the basic structure of this email validation using HTML and CSS code. The background color of the webpage is blue and the width of the box is 400px. This box has no specific height. This will determine the amount of content and its own height.

Step 2: Add a title
I have added a heading with the help of HTML below. I have used font-size: 25px to increase the size of this heading and text-align: center to keep the text in the middle.

Step 3: Create a place to input email
I have created an input box and level to input the email ID. Took the help of HTML’s input function to create the input space.

Step 4: Create a validation viewing icon
Now I have added the error icon to this email validation form. Two types of icons will be noticed whenever you input something. A rate icon will appear when you input the email ID incorrectly. A green icon will appear when the email ID is properly input.
Adding all these controls and icons I did with the help of JavaScript. Now using only HTML CSS I have created a place to see the icon.

Step 5: Add error message in email Validation
When you input the format of the email ID incorrectly, a type of text appears. Which warns the user that he has made incorrect input. The following codes have helped to add this error text.

Step 6: Activate Email Validation with JavaScript
Above we have created the basic structure of this simple email pattern validation. Now it needs to be done with JavaScript.
First I set the constants of some of the ID functions one by one. Because we know that no ID is used directly in JavaScript.
Now I have added the regular expression characters using mailRegex. The regular expression is basically a pattern of characters to input something. Your input email must be in accordance with this pattern.
If you take a closer look at the patent, you will understand its structure.
Now I have added conditions using ‘if’.
➤ In the first condition, I gave it when the input email id will match with mailRegex then the green icon will be seen. The border of the input will be green. In this case, the error text will be hidden.
➤ If you do not input anything in the input field, no change will occur. With this, the error text will be hidden.
➤ If the above two conditions do not apply then the following codes will apply. This means that if you input something and it does not match the wrong mailRegex, then the color of the icon will be red. Also, the border here will be red. In this case, the text of Obsay Error can be seen.


Hope you have followed this tutorial and learned how to create Simple Email Validation using JavaScript. I have already shared with you the design of many tutorials of many types. If you like this project (Email Validation in Javascript), please share it.