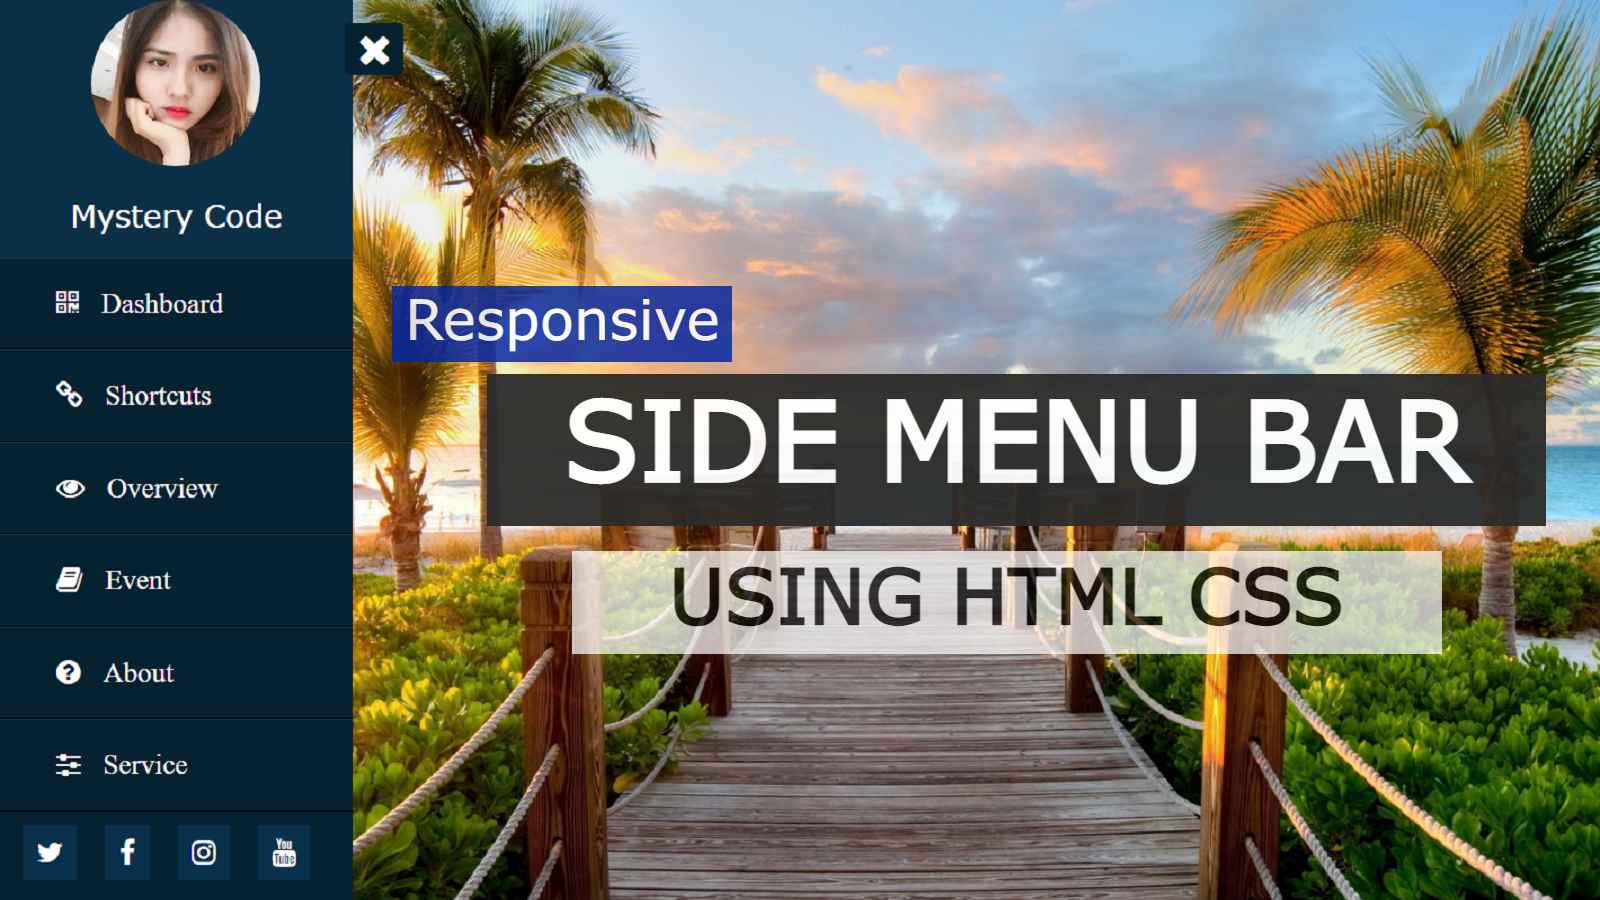
In this article, I am going to show you how to create a side menu bar using only simple HTML and CSS programming code. I have designed different types of menu bars on this website (eg Top Menu, Overlay Menubar, Responsive Menu).
In this article, I have shown you how to create a side menu bar. Under normal circumstances, this menu bar is completely hidden on the website and a small button can be seen. Clicking on it brings out the entire menu bar. This menu bar is completely modern and simply designed. If you know simple HTML and CSS, you can easily build it. I have used many menus here, along with a profile image. I used the name below and the social icon below to share on social media.
There is a cross button which when clicked will hide this menu bar again. Undoubtedly this type of menu is much more interesting and many websites are currently using this type of design.
Watch the video tutorial to know step by step
You can watch the video below to know the complete step-by-step method of making it. In this video, I have shown exactly how I created this side menu bar.
Hopefully from the video tutorial above you have fully learned how to make it.
How to create a Sidebar Menu Using Only HTML and CSS
Below I have shown which programming code has been used to create an element. I basically used HTML and CSS code to make it. I created it using HTML code and designed it using CSS code.
HTML Code
Create an Html file to copy and use the code below. Then copy and paste the following HTML code into your HTML file.
<input type=”checkbox” id=”check”>
<label for=”check”>
<i class=”fa fa-bars” id=”btn”></i>
<i class=”fa fa-times” id=”cancle”></i>
</label>
<div class=”sidebar”>
<header><img src=”https://encrypted-tbn0.gstatic.com/images?q=tbn:ANd9GcQpYJQKSoM7S75P_KMRtQHqAAIPh133CSxByw&usqp=CAU”>
<p>Mystery Code</p>
</header>
<ul>
<li><a href=”#”><i class=”fa fa-qrcode”></i>Dashboard</a></li>
<li><a href=”#”><i class=”fa fa-link”></i>Shortcuts</a></li>
<li><a href=”#”><i class=”fa fa-eye”></i>Overview</a></li>
<li><a href=”#”><i class=”fa fa-book”></i>Event</a></li>
<li><a href=”#”><i class=”fa fa-question-circle”></i>About</a></li>
<li><a href=”#”><i class=”fa fa-sliders”></i>Service</a></li>
<li><a href=”#”><i class=”fa fa-id-card”></i>Contact</a></li>
</ul>
<li>
<div class=”social-links”>
<a href=”#” class=”twitter”><i class=”fa fa-twitter”></i></a>
<a href=”#” class=”facebook”><i class=”fa fa-facebook”></i></a>
<a href=”#” class=”instagram”><i class=”fa fa-instagram”></i></a>
<a href=”#” class=”google-plus”><i class=”fa fa-youtube”></i></a>
</div>
</li>
</div>
<section></section>
CSS Code
The following codes are CSS codes. Create a CSS file to use in your project. Then copy the following CSS code and add it to the file. Of course, you link your CSS file to an HTML file
* {
margin: 0;
padding: 0;
list-style: none;
text-decoration: none;
}
body{
background-image: url(“http://getwallpapers.com/wallpaper/full/2/9/d/920568-full-size-beautiful-background-pics-1920×1200-for-android-50.jpg”);
background-position: center;
background-size: cover;
height: 700px;
background-repeat: no-repeat;
}
#check {
display: none;
}
label #btn,
label #cancle {
position: absolute;
cursor: pointer;
background: #042331;
color: #fff;
border-radius: 3px;
}
label #btn {
left: 40px;
top: 25px;
font-size: 35px;
color: #fff;
padding: 6px 12px;
transition: all 0.5s;
}
#cancle {
z-index: 1111;
left: -195px;
top: 17px;
font-size: 30px;
color: #0a5275;
padding: 4px 9px;
transition: all 0.5s;
}
/* active side bar */
.sidebar {
position: fixed;
left: -250px;
width: 250px;
height: 100%;
background: #042331;
transition: all 0.5s ease;
}
#check:checked ~ .sidebar {
left: 0;
}
#check:checked ~ label #btn {
left: 250px;
opacity: 0;
pointer-events: none;
}
#check:checked ~ label #cancle {
left: 245px;
}
#check:checked ~ section {
margin-left: 250px;
}
.sidebar header img {
border-radius: 50%;
width: 120px;
height: 120px;
}
.sidebar header {
font-size: 22px;
color: #fff;
text-align: center;
line-height: 30px;
background: #063146;
font-family: Verdana, Geneva, Tahoma, sans-serif;
user-select: none;
}
.sidebar ul a {
display: block;
height: 100%;
width: 100%;
line-height: 65px;
font-size: 20px;
color: #fff;
padding-left: 40px;
box-sizing: border-box;
border-top: 1px solid rgba(255,255,255,0.1);
border-bottom: 1px solid black;
transition: 0.4s;
}
.sidebar ul a i {
margin-right: 16px;
}
/* hover effect */
ul li:hover a {
padding-left: 50px;
}
/* Social Links */
.social-links i {
padding: 10px;
margin-left: 16px;
margin-top: 10px;
color: #fff;
background: #04334b;
font-size: 20px;
}
/* icons hover effect */
.social-links i:hover {
background: #1492d1;
}
.sidebar header p {
padding: 15px;
}
I hope you have learned how to create a side menu bar from this article. I have also designed many more types of menubars. You can see the design of that menu bar to increase your knowledge.


