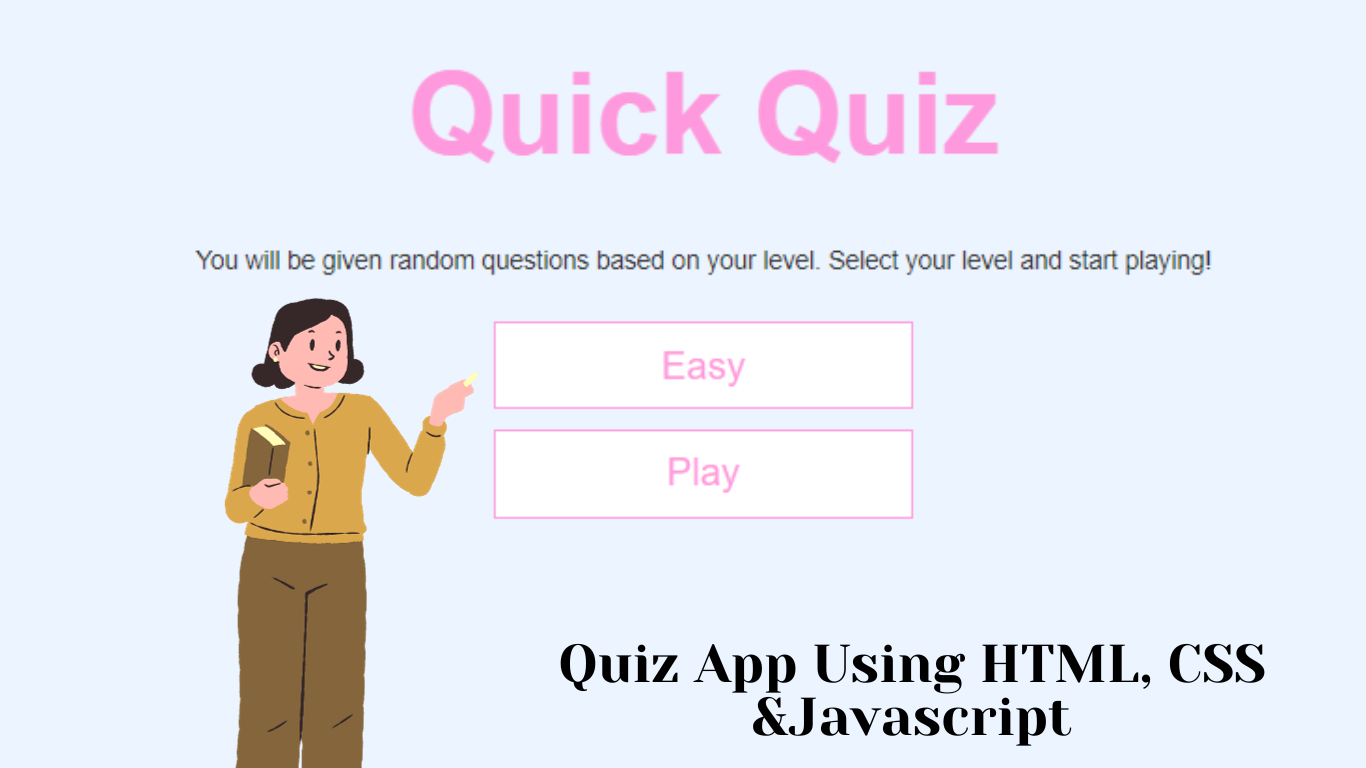
A Quiz App is a beginner project in which we create a multi-step form where we create a page for each quiz question. A quiz app is a collection of multiple questions with four options, and the user has to choose one answer out of the given options. At the end, we check the answer to each question and display the result to the user.

In this article, we will be using HTML, CSS, and Javascript to create different components for our quiz app. We will first create the structure of our quiz app using HTML with form elements, and then using the CSS properties, we will be adding some styling like padding, margin, border, and background color. We will be styling our quiz app so that our project looks more attractive, and using the javascript functions, we will create a javascript function through which we can add javascript functions.
Let’s take a look at the live demo of our quiz app:
I hope you have some general idea about our project. If you have some idea about the project, you will easily understand the whole process at once. We will be creating our quiz in a step-by-step format so that even beginners can understand the concept easily.
35+ Free JavaScript Games(Code+ Demo)
Adding the Structure (HTML):
First of all using the basic HTML tags and elements such as doctype HTML that helps in telling the browser that we are creating the structure in laters HTML version and then using the head tag we will add all the essential links for different CSS and javascript files and also using the child selector we will set the title of the webpage.
Now inside our body using the <h1> tag selector we will set the heading of the webpage of the quiz app . Then using the <p> tag we will add a basic text to ask the user to choose the game level from the drop down menu.
Using the select property we will create a drop-down menu where we will add three list option easy,medium and hard and also using the button tag for creating the play button to start the quiz app.
<!DOCTYPE html>
<html lang="en">
  <head>
    <meta charset="UTF-8" />
    <meta name="viewport" content="width=device-width, initial-scale=1.0" />
    <meta http-equiv="X-UA-Compatible" content="ie=edge" />
    <title>Quick Quiz</title>
    <link rel="stylesheet" href="app.css" />
    <link rel="stylesheet" href="game.css" />
    <link rel="stylesheet" href="end.css" />
  </head>
  <body>
      <body>
          <div class="firstcontainer" class="flex-center flex-column">
              <h1>Quick Quiz</h1>
              <p class="explanation">You will be given random questions based on your level. Select your level and start playing!</p>
              <div id="home" class="flex-center flex-column">
                <select class="btn" id="selectoptions" name="cars">
                    <option value="easy" >Easy</option>
                    <option value="medium">Medium</option>
                    <option value="hard" >Hard</option>
                </select>
              <a class="btn" id="playButton">Play</a>
              </div>
          </div>
          <script src="game.js"></script>
        </body>
  </body>
</html>
Now, using the div tag with class “container,” we will create a container for our JavaScript quiz question, and using the child div selector, we will create a blank block-level element for the loader of the webpage.
Then we will create the section for the quiz answer, which helps in checking the user and question data and checking the answer to display the result, and at the end of the page, we will create a dedicated section for our website.
<div class="container hidden" id="playing">
<div id="loader" ></div>
<div id="game" class="justify-center flex-column hidden">
<div id="hud">
<div id="hud-item">
<p id="progressText" class="hud-prefix">Question</p>
<div id="progressBar">
<div id="progressBarFull"></div>
</div>
</div>
<div id="hud-item">
<p class="hud-prefix">Score</p>
<h1 class="hud-main-text" id="score">0</h1>
</div>
</div>
<h2 id="question"></h2>
<div class="choice-container">
<p class="choice-text" data-number="1"></p>
</div>
<div class="choice-container">
<p class="choice-text" data-number="2"></p>
</div>
<div class="choice-container">
<p class="choice-text" data-number="3"></p>
</div>
<div class="choice-container">
<p class="choice-text" data-number="4"></p>
</div>
</div>
</div>
<div class="endPage container flex-center flex-column hidden">
<p class="endText">Your result is</p>
<div class="result flex-center">0</div>
<a class="btn" id="playAgainButton">Play Again</a>
<div class="shareButtons flex-center" >
<a href="https://twitter.com/share?ref_src=twsrc%5Etfw" class="twitter-share-button" data-show-count="false">Tweet</a><script async src="https://platform.twitter.com/widgets.js" charset="utf-8"></script>
<div class="fb-share-button" data-href="https://developers.facebook.com/docs/plugins/" data-layout="button" data-size="small"><a target="_blank" href="https://www.facebook.com/sharer/sharer.php?u=https%3A%2F%2Fdevelopers.facebook.com%2Fdocs%2Fplugins%2F&src=sdkpreparse" class="fb-xfbml-parse-ignore">Paylaş</a></div> <div id="fb-root"></div>
<script async defer crossorigin="anonymous" src="https://connect.facebook.net/tr_TR/sdk.js#xfbml=1&version=v3.3"></script> </div>
</div>
Adding Styling (CSS):
Basic and Heading Styling:
Using the root tag selector, we will create a root property that uses the CSS background-color property and sets the background to sky blue. Using the font-size property, we will set the font size to 62.5%.
Also, using the universal tag selector, we will set the padding and margin to “zero,” and using the box-sizing property, we will set the box-sizing to “border-box.” Using the font family property, we will set the font family of the body text to “arial” and the font color of the text to pink.
Now we will select the multiple heading tag selector. We will add some basic styling to all the headings of our quiz app and also use the individual styling properties of the headings based on different heading sizes.
:root {
    background-color: #ecf5ff;
    font-size: 62.5%;
  }

  * {
    margin: 0;
    padding: 0;
    box-sizing: border-box;
    font-family: Arial, Helvetica, sans-serif;
    color: #333;
  }

  *:focus {
    outline:0;
  }

  h1,
  h2,
  h3,
  h4 {
    margin-bottom: 1rem;
    text-align: center;
  }

  h1 {
    font-size: 5.4rem;
    color: #ff99dd;
    margin-bottom: 3rem;
  }

  h1 > span {
    font-size: 2.4rem;
    font-weight: 500;
  }

  h2 {
    font-size: 4.2rem;
    margin-bottom: 4rem;
    font-weight: 700;
  }

  h3 {
    font-size: 2.8rem;
    font-weight: 500;
  }

Styling Container:
Using the class selector (.container), we will set the width and height of the text to 100 vw, and using the display property, we will set the display to flex. Using the justify content property, we will align the items to the center, and using the margin property, we will set the zero margin from top and bottom and the auto margin from both sides.
70+ CSS Text animation(Free Code+ Demo)
Also, by selecting the child class selector (.flex-column), we will set the display to flex and flex direction from the home opportunity. We will be adding basic styling to each and every element of the website.
.container {
    width: 100vw;
    height: 100vh;
    display: flex;
    justify-content: center;
    align-items: center;
    min-width: 280px;
    max-width: 60%;
    margin: 0 auto;
  }

  .container > * {
    width: 100%;
  }

  .flex-column {
    display: flex;
    flex-direction: column;
  }

  .flex-center {
    justify-content: center;
    align-items: center;
  }

  .justify-center {
    justify-content: center;
  }

  .text-center {
    text-align: center;
  }

  .hidden {
    display: none;
  }

  .explanation {
    font-size: 1.2rem;
    font-weight: 500;
    margin-bottom: 2rem;
    padding: 0 1rem;
    text-align: center;
    line-height: 1.8rem;
  }

  .firstcontainer {
    margin-top: 3rem;
  }


  .btn {
    font-size: 1.8rem;
    padding: 1rem 0;
    width: 20rem;
    text-align: center;
    border: 0.1rem solid #ff99dd;
    margin-bottom: 1rem;
    text-decoration: none;
    color: #ff99dd;
    background-color: white;
  }

  .btn:hover {
    cursor: pointer;
    box-shadow: 0 0.4rem 1.4rem 0 rgba(255, 153, 221, 0.5);
    transform: translateY(-0.1rem);
    transition: transform 150ms;
  }

  .btn[disabled]:hover {
    cursor: not-allowed;
    box-shadow: none;
    transform: none;
  }

Styling Select option and Responsiveness:
Using the tag selector (select), we will set the appearance to none of our quiz drop-down menus, and using the text align property, we will align the text to the center. Also, using the media query property, we will set the maximum width of the screen sizes. If the screen size of the quiz goes below the defined screen size, then we can add a responsive website.
select {
    appearance: none;
    text-align-last:center;
    text-align: center;
    border: none;
  }
option {
  appearance: none;
  -webkit-appearance: none;
  font-size: 16px;
  color: #ff99dd;
  padding: 3px;
}

  @media only screen and (max-width: 360px) {
    h1 {
        font-size: 4rem;
        white-space: nowrap;
      }
  }
  @media only screen and (max-width: 900px) {
    .container {
      max-width: 80%;
    }
  }
.choice-container {
  display: flex;
  margin-bottom: 0.5rem;
  width: 100%;
  font-size: 1.8rem;
  border-radius: 5px;
  border: 0.1rem solid rgb(255, 153, 221, 0.25);
  background-color: white;
}

.choice-container:hover {
  cursor: pointer;
  box-shadow: 0 0.4rem 1.4rem 0 rgba(255, 153, 221, 0.5);
  transform: translateY(-0.1rem);
  transition: transform 150ms;
}

.choice-text {
  font-size: 1.6rem;
  text-align: center;
  padding: 1.5rem;
  width: 100%;
}

.correct {
  background-color: #28a745;
}

.incorrect {
  background-color: #dc3545;
}

#question {
  font-size: 1.6rem;
  text-align: center;
}


#hud {
  display: flex;
  justify-content: space-between;
}

.hud-prefix {
  text-align: center;
  font-size: 2rem;
}

.hud-main-text {
  text-align: center;
}

#progressBar {
  width: 20rem;
  height: 4rem;
  border: 0.3rem solid #ff99dd;
  margin-top: 1.5rem;
}

#progressBarFull {
  height: 3.4rem;
  background-color: #ff99dd;
  width: 0%;
  max-width: 100%;
}


#loader {
  border: 1.6rem solid white;
  border-radius: 50%;
  border-top: 1.6rem solid #ff99dd;
  width: 12rem;
  height: 12rem;
  animation: spin 2s linear infinite;
}

@keyframes spin {
  0% {
    transform: rotate(0deg);
  }
  100% {
    transform: rotate(360deg);
  }
}

@media only screen and (max-width: 365px) {
  :root {
    font-size: 50%;
  }
  .hud-main-text {
    margin-top: 10px;
  }
}
.endText {
    margin-bottom: 3rem;
    font-size: 3rem;
    text-align: center;
}

.result {
    width: 50%;
    max-width:380px;
    min-width: 20rem;
    border: 10px solid pink;
    margin-bottom: 3rem;
    display: flex;
    font-size: 3rem;
}

.result:after {
    content: "";
    display: block;
    padding-bottom: 100%;
}

.shareButtons {
    width: 100%;
    max-width: 20rem;
    display: flex;
    margin-bottom: 3rem;
    justify-content: center;
}


.twitter-share-button {
    margin-right: 1rem;
}

.fb-share-button {
    margin-left: 1rem;
}
.endPage {
    justify-content: flex-start;
    max-height: 300px;
}

@media only screen and (max-width: 365px) {
    .endPage {
      max-height: 400px;
      overflow: hidden;
    }
}
Using Javascript :
We will be using the API’s for requesting information from the server, and user input can be selected with one array, which will store all the browsers. In this project, we will be using the const selector property to set the document. In the queryselector method, we will select the hTML element, and using the choices property, we will select all the elements in our HTML file section for creating the structure of the website.
let url ='https://opentdb.com/api.php?amount=10&category=9&difficulty=easy&type=multiple'

const question = document.querySelector("#question");
const choices = Array.from(document.getElementsByClassName("choice-text"));

const progressBarFull = document.querySelector("#progressBarFull");
const progressText = document.querySelector("#progressText");
const scoreText = document.querySelector("#score");

const home = document.querySelector("#home");
const playing = document.querySelector("#playing");
const playButton = document.querySelector("#playButton");
const explanation = document.querySelector('.explanation');
const selectoptions = document.querySelector("#selectoptions");
const endPage = document.querySelector('.endPage');
const result = document.querySelector('.result');
const playAgainButton = document.querySelector('#playAgainButton');

const point = 10;
const maxQuestion = 10;
let score = 0;
let questionCounter = 0;
let acceptingAnswers = false;
let resultvalue = 0;

let allQuestionsArray = [];
let currentQuestion = {};
Adding Functions:
We will be adding different functions inside our HTML file, and we will also create an array of questions using the if else condition. If the code is easy, then using the API URL request, we will open the easy category of the quiz app. In a similar manner, if we choose any other category, then using the javascript method, we will add the request from the API, and then the selected category is visible on the screen.
Now we will create a play function, where we will create a function that fetches the user information and adds and removes the classes from the project, and we will be adding and removing the text from the defined places. We will also be checking the length of the project, storing the user’s input, and displaying the final result to the user.
function urlSelection() {
    var x = selectoptions.value;
    if(x === 'easy') {
        url = 'https://opentdb.com/api.php?amount=10&category=9&difficulty=easy&type=multiple';
    }
    if(x === 'medium') {
        url = 'https://opentdb.com/api.php?amount=10&category=9&difficulty=medium&type=multiple';
    }
    if(x === 'hard') {
        url = 'https://opentdb.com/api.php?amount=10&category=9&difficulty=hard&type=multiple';
    }
}
selectoptions.addEventListener('change', urlSelection)

function play() {
    explanation.innerHTML = 'Good Luck!'
    game.classList.add("hidden");
    loader.classList.remove("hidden");
    playing.classList.remove("hidden");
    home.classList.add("hidden");
    fetch(url)
    .then(response => {
        return response.json();
    })
    .then(response => {
        allQuestionsArray = response.results.map(q => {
            let allQuestionsObject = {};
            allQuestionsObject.question = q.question;
            allQuestionsObject.answer = Math.floor(Math.random() * 3) + 1;
            const choices = [...q.incorrect_answers];
            choices.splice(allQuestionsObject.answer - 1, 0, q['correct_answer']);
            choices.forEach((eachChoice, index) => {
                allQuestionsObject["choice" + (index + 1)] = eachChoice;
            });
            return allQuestionsObject;
            });
        startGame();
    })
}
playButton.addEventListener('click', play)

function startGame() {
    score = 0;
    questionCounter = 0;
    remainedQuestions = [...allQuestionsArray];
    getQuestion();
    game.classList.remove("hidden");
    loader.classList.add("hidden");
}

function getQuestion() {
    if (remainedQuestions.length === 0 || questionCounter >= maxQuestion) {
        endGame();
        return;
    }
    questionCounter++;
    progressText.innerText = `Question ${questionCounter}/${maxQuestion}`;
    progressBarFull.style.width = `${(questionCounter / maxQuestion) * 100}%`;
    const questionIndex = Math.floor(Math.random() * remainedQuestions.length);
    currentQuestion = remainedQuestions[questionIndex];
    question.innerText = decoding(currentQuestion.question);
    choices.forEach(choice => {
        const number = choice.dataset["number"];
        choice.innerText = decoding(currentQuestion["choice" + number]);
    });
    remainedQuestions.splice(questionIndex, 1);
    acceptingAnswers = true;
}

let incrementScore = num => {
    score += num;
    scoreText.innerText = score;
    resultvalue += num;
    result.innerHTML = `${resultvalue}%`;
}

function decoding(html) {
    let el = document.createElement( 'html' );
    el.innerHTML = html;
    return el.textContent;
}

choices.forEach(choice => {
    choice.addEventListener("click", e => {
      if (!acceptingAnswers) return;

      acceptingAnswers = false;
      const selectedChoice = e.target;
      const selectedAnswer = selectedChoice.dataset["number"];
      const classToApply =
        selectedAnswer == currentQuestion.answer ? "correct" : "incorrect";

      if (classToApply === "correct") {
        incrementScore(point);
      }

      selectedChoice.parentElement.classList.add(classToApply);

      setTimeout(() => {
        selectedChoice.parentElement.classList.remove(classToApply);
        getQuestion();
      }, 500);
    });
  });


function endGame() {
    endPage.classList.remove("hidden");
    playing.classList.add("hidden");
    explanation.innerHTML = "";
}


function playAgain() {
    home.classList.remove("hidden");
    endPage.classList.add("hidden");
    scoreText.innerHTML = 0;
    resultvalue = 0;
    result.innerHTML = `0%`;
    questionCounter = 0;
    explanation.innerHTML = "You will be given random questions based on your level. Select your level and start playing!";
}

playAgainButton.addEventListener('click', playAgain);
final Video Output:
Conclusion:
Hopefully, the above tutorial has helped you to know how to create this Quiz App Using HTML, CSS, and Javascript
Here we have learned how to use a Quiz App Using HTML, CSS, and Javascript. Next time, I am going to write an article on how online bookstores use HTML and CSS. Please give us your valuable feedback on how you like this Quiz App Using HTML, CSS, and Javascript.
If you like the project, don’t forget to follow our website, foolishdeveloper.com.
Codepen by: Sumerya
Author: Arun


