In this article you will know how to detect Internet speed with JavaScript. If you know basic JavaScript then this article will fully help you to detect Internet speed by JavaScript.

Detecting internet speed with JavaScript is a useful tool for web developers to have in their toolkit, as it allows them to provide a better user experience for those with slower internet connections.
detect Internet speed with JavaScript
I have seen how to check internet speed in Javascript in this tutorial. Below I have shared a preview of this project() to let you know how it works. It works by loading a random image from the URL “https://source.unsplash.com/random?topics=nature” and calculating the time it takes to load the image. The time is then used to calculate the speed in bits per second, kilobits per second and megabits per second.
The code starts by declaring some global variables such as startTime, endTime, imageSize, image, bitOutput, kboutput, and mboutput. The bitOutput, kboutput, and mboutput are used to display the internet speed on the web page.
See the Pen Detect Internet Speed Javascript by Ground Tutorial (@groundtutorial) on CodePen.
When the image loads, the function onload is triggered and it calculates the time taken to load the image by subtracting the start time from the end time.
After that, it uses the fetch API to get the image size and the headers object to get the content-length of the image. Once the image size is obtained, the function calculateSpeed() is called which calculates the internet speed.
Hopefully from the above explanation you have come to know how this JavaScript Internet speed detect apps work. Also above I have shared preview which will help you to watch live.
How to Check Internet Speed in JavaScript
In the following article I have explained how I created this project(). Here you will find step by step tutorial and required source code.
Step 1: Create the basic structure
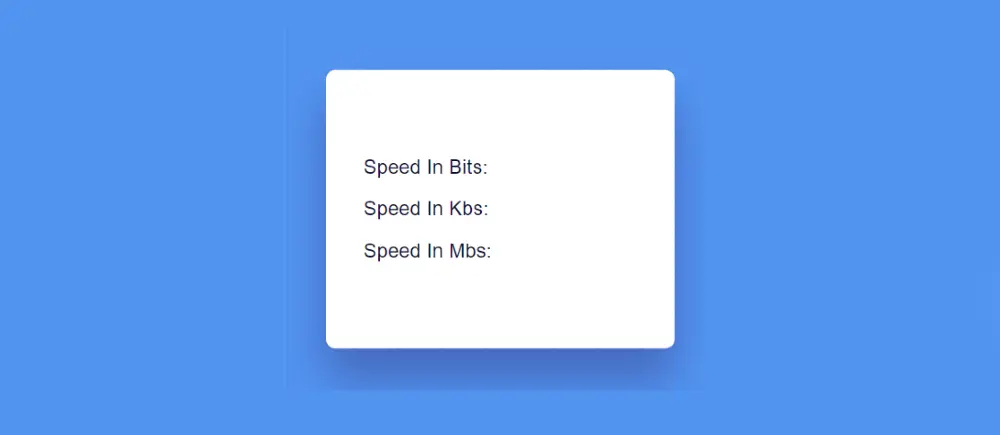
First I created a basic structure of this project. That is, I have created a box that contains all the information.
					<div class="container">

</div>
					* {
  margin: 0;
  padding: 0;
  box-sizing: border-box;
}
body {
  height: 100vh;
  background:  #5294f1;
}
.container {
  width: 350px;
  background-color: #ffffff;
  padding: 4em 2em;
  position: absolute;
  transform: translate(-50%, -50%);
  top: 50%;
  left: 50%;
  border-radius: 0.5em;
  font-family: "Poppins", sans-serif;
  font-size: 1.2em;
  line-height: 2.2em;
  box-shadow: 0 1.6em 2.4em rgb(40, 4, 67, 0.3);
}

Step 2: Add information to collect internet speed
The code you provided is HTML that creates three paragraphs with the ids “bits”, “kbs”, and “mbs”. These paragraphs are used to display the internet speed on the web page.
Each paragraph contains a span element with a label “Speed In Bits:”, “Speed In Kbs:”, “Speed In Mbs:” respectively. The JavaScript code uses the innerHTML property to add the calculated speed to these span elements.
					<p id="bits"><span>Speed In Bits:</span></p>
<p id="kbs"><span>Speed In Kbs:</span></p><div class='code-block code-block-9' style='margin: 8px 0; clear: both;'> <script type="litespeed/javascript" data-src="https://pagead2.googlesyndication.com/pagead/js/adsbygoogle.js?client=ca-pub-2145094925886663"
     crossorigin="anonymous"></script> <ins class="adsbygoogle"
     style="display:block; text-align:center;"
     data-ad-layout="in-article"
     data-ad-format="fluid"
     data-ad-client="ca-pub-2145094925886663"
     data-ad-slot="7515873849"></ins> <script type="litespeed/javascript">(adsbygoogle=window.adsbygoogle||[]).push({})</script></div>

<p id="mbs"><span>Speed In Mbs:</span></p>
					p {
  font-size: 400;
  color: #747497;
  letter-spacing: 0.02em;
}
span {
  font-weight: 500;
  color: #090931;
}
Step 3: Detect Internet speed with JavaScript
Now this Detect Internet Speed Javascript has to be activated. The JavaScript used here is easy to understand if you have a basic understanding of JavaScript.
					let startTime, endTime;
let imageSize = "";
let image = new Image();
let bitOutput = document.getElementById("bits");
let kboutput = document.getElementById("kbs");
let mboutput = document.getElementById("mbs");

//Gets random image from unsplash.com
let imageLink = "https://source.unsplash.com/random?topics=nature";
It starts by declaring some global variables such as startTime, endTime, imageSize, image, bitOutput, kboutput, and mboutput.
The variables startTime and endTime are used to store the time when the image loading starts and ends. The variable imageSize is used to store the size of the image. The variable image is an instance of the Image object, which is used to load the image from a given URL. The variables bitOutput, kboutput, and mboutput are used to store references to the HTML elements that display the internet speed on the web page.
The imageLink variable is set to the URL of the image that we want to load, in this case, it is “https://source.unsplash.com/random?topics=nature“. This link will return a random image about nature from unsplash.com.
					//When image loads
image.onload = async function () {
  endTime = new Date().getTime();

  //Get image size
  await fetch(imageLink).then((response) => {
    imageSize = response.headers.get("content-length");
    calculateSpeed();
  });
};
It is the onload event handler for the Image object.
The onload event is triggered when the image is completely loaded and it sets the endTime variable to the current time using the Date().getTime() method.
After that, it uses the fetch API to get the image size by sending a request to the imageLink URL. The response object returned by the fetch API contains a headers property, which is an object representing the headers of the response. Using the headers.get() method, it gets the value of the “content-length” header. This header contains the size of the image in bytes.
Once the image size is obtained, the function calculateSpeed() is called which calculates the internet speed.
					//Function to calculate speed
function calculateSpeed() {
  //Time taken in seconds
  let timeDuration = (endTime - startTime) / 1000;
  //total bots
  let loadedBits = imageSize * 8;
  let speedInBps = (loadedBits / timeDuration).toFixed(2);
  let speedInKbps = (speedInBps / 1024).toFixed(2);
  let speedInMbps = (speedInKbps / 1024).toFixed(2);

  bitOutput.innerHTML += `${speedInBps}`;
  kboutput.innerHTML += `${speedInKbps}`;
  mboutput.innerHTML += `${speedInMbps}`;
}
The first step is to calculate the time duration it took to load the image by subtracting the start time from the end time and then dividing by 1000 to convert it to seconds.
Next, the function calculates the total number of bits loaded by multiplying the image size (in bytes) by 8 (since there are 8 bits in a byte).
After that, it calculates the internet speed in bits per second by dividing the total number of bits loaded by the time duration. The .toFixed(2) method is used to round the result to 2 decimal places.
Then, it calculates the internet speed in kilobits per second by dividing the speed in bits per second by 1024 (since 1 kilobit = 1024 bits). The .toFixed(2) method is used to round the result to 2 decimal places.
Finally, it calculates the internet speed in megabits per second by dividing the speed in kilobits per second by 1024 (since 1 megabit = 1024 kilobits). The .toFixed(2) method is used to round the result to 2 decimal places.
The last step is to update the innerHTML of the HTML elements that display the internet speed on the web page by adding the calculated speed in bits per second, kilobits per second, and megabits per second respectively.
					//Initial
const init = async () => {
  startTime = new Date().getTime();
  image.src = imageLink;
};

window.onload = () => init();
It sets the global variable startTime to the current time using the Date().getTime() method and sets the source of the Image object to the imageLink variable.
The function is defined as an async function and it doesn’t take any input. It’s a function that is called when the window is loaded using the window.onload event.
The window.onload event is triggered when all the resources of the webpage have been loaded, including images, scripts, and stylesheets. By calling the init() function in the window.onload event, we ensure that the image link is set and the start time is recorded only after all the resources of the webpage have been loaded.
The final step is to call the image.src = imageLink. This sets the source of the image object to the imageLink variable and triggers the loading of the image. The rest of the code is executed when the image is loaded and the onload event is triggered.
Hopefully from this article you have learned how to Check Internet Connection Speed in JavaScript. Earlier I have shared many tutorials using JavaScript. You can see them if you want. Comment how you like this article.
To check internet connection speed in a React JS application, you can use the navigator.connection object which provides information about the device’s network connection. Specifically, you can use the .downlink property which returns the estimated downlink speed of the device’s internet connection in megabits per second (Mbps).
To check the Internet speed by IP address in JavaScript, you would need to use a third-party service or API that can provide speed test results for a specific IP address. One example is the Speedtest by Ookla API, which allows you to retrieve information about a server’s speed test results by its IP address. To use this API, you would need to sign up for an API key and make a request to the appropriate endpoint with the IP address.
There are a few ways to detect network speed using JavaScript, but one common method is to use the navigator.connection object, which is part of the Network Information API. This object provides information about the user’s network connection, including the effective type of the connection, such as “4g” or “wifi”, and the estimated download and upload speeds in megabits per second (Mbps).