Do you want to create Automatic Image Slider using React JS?
In this article you will know how to Auto-Playing Slideshow with React. Earlier I have shared with you many types of automatic image slider tutorials using JavaScript. Not only that but only HTML and css, I have created many automatic image sliders in this tutorial.
12+ CSS Image Hover Effects (Free Code + Demo)
Image Slider are the carousel that helps in displaying multiple images all at one place with a small interval between all the images. This Auto playing slideshow with React is an advance project in which we will be using Javascript framework react for creating a unique image slide with automatic sliding feature.

Now it’s time to create automatic image slides with React. Earlier I shared a manual image slider tutorial by React.
But if you want to build Auto-Play Slideshow React then you have come to the right place. Here you will find necessary explanation and source code.
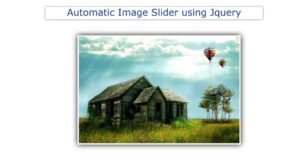
Automatic Image Slider in React JS
React JS is a popular JavaScript library for building user interfaces, and one of its common use cases is creating image sliders.
An automatic image slider is a great way to display multiple images on a website without taking up too much space. In this article, we will show you how to create an automatic image slider in React JS.
An automatic image slider is a great way to display multiple images on a website without taking up too much space. In this article, we will show you how to create an automatic image slider in React JS.
See the Pen Auto-Play Slideshow React by Ground Tutorial (@groundtutorial) on CodePen.
As you can see above it is a simple react auto slider with 3 images. Here I have not used any image. Instead I added a background color.
If you want you can add images, I will explain below in the React code how to do it. Then there is the carousel below. I used 3 carousels for three images.
How to Build an Auto-Playing Slideshow with React
Now it’s time to create this React JS automatic image slider. Here I have given you all the codes and they have published them. If you want to create a manual image slider you can see my other article.
If you just want the source code of this Auto-Play Slideshow React then you can click the download button below the article.
If you want to create a React app for the first time then you can know how to start using this link. In that article I have seen how to start a React project.
Step 1: HTML of react auto slider
The following codes are the html code of this react JS carousel auto slider. If you know Basic React then you won’t have any problem.
					<!DOCTYPE html>
<html lang="en" >
<head>
  <link data-asynced="1" as="style" onload="this.onload=null;this.rel='stylesheet'"  rel="preload" href="./style.css">
</head>
<body>
<div id="App"></div> <script type="litespeed/javascript" data-src='https://unpkg.com/react/umd/react.development.js'></script> <script type="litespeed/javascript" data-src='https://unpkg.com/react-dom/umd/react-dom.development.js'></script><script  type="litespeed/javascript" data-src="./script.js"></script> <script data-no-optimize="1">window.lazyLoadOptions=Object.assign({},{threshold:300},window.lazyLoadOptions||{});!function(t,e){"object"==typeof exports&&"undefined"!=typeof module?module.exports=e():"function"==typeof define&&define.amd?define(e):(t="undefined"!=typeof globalThis?globalThis:t||self).LazyLoad=e()}(this,function(){"use strict";function e(){return(e=Object.assign||function(t){for(var e=1;e<arguments.length;e++){var n,a=arguments[e];for(n in a)Object.prototype.hasOwnProperty.call(a,n)&&(t[n]=a[n])}return t}).apply(this,arguments)}function o(t){return e({},at,t)}function l(t,e){return t.getAttribute(gt+e)}function c(t){return l(t,vt)}function s(t,e){return function(t,e,n){e=gt+e;null!==n?t.setAttribute(e,n):t.removeAttribute(e)}(t,vt,e)}function i(t){return s(t,null),0}function r(t){return null===c(t)}function u(t){return c(t)===_t}function d(t,e,n,a){t&&(void 0===a?void 0===n?t(e):t(e,n):t(e,n,a))}function f(t,e){et?t.classList.add(e):t.className+=(t.className?" ":"")+e}function _(t,e){et?t.classList.remove(e):t.className=t.className.replace(new RegExp("(^|\\s+)"+e+"(\\s+|$)")," ").replace(/^\s+/,"").replace(/\s+$/,"")}function g(t){return t.llTempImage}function v(t,e){!e||(e=e._observer)&&e.unobserve(t)}function b(t,e){t&&(t.loadingCount+=e)}function p(t,e){t&&(t.toLoadCount=e)}function n(t){for(var e,n=[],a=0;e=t.children[a];a+=1)"SOURCE"===e.tagName&&n.push(e);return n}function h(t,e){(t=t.parentNode)&&"PICTURE"===t.tagName&&n(t).forEach(e)}function a(t,e){n(t).forEach(e)}function m(t){return!!t[lt]}function E(t){return t[lt]}function I(t){return delete t[lt]}function y(e,t){var n;m(e)||(n={},t.forEach(function(t){n[t]=e.getAttribute(t)}),e[lt]=n)}function L(a,t){var o;m(a)&&(o=E(a),t.forEach(function(t){var e,n;e=a,(t=o[n=t])?e.setAttribute(n,t):e.removeAttribute(n)}))}function k(t,e,n){f(t,e.class_loading),s(t,st),n&&(b(n,1),d(e.callback_loading,t,n))}function A(t,e,n){n&&t.setAttribute(e,n)}function O(t,e){A(t,rt,l(t,e.data_sizes)),A(t,it,l(t,e.data_srcset)),A(t,ot,l(t,e.data_src))}function w(t,e,n){var a=l(t,e.data_bg_multi),o=l(t,e.data_bg_multi_hidpi);(a=nt&&o?o:a)&&(t.style.backgroundImage=a,n=n,f(t=t,(e=e).class_applied),s(t,dt),n&&(e.unobserve_completed&&v(t,e),d(e.callback_applied,t,n)))}function x(t,e){!e||0<e.loadingCount||0<e.toLoadCount||d(t.callback_finish,e)}function M(t,e,n){t.addEventListener(e,n),t.llEvLisnrs[e]=n}function N(t){return!!t.llEvLisnrs}function z(t){if(N(t)){var e,n,a=t.llEvLisnrs;for(e in a){var o=a[e];n=e,o=o,t.removeEventListener(n,o)}delete t.llEvLisnrs}}function C(t,e,n){var a;delete t.llTempImage,b(n,-1),(a=n)&&--a.toLoadCount,_(t,e.class_loading),e.unobserve_completed&&v(t,n)}function R(i,r,c){var l=g(i)||i;N(l)||function(t,e,n){N(t)||(t.llEvLisnrs={});var a="VIDEO"===t.tagName?"loadeddata":"load";M(t,a,e),M(t,"error",n)}(l,function(t){var e,n,a,o;n=r,a=c,o=u(e=i),C(e,n,a),f(e,n.class_loaded),s(e,ut),d(n.callback_loaded,e,a),o||x(n,a),z(l)},function(t){var e,n,a,o;n=r,a=c,o=u(e=i),C(e,n,a),f(e,n.class_error),s(e,ft),d(n.callback_error,e,a),o||x(n,a),z(l)})}function T(t,e,n){var a,o,i,r,c;t.llTempImage=document.createElement("IMG"),R(t,e,n),m(c=t)||(c[lt]={backgroundImage:c.style.backgroundImage}),i=n,r=l(a=t,(o=e).data_bg),c=l(a,o.data_bg_hidpi),(r=nt&&c?c:r)&&(a.style.backgroundImage='url("'.concat(r,'")'),g(a).setAttribute(ot,r),k(a,o,i)),w(t,e,n)}function G(t,e,n){var a;R(t,e,n),a=e,e=n,(t=Et[(n=t).tagName])&&(t(n,a),k(n,a,e))}function D(t,e,n){var a;a=t,(-1<It.indexOf(a.tagName)?G:T)(t,e,n)}function S(t,e,n){var a;t.setAttribute("loading","lazy"),R(t,e,n),a=e,(e=Et[(n=t).tagName])&&e(n,a),s(t,_t)}function V(t){t.removeAttribute(ot),t.removeAttribute(it),t.removeAttribute(rt)}function j(t){h(t,function(t){L(t,mt)}),L(t,mt)}function F(t){var e;(e=yt[t.tagName])?e(t):m(e=t)&&(t=E(e),e.style.backgroundImage=t.backgroundImage)}function P(t,e){var n;F(t),n=e,r(e=t)||u(e)||(_(e,n.class_entered),_(e,n.class_exited),_(e,n.class_applied),_(e,n.class_loading),_(e,n.class_loaded),_(e,n.class_error)),i(t),I(t)}function U(t,e,n,a){var o;n.cancel_on_exit&&(c(t)!==st||"IMG"===t.tagName&&(z(t),h(o=t,function(t){V(t)}),V(o),j(t),_(t,n.class_loading),b(a,-1),i(t),d(n.callback_cancel,t,e,a)))}function $(t,e,n,a){var o,i,r=(i=t,0<=bt.indexOf(c(i)));s(t,"entered"),f(t,n.class_entered),_(t,n.class_exited),o=t,i=a,n.unobserve_entered&&v(o,i),d(n.callback_enter,t,e,a),r||D(t,n,a)}function q(t){return t.use_native&&"loading"in HTMLImageElement.prototype}function H(t,o,i){t.forEach(function(t){return(a=t).isIntersecting||0<a.intersectionRatio?$(t.target,t,o,i):(e=t.target,n=t,a=o,t=i,void(r(e)||(f(e,a.class_exited),U(e,n,a,t),d(a.callback_exit,e,n,t))));var e,n,a})}function B(e,n){var t;tt&&!q(e)&&(n._observer=new IntersectionObserver(function(t){H(t,e,n)},{root:(t=e).container===document?null:t.container,rootMargin:t.thresholds||t.threshold+"px"}))}function J(t){return Array.prototype.slice.call(t)}function K(t){return t.container.querySelectorAll(t.elements_selector)}function Q(t){return c(t)===ft}function W(t,e){return e=t||K(e),J(e).filter(r)}function X(e,t){var n;(n=K(e),J(n).filter(Q)).forEach(function(t){_(t,e.class_error),i(t)}),t.update()}function t(t,e){var n,a,t=o(t);this._settings=t,this.loadingCount=0,B(t,this),n=t,a=this,Y&&window.addEventListener("online",function(){X(n,a)}),this.update(e)}var Y="undefined"!=typeof window,Z=Y&&!("onscroll"in window)||"undefined"!=typeof navigator&&/(gle|ing|ro)bot|crawl|spider/i.test(navigator.userAgent),tt=Y&&"IntersectionObserver"in window,et=Y&&"classList"in document.createElement("p"),nt=Y&&1<window.devicePixelRatio,at={elements_selector:".lazy",container:Z||Y?document:null,threshold:300,thresholds:null,data_src:"src",data_srcset:"srcset",data_sizes:"sizes",data_bg:"bg",data_bg_hidpi:"bg-hidpi",data_bg_multi:"bg-multi",data_bg_multi_hidpi:"bg-multi-hidpi",data_poster:"poster",class_applied:"applied",class_loading:"litespeed-loading",class_loaded:"litespeed-loaded",class_error:"error",class_entered:"entered",class_exited:"exited",unobserve_completed:!0,unobserve_entered:!1,cancel_on_exit:!0,callback_enter:null,callback_exit:null,callback_applied:null,callback_loading:null,callback_loaded:null,callback_error:null,callback_finish:null,callback_cancel:null,use_native:!1},ot="src",it="srcset",rt="sizes",ct="poster",lt="llOriginalAttrs",st="loading",ut="loaded",dt="applied",ft="error",_t="native",gt="data-",vt="ll-status",bt=[st,ut,dt,ft],pt=[ot],ht=[ot,ct],mt=[ot,it,rt],Et={IMG:function(t,e){h(t,function(t){y(t,mt),O(t,e)}),y(t,mt),O(t,e)},IFRAME:function(t,e){y(t,pt),A(t,ot,l(t,e.data_src))},VIDEO:function(t,e){a(t,function(t){y(t,pt),A(t,ot,l(t,e.data_src))}),y(t,ht),A(t,ct,l(t,e.data_poster)),A(t,ot,l(t,e.data_src)),t.load()}},It=["IMG","IFRAME","VIDEO"],yt={IMG:j,IFRAME:function(t){L(t,pt)},VIDEO:function(t){a(t,function(t){L(t,pt)}),L(t,ht),t.load()}},Lt=["IMG","IFRAME","VIDEO"];return t.prototype={update:function(t){var e,n,a,o=this._settings,i=W(t,o);{if(p(this,i.length),!Z&&tt)return q(o)?(e=o,n=this,i.forEach(function(t){-1!==Lt.indexOf(t.tagName)&&S(t,e,n)}),void p(n,0)):(t=this._observer,o=i,t.disconnect(),a=t,void o.forEach(function(t){a.observe(t)}));this.loadAll(i)}},destroy:function(){this._observer&&this._observer.disconnect(),K(this._settings).forEach(function(t){I(t)}),delete this._observer,delete this._settings,delete this.loadingCount,delete this.toLoadCount},loadAll:function(t){var e=this,n=this._settings;W(t,n).forEach(function(t){v(t,e),D(t,n,e)})},restoreAll:function(){var e=this._settings;K(e).forEach(function(t){P(t,e)})}},t.load=function(t,e){e=o(e);D(t,e)},t.resetStatus=function(t){i(t)},t}),function(t,e){"use strict";function n(){e.body.classList.add("litespeed_lazyloaded")}function a(){console.log("[LiteSpeed] Start Lazy Load"),o=new LazyLoad(Object.assign({},t.lazyLoadOptions||{},{elements_selector:"[data-lazyloaded]",callback_finish:n})),i=function(){o.update()},t.MutationObserver&&new MutationObserver(i).observe(e.documentElement,{childList:!0,subtree:!0,attributes:!0})}var o,i;t.addEventListener?t.addEventListener("load",a,!1):t.attachEvent("onload",a)}(window,document);</script><script data-no-optimize="1">window.litespeed_ui_events=window.litespeed_ui_events||["mouseover","click","keydown","wheel","touchmove","touchstart"];var urlCreator=window.URL||window.webkitURL;function litespeed_load_delayed_js_force(){console.log("[LiteSpeed] Start Load JS Delayed"),litespeed_ui_events.forEach(e=>{window.removeEventListener(e,litespeed_load_delayed_js_force,{passive:!0})}),document.querySelectorAll("iframe[data-litespeed-src]").forEach(e=>{e.setAttribute("src",e.getAttribute("data-litespeed-src"))}),"loading"==document.readyState?window.addEventListener("DOMContentLoaded",litespeed_load_delayed_js):litespeed_load_delayed_js()}litespeed_ui_events.forEach(e=>{window.addEventListener(e,litespeed_load_delayed_js_force,{passive:!0})});async function litespeed_load_delayed_js(){let t=[];for(var d in document.querySelectorAll('script[type="litespeed/javascript"]').forEach(e=>{t.push(e)}),t)await new Promise(e=>litespeed_load_one(t[d],e));document.dispatchEvent(new Event("DOMContentLiteSpeedLoaded")),window.dispatchEvent(new Event("DOMContentLiteSpeedLoaded"))}function litespeed_load_one(t,e){console.log("[LiteSpeed] Load ",t);var d=document.createElement("script");d.addEventListener("load",e),d.addEventListener("error",e),t.getAttributeNames().forEach(e=>{"type"!=e&&d.setAttribute("data-src"==e?"src":e,t.getAttribute(e))});let a=!(d.type="text/javascript");!d.src&&t.textContent&&(d.src=litespeed_inline2src(t.textContent),a=!0),t.after(d),t.remove(),a&&e()}function litespeed_inline2src(t){try{var d=urlCreator.createObjectURL(new Blob([t.replace(/^(?:<!--)?(.*?)(?:-->)?$/gm,"$1")],{type:"text/javascript"}))}catch(e){d="data:text/javascript;base64,"+btoa(t.replace(/^(?:<!--)?(.*?)(?:-->)?$/gm,"$1"))}return d}</script><script data-no-optimize="1">var litespeed_vary=document.cookie.replace(/(?:(?:^|.*;\s*)_lscache_vary\s*\=\s*([^;]*).*$)|^.*$/,"");litespeed_vary||(sessionStorage.getItem("litespeed_reloaded")?console.log("LiteSpeed: skipping guest vary reload (already reloaded this session)"):fetch("/wp-content/plugins/litespeed-cache/guest.vary.php",{method:"POST",cache:"no-cache",redirect:"follow"}).then(e=>e.json()).then(e=>{console.log(e),e.hasOwnProperty("reload")&&"yes"==e.reload&&(sessionStorage.setItem("litespeed_docref",document.referrer),sessionStorage.setItem("litespeed_reloaded","1"),window.location.reload(!0))}));</script><script data-optimized="1" type="litespeed/javascript" data-src="https://foolishdeveloper.com/wp-content/litespeed/js/9359fe404d484a15c862281c5b11a96d.js?ver=bdf37"></script></body>
</html>
Step 2: CSS Code for React Auto-Play Slideshow
Now we need to design this react image slider autoplay by css. The css used here is very simple. You can understand very easily.
					/* Slideshow */

.slideshow {
  margin: 0 auto;
  overflow: hidden;
  max-width: 500px;
}

.slideshowSlider {
  white-space: nowrap;
  transition: ease 1000ms;
}

.slide {
  display: inline-block;

  height: 400px;
  width: 100%;
  border-radius: 40px;
}

/* Buttons */

.slideshowDots {
  text-align: center;
}

.slideshowDot {
  display: inline-block;
  height: 20px;
  width: 20px;
  border-radius: 50%;

  cursor: pointer;
  margin: 15px 7px 0px;

  background-color: #c4c4c4;
}

.slideshowDot.active {
  background-color: #6a0dad;
}
Step 3: Enable Automatic Image Slider with React JS
Now it’s time to activate react-automatic slider. Here I have given the necessary explanation. Hope you will not have any difficulty in understanding.
					const colors = ["#0088FE", "#00C49F", "#FFBB28"];
const delay = 2500;
This code defines two constants:
colors: an array of strings representing hex color codes.delay: a constant number representing the delay time in milliseconds before switching to the next slide.
colors will be used to set the background color of each slide, and delay is used to set the time interval between transitioning to the next slide.

					function Slideshow() {
  const [index, setIndex] = React.useState(0);
  const timeoutRef = React.useRef(null);

  function resetTimeout() {
    if (timeoutRef.current) {
      clearTimeout(timeoutRef.current);
    }
  }
This is a function that creates a React component called “Slideshow”. Inside the function, it uses the “useState” Hook to create a state variable called “index” with an initial value of 0, and a state updater function called “setIndex”. It also uses the “useRef” Hook to create a reference called “timeoutRef” with an initial value of null.
It also contains a function called “resetTimeout” which checks if the “timeoutRef” current value is not null, if it is not null, it clears the timeout using the “clearTimeout” function. This function will be used to clear any previously set timeouts, so that only one timeout is active at a time.
					  React.useEffect(() => {
    resetTimeout();
    timeoutRef.current = setTimeout(
    () =>
    setIndex((prevIndex) =>
    prevIndex === colors.length - 1 ? 0 : prevIndex + 1),

    delay);

    return () => {
      resetTimeout();
    };
  }, [index]);
This is a React Hook that uses the “useEffect” Hook to run some code when the component is rendered or when the “index” state variable changes. It sets up a timeout that calls a function to increment the “index” state variable to the next slide after a certain delay, which is passed in as the “delay” prop.
The function that increments the “index” state variable checks if the current index is the last index of the “colors” array, if it is then it sets the “index” to 0, otherwise it increments it by 1.
Simple Image Hover Effects in HTML & CSS
It also calls a “resetTimeout” function, which clears the timeout using the “timeoutRef” reference, and returns another function that also calls the “resetTimeout” function. This return function will run when the component unmounts or when the “index” state variable changes, effectively clearing the previous timeout so that only one timeout is active at a time.

					  return /*#__PURE__*/(
    React.createElement("div", { className: "slideshow" }, /*#__PURE__*/
    React.createElement("div", {
      className: "slideshowSlider",
      style: { transform: `translate3d(${-index * 100}%, 0, 0)` } },

    colors.map((backgroundColor, index) => /*#__PURE__*/
    React.createElement("div", {
      className: "slide",
      key: index,
      style: { backgroundColor } }))), /*#__PURE__*/

    React.createElement("div", { className: "slideshowDots" },
    colors.map((_, idx) => /*#__PURE__*/
    React.createElement("div", {
      key: idx,
      className: `slideshowDot${index === idx ? " active" : ""}`,
      onClick: () => {
        setIndex(idx);
      } })))));
}
This is a function that returns a JSX element that creates a slideshow using React. The JSX element consists of a parent “div” element with a class of “slideshow”. Within that element, there is another “div” element with a class of “slideshowSlider”, which has a “transform” style that updates the position of the slides based on the value of the “index” variable.
The “slideshowSlider” element also contains a “map” function that creates a new “div” element for each color in the “colors” array, with the background color set to the color in the array. Each slide “div” element also receives a class name “slide” and the key is set to the current index.
Outside of the “slideshowSlider” element, there is another “div” element with a class of “slideshowDots”, which also uses a “map” function to create a new “div” element for each color in the “colors” array. Each dot “div” element has a class of “slideshowDot” and an “onClick” function that sets the “index” to the current index when clicked. The dot also receives an additional class of “active” if the current index matches the index of the dot.
ReactDOM.render( /*#__PURE__*/React.createElement(Slideshow, null), document.getElementById("App"));
This line of code is using ReactDOM’s render method to render the react auto Slideshow component to the element with an ID of “App” in the HTML document. The first argument passed to the render method is the JSX element representing the Slideshow component, which is being created using the React.createElement method.
The second argument is the target DOM node, which is the element with an ID of “App” in this case. The render method will replace the contents of the target DOM node with the JSX element passed to it.
This line of code is the final step of the code and it is what makes the slideshow visible on the website. It’s also worth noting that the code is using a JSX syntax feature, /#PURE/ , which is an indication for the JSX transform to include or exclude this element.
Hope you have learned from this article how to create Automatic Image Slider using React js. If there is any difficulty in creating this Auto-Play Slideshow React, you can comment me.
See the Pen Auto-Play Slideshow React by Omar Benseddik (@bnsddk) on CodePen.
An automatic image slider in React JS can be created by using a combination of state, hooks and JSX elements. Here is an example of a basic automatic image slider in React:
import React, { useState, useEffect } from ‘react’;
function ImageSlider() {
// Create state variables for the index and image array
const [index, setIndex] = useState(0);
const images = [‘image1.jpg’, ‘image2.jpg’, ‘image3.jpg’];
// Use useEffect to increment the index and update the image every 5 seconds
useEffect(() => {
const intervalId = setInterval(() => {
setIndex(prevIndex => (prevIndex + 1) % images.length);
}, 5000);
return () => clearInterval(intervalId);
}, []);
// Render the current image
return (
<img src={images[index]} alt=”Slider” />
);
}
export default ImageSlider;
Here are the steps to create an automatic image slider in React JS:
Create a new React component for the slider.
Use the
useStatehook to create state variables for the index and image array.Use the
useEffecthook to set up a function that increments the index and updates the displayed image at a specified time interval.Use JSX to render the current image.
Style the component to make it look more presentable.
Import the component in the parent component and render it.
Test the component by running the app and checking that the images are transitioning at the desired interval.
Make any necessary adjustments, such as changing the time interval, adding or removing images, or making changes to the styling.
Here are the steps to create a carousel slider in React JS:
Create a new React component for the carousel.
Use the
useStatehook to create state variables for the current slide index and the number of slides.Use the
useEffecthook to create a function that updates the current slide index based on a specified time interval.Use JSX to render the carousel slides.
Use CSS to style the carousel.
Add navigation buttons to the carousel, such as “previous” and “next” buttons, that allow the user to manually change the current slide.
Import the component in the parent component and render it.
Test the component by running the app and checking that the slides are transitioning at the desired interval and that the navigation buttons work as expected.
Make any necessary adjustments, such as changing the time interval, adding or removing slides, or making changes to the styling.