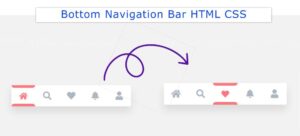
Introduction
Hello Coder, Welcome Back to Our new tutorial where today we’re are going to learn some advanced concepts of HTML, and also we will see the implementation of Textarea. You’ve seen in most of the websites in the Contact Us section that is on the button of the page, an Input Text Box that is of unlimited length means we can increase or decrease as per our need using our cursor that sound cool? Yeah, Today we’re going to build the same. So What we’re waiting for let’s get started.
Demo Of TextArea Implementaion
What Is TextArea?
You must have question about how we’re going to implement TextArea but before you proceed to learn you need to understand a terminology called ‘Textarea’.
A Textarea `<Textarea>` is an HTML attribute that is often used in forms to submit comments or reviews. This Text area can hold an unlimited number of characters and rows or columns.
Read Also:- 30+ HTML CSS and Javascript Projects
Implementation
Let’s make this tutorial interesting by writing some code. The best practice for writing code is that it should be well structured so we’ll be creating separate files for HTML, CSS, and JS Code. By the end of the Tutorial, you can clear your questions like, How to create TextArea using JavaScript? , How to make a custom Input TextBox ? and Many more questions.
HTML Code Snippet
Below is the HTML Code part For the Textarea
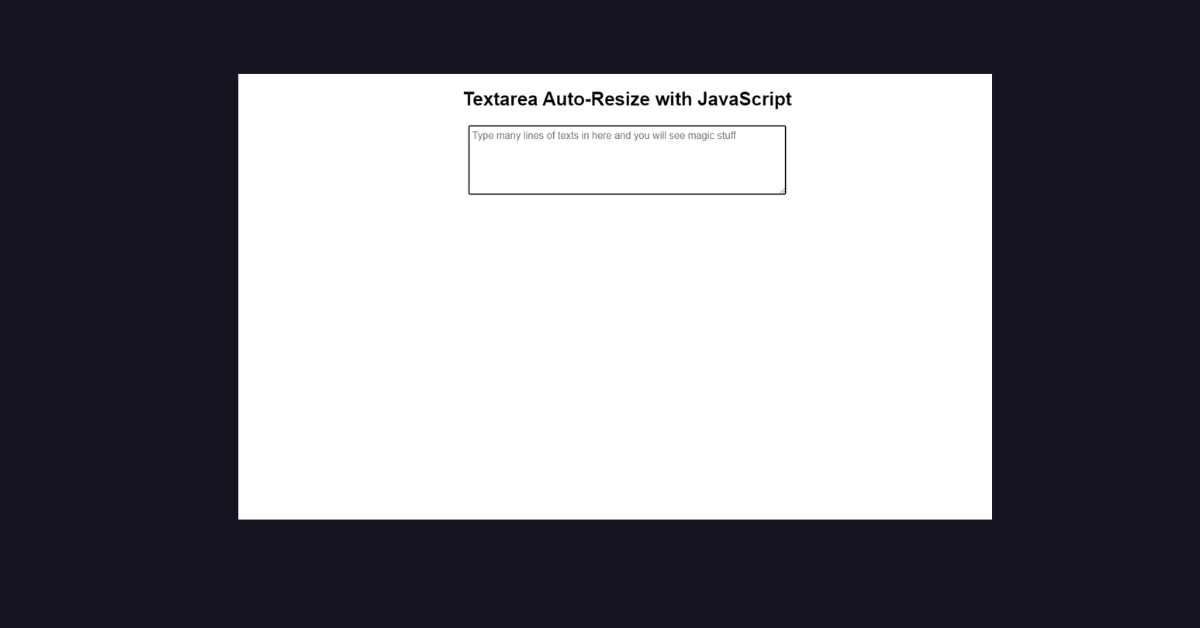
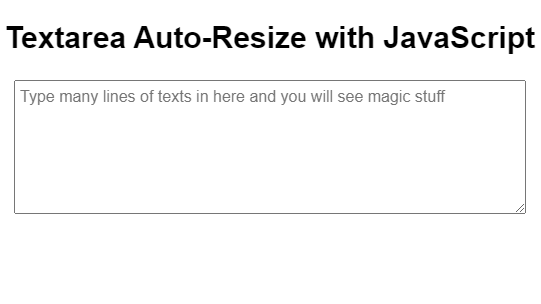
<main>
  <h2>Textarea Auto-Resize with JavaScript</h2>
  <textarea placeholder="Type many lines of texts in here and you will see magic stuff" class="txta"></textarea>
</main>
In the Above HTML code, we’ve added the <textarea> attribute with the class name “txta”.
CSS Code
Create another file named “Index.css” and add the following code:
body {
  font-family: Arial, sans-serif;
  padding: 0 20px;
}

h2 {
  font-size: 30px;
}

main {
  text-align: center;
  margin: 0 auto;
  max-width: 800px;
}

textarea {
  color: #444;
  padding: 5px;
}

/* TEXTAREA AUTO RESIZE STYLES BEGIN */

/* the styles for 'txta' are applied to both the textarea and the hidden clone */
/* these must be the same for both */
.txta {
  width: 100%;
  max-width: 500px;
  min-height: 100px;
  font-family: Arial, sans-serif;
  font-size: 16px;
  overflow: hidden;
  line-height: 1.4;
}
/* TEXTAREA AUTO RESIZE STYLES END */
Let’s break down the code and understand the key components:
- Textarea Auto Resize Styles:- We’ve set the width of the textarea to 100% of its container. We’ve also set the input text’s default maximum height and width to 100px and 500px, respectively.
- Global Styles:- In Globla style we’ve set the default font for the entire document to Arial or a sans-serif font. The main content is aligned at the center with the max-width 800px.
JavaScript Code
Create another file, name it Index.js and paste the following code:
// Targets all textareas with class "txta"
let textareas = document.querySelectorAll('.txta'),
    hiddenDiv = document.createElement('div'),
    content = null;

// Adds a class to all textareas
for (let j of textareas) {
  j.classList.add('txtstuff');
}

// Build the hidden div's attributes

// The line below is needed if you move the style lines to CSS
// hiddenDiv.classList.add('hiddendiv');

// Add the "txta" styles, which are common to both textarea and hiddendiv
hiddenDiv.classList.add('txta');

// Add the styles for the hidden div
// These can be in the CSS, just remove these three lines and uncomment the CSS
hiddenDiv.style.display = 'none';
hiddenDiv.style.whiteSpace = 'pre-wrap';
hiddenDiv.style.wordWrap = 'break-word';

// Loop through all the textareas and add the event listener
for(let i of textareas) {
  (function(i) {
    // Note: Use 'keyup' instead of 'input'
    // if you want older IE support
    i.addEventListener('input', function() {

      // Append hiddendiv to parent of textarea, so the size is correct
      i.parentNode.appendChild(hiddenDiv);

      // Remove this if you want the user to be able to resize it in modern browsers
      i.style.resize = 'none';

      // This removes scrollbars
      i.style.overflow = 'hidden';

      // Every input/change, grab the content
      content = i.value;

      // Add the same content to the hidden div

      // This is for old IE
      content = content.replace(/\n/g, '<br>');

      // The <br ..> part is for old IE
      // This also fixes the jumpy way the textarea grows if line-height isn't included
      hiddenDiv.innerHTML = content + '<br style="line-height: 3px;">';

      // Briefly make the hidden div block but invisible
      // This is in order to read the height
      hiddenDiv.style.visibility = 'hidden';
      hiddenDiv.style.display = 'block';
      i.style.height = hiddenDiv.offsetHeight + 'px';

      // Make the hidden div display:none again
      hiddenDiv.style.visibility = 'visible';
      hiddenDiv.style.display = 'none';
    });
  })(i);
}
The Above JavaScript code is being used to enable the auto-resizing feature of the input text area. The main purpose of using JavaScript is to Dynamically Adjust the Height and width of the text area based on the content.
- Selecting Textareas: First, we’ve selected the area using the JavaScript Property `document.querySelectorAll`. It’ll select all the elements with the class “.txta” and then store them in the variable “textareas”.
- Adding Class to Textareas: we’ve run Loop through all the textareas and add the event listener. It’ll Iterate through each textarea and add a class ‘txtstuff’ to them.
- Auto-Resize Logic: hiddenDev class performing the functioning of Resizing the Textarea Sets styles for
hiddenDiv, including hiding it (display: none), settingwhiteSpacetopre-wrap, and enabling word wrapping.
Final Output Using TextArea
Thank you for your attention to this post. I hope you’ve learned something new today. If you’ve any query or any questions regarding above content feel free to comment below. we’ll try to clear the doubts as soon as possible.
HAPPY CODING!
Code Credit:- Louis Lazaris